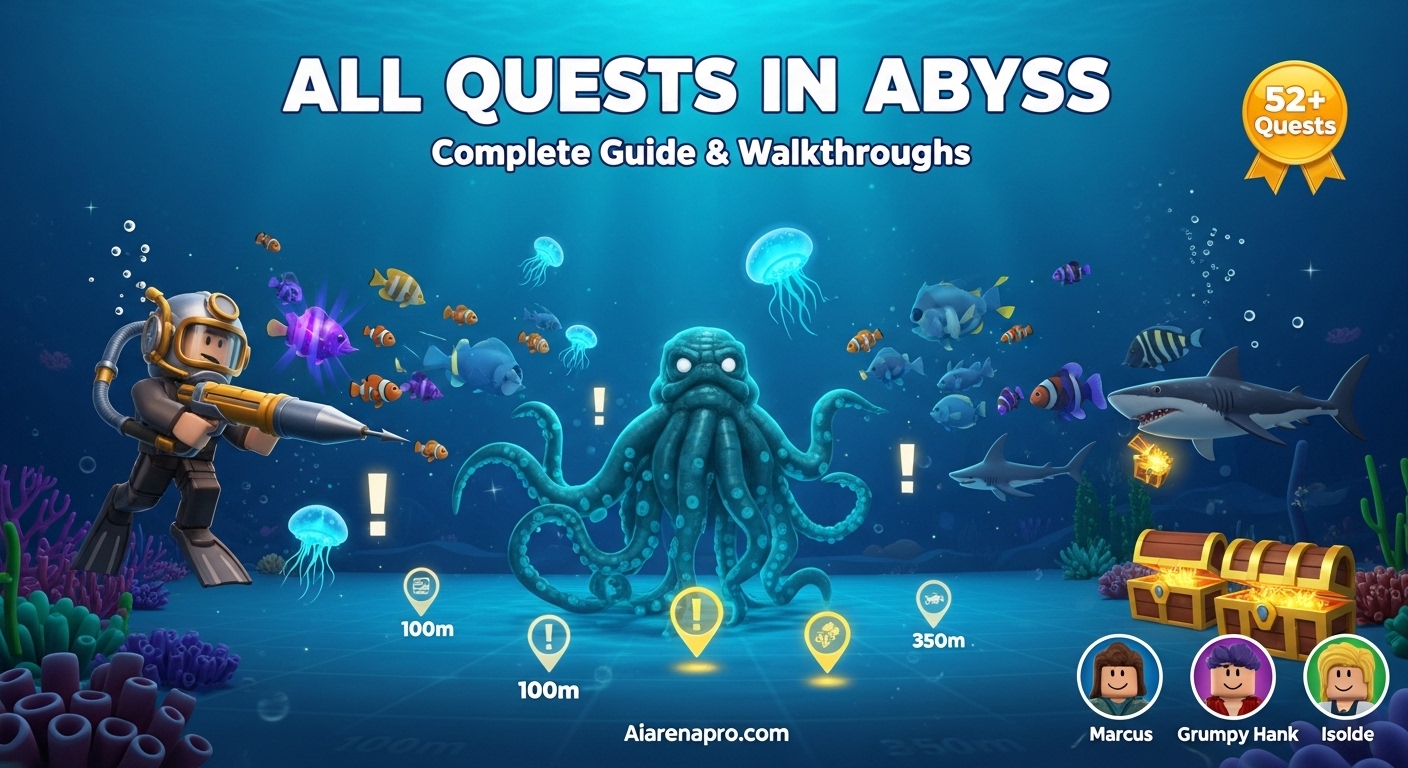
All Quests in Abyss and How to Complete Them (February 2026) Complete Guide
Table Of Contents
Looking to level up fast in Roblox Abyss? You’re in the right place. I’ve spent countless hours diving through every questline in this game, and I’m going to share everything you need to know about completing all quests efficiently. From the tutorial Kraken quests that teach you the basics to the endgame challenges that unlock hidden areas, this guide covers every single quest available in Abyss right now.
All Quests in Abyss – Quick Overview
Before we dive deep into the detailed walkthroughs, let me give you a quick overview of what’s available. Here’s every NPC quest-giver in Abyss, their locations, and what you can expect:
NPC Quest-Giver
Total Quests
Location
Difficulty Level
Main Rewards
Kraken
6 quests
Forgotten Deep Dome (Center)
Beginner
$4,400, 70 Star Shards, Keys
Mr. Black
6 quests
Forgotten Deep Dome (Purple Tree)
Beginner-Intermediate
$19,300, 70 Star Shards, Potions
Scientist
1 quest
Forgotten Deep Dome (Blue Toilet)
Easy
Teleporter Unlock
Virelia
3 quests
Forgotten Deep Dome (Purple Stall)
Intermediate
$26,250, 150 Star Shards, Oxygen
Marcus
6 quests
Ancient Sands (Archaeological Site)
Intermediate
$21,150, 60 Star Shards
Grumpy Hank
4 quests
Ancient Sands (Near Crazy Jeff)
Hard
$38,250, 100 Star Shards, Ancient Key
Suspicious Fisher
1 quest
Ancient Sands (Stone Pillar)
Easy
40 Star Shards
Diver
5 quests
Ocean (Submarine)
Easy
$2,850, 35 Star Shards
Isolde
3 quests
Spirit Roots (Hollow Cave)
Hard
$31,150, 74 Star Shards
Lumi
1 quest
Spirit Roots (Hollow Cave)
Intermediate
$8,000, 25 Star Shards, Potions
Isaac
3 quests
Spirit Roots (Blue Rocks Area)
Intermediate
$18,000, 70 Star Shards
Lost Captain
1 quest
Ocean (Shipwreck)
Hard
$15,000, 30 Star Shards, Potions
Morveth
4 quests
Morveth’s Cave (280m Deep)
Beginner-Intermediate
$7,150, 100 Star Shards, Ruby Runes
Victor
2 quests
Spirit Roots (Behind Water Barrier)
Hard
$17,000, 30 Star Shards
Golem
1 quest
Spirit Roots (Deep Cave)
Very Hard
$25,000, 20 Star Shards, Potions
Crab
1 quest
Forgotten Deep (Tubes Shop)
Easy
Unknown Rewards
King Cat
1 quest
Spirit Roots (Hidden Lair)
Extremely Hard
King’s Fortune
Total Rewards from All Quests: Over $233,350 in cash and 900+ Star Shards, plus numerous oxygen pods, potions, keys, and special items!
Tutorial Quests: Your First Steps in Abyss
When you first spawn into Abyss, the game automatically guides you through four essential tutorial quests. These aren’t optional – you must complete them to unlock free roam mode. Here’s exactly what you need to do.
Tutorial Quest 1: Learn to Fish
This is your introduction to the fishing mechanics. The game will guide you step-by-step:
Equip your Starter Gun from your inventory
Head to the edge of the dome and enter the water
Follow the white marker to locate your first fish
Aim your gun at the fish and left-click to shoot
Complete the fishing minigame by clicking rapidly to keep the fish icon inside the larger bar
Wait for the progress bar to fill completely
Repeat two more times to catch 3 fish total
Pro Tip: Don’t worry about getting perfect catches here. The tutorial fish are extremely easy to catch, so use this time to get comfortable with the minigame mechanics.
Tutorial Quest 2: Selling Your Catch
After catching three fish, you need to sell them:
Swim back to the Kraken in the center of the dome
Interact with the Kraken
Your fish will automatically be sold
This tutorial teaches you that the Kraken is your primary fish buyer in the early game.
Tutorial Quest 3: Purchase Your First Gear
Now it’s time to upgrade your equipment. You need to buy two items:
First – Buy a Tube:
Locate the Tubes shop near the Kraken (look for David NPC)
Purchase the marked tube (the game highlights which one)
The tube costs a few hundred dollars (you should have enough from selling your three fish)
Second – Buy a Gun:
Head to the Harpoon shop (look for Henry NPC)
Purchase the marked gun
Return to the Kraken to complete the quest
Tutorial Quest 4: Race Reroll System
The final tutorial quest introduces you to the race system:
Click the Races icon at the top of your screen
Click the Reroll button at the bottom
Spend Star Shards to spin for a new race
You don’t have to accept the new race – this is just a demonstration
Important: Don’t waste all your Star Shards here! Early game races don’t matter much, so save your shards for better equipment.
Kraken Quest Chain: Main Storyline (6 Quests)
The Kraken serves as your introduction to the main gameplay loop of Abyss. Located right in the center of the Forgotten Deep Dome, this massive tentacled creature will be your guide through your first real challenges. I highly recommend completing all six Kraken quests before moving on to other NPCs.
Kraken Quest 1: First Breath
Objective:
Catch 1x Clownfish
Catch 2x Blue Tang
Catch 2x Tang
Rewards:
$150 cash
5x Star Shards
How to Complete:
Start by talking to the Kraken and selecting “[Quest] Do you have any quests for me?” These three fish species are the most common in the Forgotten Deep starting area. Here’s where to find them:
Clownfish: Orange with white stripes, swim near the dome’s edge
Blue Tang: Bright blue fish, usually in groups
Tang: Similar to Blue Tang but slightly different color
Equip your gun, swim out into the open water around the dome, and start shooting. The fishing minigame is straightforward – click rapidly to keep the fish icon in the green zone. These fish have very low health and easy minigames, so you’ll complete this quest in about 5-10 minutes.
Pro Strategy: Look for schools of fish. You’ll often find multiple Blue Tang and Tang fish swimming together, making it faster to complete the quest.
Kraken Quest 2: Spines and Steel
Objective:
Purchase the Beginner’s Gun ($350)
Catch 1x Pufferfish
Catch 3x Clownfish
Rewards:
$350 cash
5x Star Shards
1x Small Oxygen Pod
How to Complete:
First, head to Henry’s Harpoon Shop. The Beginner’s Gun will be sitting in a blue wooden box outside the shop. It costs $350, which you should have from completing Quest 1 and selling some extra fish.
Now comes the challenging part – catching Pufferfish. These yellow fish are defensive:
Locate a Pufferfish – They’re bright yellow, hard to miss
Approach carefully – When you get close, they inflate and start damaging you
Maintain distance – Stay back at least 10-15 studs
Shoot quickly – The Beginner’s Gun helps with its better damage
Complete the minigame – Pufferfish jump erratically in the minigame, requiring better timing
The Clownfish are the same as Quest 1 – easy catches near the dome.
Critical Tip: If a Pufferfish is inflated and damaging you, swim away and wait for it to deflate before shooting. Trying to catch an angry Pufferfish while taking damage often results in missing the minigame and wasting a shot.
Kraken Quest 3: Crack that Rock
Objective:
Purchase Normal Tube ($600)
Catch 1x Salmon
Catch 2x Pufferfish
Find 1x Geode
Crack 1x Geode
Rewards:
$600 cash
10x Star Shards
3x Small Oxygen Pods
1x Speed Potion
How to Complete:
This quest introduces two new mechanics: Geodes and the Normal Tube upgrade.
First – Buy the Normal Tube:
Head to David’s Tubes shop and purchase the Normal Tube for $600. This significantly increases your oxygen capacity and diving depth, allowing you to explore further from the safety dome.
Second – Catch the Fish:
Salmon: Pink fish, slightly larger than the beginner fish. They swim faster and have more health, so aim carefully.
Pufferfish: You already know these from Quest 2. Catch two more using the same strategy.
Third – Find and Crack a Geode:
Geodes are random drops when fishing. You’ll see them appear in your inventory after catching fish. Once you have one:
Locate Virelia’s shop (purple glowing tentacles, very hard to miss)
Interact with Virelia
Select “Yes [Open Artefact]”
Choose your Mossy Geode
Pay the fee (varies by geode type)
Wait for the cracking timer
Geode Cracking Times:
Mossy Geode: ~2 minutes
Cactus Geode: ~5 minutes
Rooted Geode: ~10 minutes
Money-Saving Tip: Geodes cost money to crack AND take time. Only crack geodes when you need them for quests. Early game, the artifacts inside aren’t worth the investment compared to upgrading your gear.
Kraken Quest 4: Risk and Fortune
Objective:
Purchase Advanced Gun ($1,050)
Catch 1x Lionfish
Catch 3x Salmon
Catch 2x Pufferfish
Rewards:
$850 cash
10x Star Shards
2x Mossy Geodes
1x Basic Oxygen Pod
How to Complete:
This quest represents a significant difficulty spike. You’ll need to grind cash to afford the Advanced Gun, and Lionfish are genuinely dangerous.
First – Save $1,050:
You’ll need to catch and sell a lot of fish to afford the Advanced Gun. Here’s my recommended grinding strategy:
Catch Salmon (sell for ~$75 each)
Catch Mahi Mahi if you can find them (sell for ~$100 each)
Look for mutated fish (they sell for 1.5x to 3x normal value)
Avoid wasting time on Clownfish and Tang – they’re worth very little now
Pro Grinding Tip: Set up a route around the dome where Salmon commonly spawn. Equip the Beginner’s Gun for faster catches, and sell every 5-10 fish to avoid losing them if you die.
Second – Purchase the Advanced Gun:
The Advanced Gun is located under the tree near Henry’s shop. It costs $1,050 and provides significantly better damage and control stats.
Third – Catch the Lionfish:
Lionfish are red and white striped, medium-sized fish that actively attack players. Here’s the safe strategy:
Locate a Lionfish – They patrol specific areas around the dome
Shoot from maximum range – Don’t let them get close
Kite backwards while shooting – Keep moving away
Complete the minigame quickly – Lionfish struggle more than Pufferfish
Heal if damaged – Return to the safe dome if your health is low
Combat Tip: Lionfish deal damage when they touch you. If one is chasing you, swim in circles around rocks or terrain to break their line of sight, then shoot them from behind.
Kraken Quest 5: The Forgotten Gate
Objective:
Catch 2x Mahi Mahi
Catch 4x Lionfish
Crack 2x Geodes
Find 3x Tier-1 Treasure Chests
Rewards:
$1,150 cash
20x Star Shards
3x Mossy Geodes
1x Forgotten Key
How to Complete:
This quest combines fishing challenges with exploration. The treasure chest hunt is new.
First – Fish Requirements:
Mahi Mahi: Large, golden-green fish. They’re fast swimmers found in deeper water outside the dome. Use your Normal Tube to extend your oxygen while hunting them.
Lionfish: You need four this time. Use the same kiting strategy from Quest 4, but be prepared for longer hunting sessions.
Second – Crack 2 Geodes:
Return to Virelia and crack two of your Mossy Geodes. This will take about 4 minutes total waiting time. You can fish while waiting for the timer.
Third – Find 3 Tier-1 Treasure Chests:
Treasure chests are scattered around the Forgotten Deep area. Here are the three easiest locations:
Chest 1: On top of a large rock beside Henry’s Harpoon shop (very easy to spot)
Chest 2: Behind one of the NPC shops near the dome’s edge (check behind David’s Tubes shop)
Chest 3: Outside the safety dome, resting on the ocean floor. Follow the terrain downward from the dome entrance – you’ll see a glowing chest about 50 studs away
Chest Location Tip: Treasure chests emit a faint golden glow and make a shimmering sound when you’re near them. Turn up your game volume to help locate them.
Important Reward: The Forgotten Key you receive unlocks Fish Shrines scattered around the map. These shrines contain rare loot, so save this key for later when you’re more experienced.
Kraken Quest 6: Path to the Second Isle
Objective:
Buy Pufferfish Tube ($2,850)
Catch 1x Barracuda
Catch 3x Mahi Mahi
Crack 3x Geodes
Find 5x Tier-1 Treasure Chests
Rewards:
$1,500 cash
20x Star Shards
5x Small Oxygen Pods
1x Strength Potion
How to Complete:
This is the final Kraken quest and the hardest one. You’ll need significant cash savings and exploration skills.
First – Save $2,850 for Pufferfish Tube:
This is a major investment. The Pufferfish Tube is essential for reaching Ancient Sands (the next biome). Here’s my grinding strategy:
Focus on Mahi Mahi and Barracuda – These sell for $100-150 each
Hunt for mutations – Golden, Albino, and Transparent mutations sell for 1.5x-2x value
Use Billy’s Bank – Store your best fish to prevent losing them on death
Sell in bulk – Make trips to the Kraken every 10 fish
Time Investment: Expect to spend 2-3 hours grinding if you’re starting from zero cash. If you’ve been selling fish consistently during the previous quests, you might already have enough.
Second – Purchase Pufferfish Tube:
Head to David’s Tubes shop and buy the Pufferfish Tube. This tube has:
100 oxygen capacity (huge upgrade from Normal Tube’s 50)
150m max depth (allows access to Ancient Sands)
25kg weight capacity (carry more fish)
Third – Catch Barracuda:
Barracuda are long, silver fish with sharp teeth. They’re aggressive and fast:
Location: Found in deeper water, 80-120m depth
Equipment: Use the Pufferfish Tube you just bought and the Advanced Gun
Strategy: Barracuda chase you aggressively. Kite them in circles while shooting
Minigame: Their minigame is harder than Lionfish – be ready for fast movements
Fourth – Catch 3 More Mahi Mahi:
You’re experienced with these by now. The Pufferfish Tube makes it much easier since you can stay underwater longer.
Fifth – Crack 3 Geodes:
Return to Virelia one more time. You should have at least 3 Mossy Geodes from quest rewards and random drops.
Sixth – Find 5 Tier-1 Treasure Chests:
This is the tricky part. You already found 3 chests in Quest 5. Now you need 5 more (8 total). Here’s where to find them:
Easy Chests (Inside Dome Area):
Top of the rock by Henry’s shop
Behind David’s Tubes shop
Under the developer NPCs’ table
Water Chests (Require Pufferfish Tube): 4. 50 studs outside the dome entrance, on the ocean floor 5. Behind a large rock formation, 100m depth to the east 6. Inside a small underwater cave, 120m depth to the south 7. Near the Ancient Sands entrance, 140m depth (follow the path) 8. Hidden under coral formations, 80m depth to the north
Chest Hunting Tip: Use the minimap (purchase from Crazy Jeff for $450) to mark chest locations. The minimap shows icons for nearby collectibles.
Congratulations! After completing all 6 Kraken quests, you’ve earned $4,400, 70 Star Shards, multiple oxygen pods and potions, and most importantly, a Forgotten Key. You’re now ready to explore Ancient Sands!
Mr. Black Quest Chain: Mutation Mastery (6+ Quests)
Mr. Black is the mutation specialist hiding under a tree with purple flowers in the Forgotten Deep Dome. His questline teaches you about fish mutations – special variants that sell for more money. I strongly recommend doing Mr. Black’s quests alongside the Kraken quests since many objectives overlap.
Understanding Fish Mutations
Before we dive into the quests, you need to understand mutations:
Mutation Types:
Coral: Fish covered in coral (orange/pink tint) – 1.5x value
Metal: Shiny metallic appearance – 1.5x value
Albino: Pure white coloration – 1.8x value
Transparent: See-through, ghost-like – 2x value
Golden: Bright gold color – 2.5x value
Negative: Black with glowing outline – 2.5x value
Angelic: White with glow – 3x value (very rare)
How to Find Mutations:
Buy the Radar from Richard NPC ($250) – this is ESSENTIAL. The Radar shows you each fish’s mutation when you hover over them. Without it, you’re guessing blindly.
Mr. Black Quest 1: Reach Level 5
Objective:
Reach Level 5
Rewards:
$300 cash
5x Star Shards
How to Complete:
This is a simple level requirement. You gain XP by:
Catching fish (10-50 XP each depending on rarity)
Completing other quests (100-500 XP each)
Selling valuable fish
If you’ve been following the Kraken questline, you’re probably already Level 5 or close to it. If not, catch and sell 20-30 fish to level up.
XP Grinding Tip: Larger, rarer fish give more XP. Focus on Salmon and Pufferfish instead of Clownfish for faster leveling.
Mr. Black Quest 2: Coral and Metal Mutations
Objective:
Catch 4x Coral-Mutated Fish
Catch 3x Metal-Mutated Fish
Rewards:
$1,000 cash
5x Star Shards
3x Small Oxygen Pods
How to Complete:
FIRST – Buy the Radar! I cannot stress this enough. Go to Richard NPC (near the Kraken) and buy the Radar for $250. Without it, you’ll waste hours catching the wrong fish.
Once you have the Radar:
Equip the Radar from your inventory
Aim at fish before shooting them
Check the mutation type displayed on the Radar
Only shoot Coral and Metal mutations
Coral Mutations (Need 4):
Look for fish with orange/pink tints
Common on: Clownfish, Tang, Pufferfish
Spawn rate: About 1 in 10 fish
Metal Mutations (Need 3):
Look for shiny, metallic-looking fish
Common on: Salmon, Lionfish
Spawn rate: About 1 in 12 fish
Efficient Strategy: Don’t shoot every fish you see. Swim around the dome scanning with your Radar until you find the mutations you need. This saves time and ammunition.
Mr. Black Quest 3: Metal and Albino Mutations
Objective:
Catch 4x Metal-Mutated Fish
Catch 3x Albino-Mutated Fish
Rewards:
$2,000 cash
10x Star Shards
2x Basic Oxygen Pods
1x Speed Potion
How to Complete:
Metal mutations are the same as Quest 2. Albino mutations are rarer.
Albino Mutations (Need 3):
Look for pure white fish
Common on: Blue Tang, Clownfish, Salmon
Spawn rate: About 1 in 15 fish
Sell for 1.8x normal value
Time-Saving Tip: Albino fish are easier to spot visually than Coral or Metal. Look for pure white fish swimming around, then confirm with the Radar before shooting.
Quest Strategy: This quest takes longer because Albino is rarer. My approach:
Swim to areas with high fish density
Scan for white-colored fish visually
Confirm with Radar
If no Albino nearby, move to a different area
Check the Ancient Sands entrance – mutations spawn more frequently there
Mr. Black Quest 4: Transparent and Albino Mutations
Objective:
Catch 3x Transparent-Mutated Fish
Catch 3x Albino-Mutated Fish
Catch 2x Metal-Mutated Fish
Rewards:
$2,000 cash
10x Star Shards
2x Basic Oxygen Pods
1x Speed Potion
How to Complete:
Transparent mutations are harder to find than Albino.
Transparent Mutations (Need 3):
Look for ghost-like, see-through fish
Common on: Jellyfish, Tang, Blue Tang
Spawn rate: About 1 in 20 fish
Sell for 2x normal value
Visual Tip: They’re literally transparent! Look for fish where you can see through their body
Grinding Location: The area between Forgotten Deep and Ancient Sands has higher Transparent spawn rates. Equip the Pufferfish Tube and hunt there.
Time Estimate: Expect 45-60 minutes for this quest if you’re unlucky with spawns.
Mr. Black Quest 5: Transparent and Golden Mutations
Objective:
Catch 4x Transparent-Mutated Fish
Catch 3x Golden-Mutated Fish
Catch 4x Coral-Mutated Fish
Rewards:
$5,750 cash
20x Star Shards
4x Basic Oxygen Pods
1x Strength Potion
How to Complete:
This is where mutation hunting gets serious. Golden mutations are significantly rarer than anything you’ve encountered.
Golden Mutations (Need 3):
Look for bright gold, shiny fish
Can appear on ANY fish species
Spawn rate: About 1 in 30-40 fish
Sell for 2.5x normal value
Most Common On: Mahi Mahi, Barracuda, Salmon
Where to Hunt Golden Mutations:
The spawn rate increases in deeper water and near biome transitions. My recommended route:
Start at Ancient Sands entrance (140m depth)
Hunt Mahi Mahi and Barracuda – these have higher Golden rates
Server hop if needed – If you haven’t seen a Golden in 30 minutes, try a different server
Use the Speed Potion from previous quests to cover more ground
Advanced Tactic: Golden mutations spawn in clusters. If you find one Golden fish, there’s often 1-2 more in the same area within the next 10 minutes.
Time Estimate: 1-2 hours depending on luck. This is the first genuinely grindy mutation quest.
Mr. Black Quest 6: Albino, Metal, and Negative Mutations
Objective:
Catch 8x Albino-Mutated Fish
Catch 4x Metal-Mutated Fish
Catch 4x Negative-Mutated Fish
Rewards:
$8,250 cash
20x Star Shards
1x XP Potion
1x Strength Potion
How to Complete:
Negative mutations are the newest challenge – they’re as rare as Golden.
Negative Mutations (Need 4):
Look for black fish with glowing outlines
Can appear on ANY fish species
Spawn rate: About 1 in 35 fish
Sell for 2.5x normal value
Visual: Very distinctive black color with white/blue outline glow
Where to Hunt Negative Mutations:
Negative mutations have higher spawn rates at night (in-game time):
Wait for nighttime in Abyss (check the skybox)
Hunt in the darkest areas – deep water, caves, under structures
Focus on Lionfish and Barracuda – aggressive fish have higher Negative rates
Ancient Sands transition area – best spawn location I’ve found
Quest Strategy for All Three Mutations:
Since you need 8 Albino (easy), 4 Metal (easy), and 4 Negative (hard), here’s my approach:
Hunt Negative first at night – they’re the bottleneck
Collect Albino and Metal along the way – you’ll find plenty while hunting Negative
Don’t stress about Albino – you’ll get 8 easily just by playing normally
Server hop if stuck – If you haven’t found a Negative in 45 minutes, switch servers
Time Estimate: 2-3 hours for this quest. It’s legitimately challenging.
Total Mr. Black Questline Rewards: $19,300 cash, 70 Star Shards, multiple oxygen pods, and useful potions. These quests also massively improve your fish-hunting efficiency, which pays off in every other questline.
Scientist Quest: Unlock Fast Travel (1 Quest)
The Scientist stands next to a blue portable toilet in the Forgotten Deep Dome. His single quest is CRITICAL for quality of life – it unlocks the teleporter system that lets you fast travel between areas.
Priority Level: Complete this quest as soon as possible, ideally before heading to Ancient Sands.
Scientist Quest: Bathroom Emergency
Objective:
Find the Toilet
Find the Door
Find the Toilet Paper
Find the Power Relays
Rewards:
Teleporter System Unlocked
$500 cash
10x Star Shards
How to Complete:
All four items are hidden around the Forgotten Deep Dome. Here’s exactly where to find them:
Item 1 – The Toilet:
Location: Behind Richard’s Bestiary shop, under the trees
Face Richard’s shop
Walk directly behind it
Look for a white toilet sitting on the ground
Walk up to it and interact
The toilet will disappear and add to your quest progress
Item 2 – The Door:
Location: Behind David’s Tubes shop
Go to the Tubes shop
Walk around to the back side
You’ll see a blue door standing upright with no walls around it
Interact with the door
It disappears
Item 3 – The Toilet Paper:
Location: Under the developer NPCs’ round table
Find the round white table where developer NPCs hang out (they have “Dev” tags)
Crouch (press C on keyboard)
Walk under the table
Look for toilet paper roll
Interact with it
Pro Tip: If you can’t find the developer table, it’s the one with a huge “Deep Spirit Games” banner nearby.
Item 4 – The Power Relays:
Location: Beside the blue container where Billy (Bank) NPC stands
Locate Billy – he’s the NPC who manages your bank/storage
Look at the large blue shipping container next to him
On the side of the container, you’ll see a small machine with lights
Interact with the Power Relays
Quest complete!
Return to Scientist:
Once you have all four items, return to the Scientist and talk to him. He’ll activate the teleporter system.
How the Teleporter Works:
Find any blue portable toilet (they’re fast travel points)
Interact with it
Select your destination
Pay a small fee ($50-100 depending on distance)
Instant teleport!
Teleporter Locations:
Forgotten Deep Dome (starting area)
Ancient Sands (near Marcus)
Spirit Roots (near Isolde)
Additional secret locations unlocked through exploration
Why This Quest Matters:
Without the teleporter, you’ll spend 5-10 minutes swimming between biomes every time you want to sell fish or visit a different NPC. The teleporter saves HOURS of playtime. Complete this quest ASAP.
Virelia Quest Chain: Geode Master (3 Quests)
Virelia runs the artifact shop in the Forgotten Deep Dome. Her purple glowing tentacle stall is impossible to miss. Her quests focus on cracking geodes to obtain artifacts.
Important: You must crack at least 1 geode before Virelia’s quests become available. Complete Kraken Quest 3 first.
Virelia Quest 1: Mossy Geode Cracking
Objective:
Crack 10x Mossy Geodes
Rewards:
$1,250 cash
20x Star Shards
2x Basic Oxygen Pods
How to Complete:
First – Obtain 10 Mossy Geodes:
Mossy Geodes are common drops from fish in the Forgotten Deep area. Here’s how to farm them efficiently:
Fish in Forgotten Deep – Geodes drop randomly from any fish
Drop Rate: About 1 geode per 5-8 fish caught
Best Fish to Catch: Salmon, Pufferfish, Mahi Mahi (faster catches = more geodes)
Time Required: 30-45 minutes of active fishing
Geode Farming Tip: Don’t crack geodes as you get them. Wait until you have all 10, then crack them together. This way, you can fish continuously without interruptions.
Second – Crack All 10 Geodes:
Return to Virelia with your 10 Mossy Geodes:
Talk to Virelia
Select “Yes [Open Artefact]”
Choose Mossy Geode
Pay the cracking fee ($50 per geode = $500 total)
Wait 2 minutes per geode (20 minutes total if done one at a time)
Time-Saving Trick: You can crack one geode, then go fishing while waiting for the timer. Come back in 2 minutes to crack the next one. This way, you’re not just sitting idle.
What You Get from Geodes:
Artifacts (equip up to 3 for stat boosts)
Star Shards
Rarely, special items
Quest Complete: After cracking 10 Mossy Geodes, return to Virelia to claim your rewards.
Virelia Quest 2: Cactus Geode Cracking
Objective:
Crack 15x Cactus Geodes
Rewards:
$5,000 cash
50x Star Shards
3x Advanced Oxygen Pods
1x Strength Potion
How to Complete:
Cactus Geodes only drop in Ancient Sands (the second biome). You must have the Pufferfish Tube to reach this area.
First – Reach Ancient Sands:
Complete Kraken Quest 6 to get the Pufferfish Tube
Swim to Ancient Sands (follow the quest marker or teleport if unlocked)
Look for the giant stone arch with “Crazy Jeff” sign
There’s a cave with air pockets under the arch
Second – Farm 15 Cactus Geodes:
Fish in Ancient Sands area:
Best Fish: Pompano, Cod, Blackfin Tuna
Drop Rate: About 1 Cactus Geode per 6-10 fish
Time Required: 1-2 hours of fishing
Location: Stay near the cave entrance so you can refill oxygen easily
Ancient Sands Fishing Tip: The water here is deeper (150-200m), so you NEED the Pufferfish Tube. Watch your oxygen meter constantly. When it gets to 30%, return to the cave immediately.
Third – Crack 15 Cactus Geodes:
Cactus Geodes take longer to crack than Mossy Geodes:
Each Cactus Geode costs $150 to crack
Cracking time is 5 minutes each
Total cost: $2,250
Total time: 75 minutes (if done sequentially)
Geode Cracking Strategy:
Crack 2-3 geodes
Go fishing while waiting
Repeat
This way you’re progressing on other quests simultaneously
Cactus Geode Rewards:
Cactus Geodes contain better artifacts than Mossy Geodes:
Cactus artifact (reduces fall damage in water)
Sea Star artifact (faster swimming)
Better Star Shard drops (5-15 instead of 1-3)
Virelia Quest 3: Rooted Geode Cracking
Objective:
Crack 20x Rooted Geodes
Rewards:
$20,000 cash
80x Star Shards
2x Heavy Oxygen Pods
2x XP Potions
1x Strength Potion
1x Speed Potion
How to Complete:
Rooted Geodes are the rarest geode type, dropping only in Spirit Roots (the third biome). This is a late-game quest.
First – Reach Spirit Roots:
Requirements:
Lost Spirit Tube (costs $8,000+)
Level 25+
Completed most Ancient Sands quests
Second – Farm 20 Rooted Geodes:
Fish in Spirit Roots area:
Best Fish: Napoleon, Jellyfish, Sunfish, Pacific Fanfish
Drop Rate: About 1 Rooted Geode per 8-12 fish
Time Required: 3-4 hours of fishing
Difficulty: Spirit Roots fish are tougher, require better guns
Spirit Roots Danger: This area is DEEP (350m+). Oxygen management is critical:
The Oxy Tube or Lost Spirit Tube is REQUIRED
Don’t venture far from air pockets
Use Heavy Oxygen Pods when exploring
Death here loses ALL fish in inventory
Third – Crack 20 Rooted Geodes:
Rooted Geodes are expensive and slow:
Each costs $300 to crack
Cracking time is 10 minutes each
Total cost: $6,000
Total time: 200 minutes (over 3 hours!)
Advanced Strategy: Don’t crack all 20 at once. Crack 5-10, use the artifacts from them, then continue questing. Come back later to crack the rest.
Rooted Geode Rewards:
These contain the best artifacts:
Holy Flower (massive oxygen boost)
Divine Hour Glass (better XP)
Eternal Crystal (rare fish spawn increase)
High Star Shard drops (10-25 per geode)
Total Virelia Questline Value:
After completing all three Virelia quests, you’ll have cracked 45 geodes total. Between the geodes themselves and the quest rewards, you’re looking at:
$26,250 cash from quest rewards
150 Star Shards from quest rewards
45+ artifacts (many duplicates to sell)
100-400 additional Star Shards from geode contents
Multiple oxygen pods and potions
Is Virelia’s Questline Worth It?
YES for late-game players. The artifacts you get are essential for endgame content. However, don’t rush these quests early – focus on equipment upgrades first.
Marcus Quest Chain: Ancient Sands Master (6 Quests)
Marcus sits on rocks in front of the archaeological site in Ancient Sands. His questline focuses on desert-themed fish, sand mutations, and exploring the Ancient Sands biome. You’ll need the Pufferfish Tube ($2,850) to start these quests.
Recommended Level: 10-15 before attempting Marcus’s quests.
Marcus Quest 1: Sandy Introduction
Objective:
Catch 6x Pompano
Catch 1x Sand-Mutated Fish
Rewards:
$1,000 cash
5x Star Shards
1x Small Oxygen Pod
How to Complete:
This is your introduction to Ancient Sands fishing.
Pompano Fish:
Small, silver fish with yellow fins
Very common in Ancient Sands shallow areas
Easy to catch, low health
Sell for $30-40 each
Finding Pompano:
Enter Ancient Sands through the underwater entrance
Stay near the cave with oxygen
Pompano swim in schools of 5-10
Shoot the nearest ones first
Sand-Mutated Fish:
Sand mutations are unique to Ancient Sands:
Orange/tan coloration (looks like sand)
1.5x value multiplier
Common on: Pompano, Cod, any Ancient Sands fish
Use your Radar to identify them
Quest Tip: You’ll likely catch a Sand mutation while hunting Pompano. If not, keep fishing – Sand is one of the most common mutations here (1 in 8 fish).
Oxygen Management Warning:
Ancient Sands is 150-200m deep. Your oxygen will drain faster than in Forgotten Deep:
Return to the cave BEFORE your oxygen hits 20%
Keep oxygen pods in your inventory as backup
Don’t swim too far from the cave entrance yet
Marcus Quest 2: Bones and Fish
Objective:
Catch 6x Cod
Catch 2x Sand-Mutated Fish
Collect 1x Fish Bone
Rewards:
$1,600 cash
5x Star Shards
2x Small Oxygen Pods
How to Complete:
Cod Fish:
Medium-sized, gray fish
More health than Pompano
Found slightly deeper (170-190m)
Sell for $50-60 each
Cod Hunting Strategy:
Equip the Crossbow Gun ($3,500) for better damage
Swim to deeper areas outside the cave
Cod swim alone, not in schools
Complete the minigame carefully – Cod jump unpredictably
Fish Bones:
Fish Bones are a new crafting material:
Drop randomly from ANY fish in Ancient Sands
Drop rate: About 1 per 20 fish
Used for crafting advanced items later
You need to collect just 1 for this quest
Quest Strategy:
While hunting for Cod and Sand mutations, you’ll naturally get Fish Bones as random drops. Don’t stress about it – by the time you catch 6 Cod, you’ll probably have 1-2 Fish Bones.
Marcus Quest 3: Tuna Time
Objective:
Catch 3x Blackfin Tuna
Catch 4x Cod
Catch 5x Pompano
Catch 1x Cactus-Mutated Fish
Rewards:
$2,450 cash
10x Star Shards
1x Basic Oxygen Pod
1x Cactus Geode
How to Complete:
Blackfin Tuna:
Large, dark blue fish with yellow fins
High health pool (requires 4-6 shots)
Found in open water, 180-220m depth
Aggressive – will chase you
Sell for $120-150 each
How to Catch Blackfin Tuna:
Use the Crossbow Gun (minimum) or Wasted Gun (better)
Shoot from medium range
Kite backwards while shooting – they chase fast
Complete the minigame (moderately difficult)
Don’t panic if they get close – keep clicking
Cactus-Mutated Fish:
Green coloration with cactus-like spines
1.6x value multiplier
Common on: Blackfin Tuna, Grouper, Scorpionfish
Spawn rate: 1 in 12 fish
Quest Tip: Hunt Blackfin Tuna first. While looking for 3 regular Blackfin, you’ll likely encounter one with Cactus mutation. If you find the Cactus mutation first, catch it and keep hunting – you need 3 total Blackfin (mutation counts as one).
Danger Warning: Blackfin Tuna hit hard. If you’re taking damage, retreat to the cave to heal. Don’t risk dying with valuable fish in your inventory.
Marcus Quest 4: Deep Diving Preparation
Objective:
Catch 6x Blackfin Tuna
Catch 6x Pompano
Catch 3x Sand-Mutated Fish
Collect 2x Fish Bone
Crack 3x Cactus Geodes
Find 10x Tier-1 Treasure Chests
Rewards:
$3,850 cash
10x Star Shards
2x Basic Oxygen Pods
1x Speed Potion
How to Complete:
This quest is more about quantity than difficulty. You’re grinding for chests and bones.
Fish Requirements:
All these fish you’ve caught before:
6x Blackfin Tuna (you know the drill)
6x Pompano (easy catches)
3x Sand mutations (common enough)
Fish Bones (Need 2):
You’ll get these naturally while catching the other fish. Fish Bone drop rate in Ancient Sands is about 1 per 15-20 fish.
Cactus Geodes (Crack 3):
You probably have some from fishing. If not:
Fish until you get 3 Cactus Geodes
Return to Virelia
Pay $450 total ($150 each)
Wait 15 minutes total (5 min each)
Treasure Chests (Find 10):
This is the time-consuming part. Ancient Sands has treasure chests scattered around:
Easy Chest Locations: 1-3. Inside Crazy Jeff’s cave (look on shelves and behind crates) 4-5. On top of the archaeological dig site ruins 6-7. Behind the stone pillars near Suspicious Fisher NPC
Underwater Chest Locations: 8. Under the giant stone arch (180m depth) 9. Inside a small cave opening (200m depth, southeast of Marcus) 10. Near the Ancient Sands/Spirit Roots border (240m depth)
Chest Hunting Tips:
Use the minimap ($450 from Crazy Jeff) – it shows chest icons
Equip the Boat Tube ($4,500) for better oxygen capacity
Mark found chests on your map so you don’t revisit them
Some chests are in dangerous areas – bring oxygen pods
Quest Strategy:
Do all the fishing first (1-2 hours)
Crack geodes while you fish
Hunt treasure chests last
Use the Speed Potion from Quest 3 to move faster while chest hunting
Marcus Quest 5: Grouper Challenge
Objective:
Catch 4x Grouper
Catch 5x Blackfin Tuna
Catch 6x Cod
Catch 2x Fossil-Mutated Fish
Find 2x Tier-2 Treasure Chests
Rewards:
$4,450 cash
15x Star Shards
4x Small Oxygen Pods
1x Drop Luck Potion
How to Complete:
Grouper Fish:
Massive, brown fish with spots
Very high health (8-10 shots to catch)
Found in deep water, 220-260m
Slow swimmers but tough minigame
Sell for $180-220 each
How to Catch Grouper:
REQUIRED: Boat Tube ($4,500) or better – Pufferfish Tube can’t reach deep enough
RECOMMENDED: Wasted Gun ($5,500) – Crossbow Gun takes too long
Location: Deep trenches and cave systems in Ancient Sands
Strategy: Grouper don’t chase you, but they tank a lot of damage. Keep shooting steadily.
Grouper Minigame:
The Grouper minigame is challenging:
The green zone is smaller
The fish icon moves erratically
Takes 30-40 seconds to complete
Don’t panic – steady clicking wins
Fossil-Mutated Fish:
Brown/gray with bone-like patterns
1.8x value multiplier
Common on: Grouper, Scorpionfish, Cavefish
Spawn rate: 1 in 15 fish
Finding Fossil Mutations:
Fossil mutations are rarer than Sand and Cactus. Best strategy:
Focus on Grouper hunting
Check EVERY Grouper with Radar before shooting
If you find a Fossil Grouper, that’s 1/2 done
Hunt in the deepest areas – Fossil spawns increase at 240m+
Tier-2 Treasure Chests:
Tier-2 chests are rarer and contain better loot:
Tier-2 Chest Locations:
Deep cave system, 260m depth (requires Boat Tube)
Hidden behind rock formations near the Ancient Sands/Spirit Roots border
Tier-2 Chest Rewards:
50-100 Star Shards
Advanced Oxygen Pods
Rare artifacts
Sometimes special fish
Quest Warning: This quest requires significant equipment investment. Don’t attempt it without the Boat Tube and a good gun. You’ll waste oxygen and time otherwise.
Marcus Quest 6: Final Sand Trial
Objective:
Catch 4x Scorpionfish
Catch 5x Grouper
Catch 6x Blackfin Tuna
Catch 3x Cactus-Mutated Fish
Catch 2x Fossil-Mutated Fish
Collect 6x Fish Bone
Crack 5x Cactus Geodes
Rewards:
$7,800 cash
15x Star Shards
4x Basic Oxygen Pods
1x XP Potion
1x Cactus Geode
1x Burger (special consumable)
How to Complete:
This is Marcus’s final challenge – a comprehensive test of everything you’ve learned in Ancient Sands.
Scorpionfish:
Spiky, red-orange fish
Medium-high health
Poisonous – damages you on contact
Found in rocky areas, 200-240m
Sell for $160-200 each
Scorpionfish Strategy:
NEVER let them touch you – they poison you
Shoot from maximum gun range
Kite backwards if they get close
The poison lasts 10 seconds and drains health rapidly
Return to cave to heal if poisoned
Comprehensive Quest Strategy:
This quest has SEVEN different objectives. Here’s the optimal order:
Phase 1 – Mutations (2-3 hours):
Hunt for Cactus and Fossil mutations first
While hunting, you’ll catch some of the required fish
Use the Drop Luck Potion to increase mutation spawns
Phase 2 – Fish Collection (2-3 hours):
4x Scorpionfish (careful, poisonous)
5x Grouper (deep water, tough)
6x Blackfin Tuna (medium difficulty)
You’ll get 6+ Fish Bones during this phase
Phase 3 – Geode Cracking (30 minutes):
Should have 5+ Cactus Geodes from all the fishing
Return to Virelia
Pay $750 ($150 x 5)
Wait 25 minutes total
Total Time Investment: 5-7 hours for this single quest. It’s genuinely difficult.
Final Tip: Don’t try to complete this quest in one session. Break it into chunks:
Day 1: Hunt mutations
Day 2: Catch required fish
Day 3: Crack geodes and turn in quest
Marcus Questline Complete!
After finishing all 6 Marcus quests, you’ll have earned $21,150 cash and 60 Star Shards. More importantly, you’re now a master of Ancient Sands fishing. You know every fish type, mutation, and location in the biome.
Grumpy Hank Quest Chain: The Ultimate Challenge (4 Quests)
Grumpy Hank lives in a small building west of Crazy Jeff’s cave in Ancient Sands. His questline is the HARDEST in the game, featuring rare fish, difficult mutations, and massive grinding requirements. Don’t attempt these quests until you’re Level 20+ with excellent equipment.
Recommended Before Starting:
Level 20+
Boat Tube or better
Wasted Gun or Lost Spirit Gun
At least $10,000 in savings
Radar equipped
Grumpy Hank Quest 1: Scorpion’s Sting
Objective:
Catch 5x Scorpionfish
Catch 3x Grouper
Collect 3x Fish Bone
Rewards:
$4,500 cash
10x Star Shards
1x Advanced Oxygen Pod
1x Speed Potion
How to Complete:
You’ve encountered both fish types in Marcus’s questline, but Grumpy Hank wants MORE.
Scorpionfish (Need 5):
Strategy for hunting 5 Scorpionfish:
Location: Rocky outcrops, 200-240m depth
Best Time: They spawn more frequently during in-game evening
Approach: Shoot from far away, never get close
Health Management: Keep oxygen pods ready – poison drains health fast
Scorpionfish Spawn Locations:
Near the stone pillars where Suspicious Fisher sits
Rock formations south of Ancient Sands cave entrance
Cave systems at 220m depth
Grouper (Need 3):
Same as before, but you need 3 this time:
Deep trenches (240-260m)
Use Boat Tube minimum
Wasted Gun recommended
Takes 8-10 shots each
Fish Bones (Need 3):
By the time you catch 8 fish, you’ll have 3+ Fish Bones. Drop rate is generous in Ancient Sands.
Time Estimate: 1-2 hours depending on Scorpionfish spawns.
Grumpy Hank Quest 2: Shark Hunt
Objective:
Catch 2x Shark
Catch 5x Scorpionfish
Catch 8x Blackfin Tuna
Catch 2x Fossil-Mutated Fish
Crack 7x Cactus Geodes
Rewards:
$8,750 cash
20x Star Shards
2x Advanced Oxygen Pods
5x Small Oxygen Pods
1x Drop Luck Potion
2x Cactus Geodes
How to Complete:
This quest introduces Sharks – one of the most dangerous fish in Abyss.
Shark:
Enormous predatory fish
VERY high health (15-20 shots)
VERY aggressive
Chases and attacks players
Massive damage on contact
Found in open ocean, 200-300m
Sell for $400-500 each
How to Catch Sharks:
CRITICAL EQUIPMENT:
Boat Tube MINIMUM (Zepline Tube better)
Wasted Gun MINIMUM (Lost Spirit Gun better)
Multiple Advanced Oxygen Pods
Health in good condition
Shark Hunting Strategy:
Locate a Shark – They patrol the deepest areas of Ancient Sands
Engage from maximum range – Start shooting immediately
Kite in large circles – Don’t swim in straight lines, Sharks are fast
Never stop moving – If the Shark catches you, you’ll take 40-60 damage
Shoot constantly – 15-20 shots needed to bring one down
Complete minigame carefully – Shark minigame is HARD, erratic movements
Heal if hit – If a Shark touches you, retreat to cave immediately
Shark Spawn Locations:
Deep water between Ancient Sands and Spirit Roots (260-280m)
Open ocean areas far from caves
Near underwater cliff edges
Shark Encounter Warning:
Sharks can KILL YOU EASILY. If you’re not careful:
They hit for 40+ damage per contact
They’re faster than your swim speed
They chase relentlessly
Dying means losing ALL fish in inventory
Strategy for 2 Sharks:
Attempt 1: Hunt the first Shark conservatively. Don’t rush.
After catching Shark 1: Return to cave, heal, restock oxygen
Attempt 2: Now you know the pattern. Second Shark is easier.
Other Quest Requirements:
The other fish are the same as previous quests:
5x Scorpionfish (still poisonous, still annoying)
8x Blackfin Tuna (easy at this point)
2x Fossil mutations (rare, but you’re experienced now)
Time Estimate: 3-4 hours. Sharks alone can take 1-2 hours to find and catch.
Grumpy Hank Quest 3: Cave Depths
Objective:
Catch 2x Cavefish
Catch 3x Shark
Catch 6x Grouper
Catch 6x Sand-Mutated Fish
Catch 4x Cactus-Mutated Fish
Collect 8x Fish Bone
Crack 14x Cactus Geodes
Rewards:
$10,500 cash
30x Star Shards
3x Advanced Oxygen Pods
2x Speed Potions
1x Strength Potion
4x Cactus Geodes
How to Complete:
This quest introduces Cavefish and ramps up ALL the requirements.
Cavefish:
Pale, eyeless fish
Found ONLY in deep cave systems
High health
Very rare
Location: 280-320m depth in specific caves
Sell for $300-400 each
Finding Cavefish:
Cavefish are EXTREMELY rare. Here’s where they spawn:
Cavefish Cave Location 1:
From Ancient Sands cave entrance
Swim to 280m depth
Look for a dark cave opening on the ocean floor
Enter the cave (bring oxygen pods!)
Cavefish swim in small groups of 2-3
Cavefish Cave Location 2:
Ancient Sands/Spirit Roots border area
300m depth
Hidden cave behind rock formations
Requires Zepline Tube or better
Cavefish Hunting Strategy:
Bring multiple Advanced Oxygen Pods – Caves have no oxygen
Use the Lost Spirit Gun – Cavefish have high health
Move carefully – Don’t rush, oxygen is precious
Mark the cave location – You might need to return
Catch both if possible – They rarely spawn alone
Sharks (Need 3):
You already caught 2 Sharks in Quest 2. Now you need 3 more (5 total killed so far). Same strategy as before, but you’re more experienced now.
Mutation Grinding (6 Sand + 4 Cactus):
At this point, mutations are easy for you:
Sand: 1 in 8 fish
Cactus: 1 in 12 fish
Just fish normally while hunting for Cavefish and Sharks. You’ll get the mutations passively.
Cactus Geodes (Crack 14):
This is expensive and time-consuming:
Cost: $2,100 ($150 each)
Time: 70 minutes total
Strategy: Crack 3-4 at a time while doing other quests
Time Estimate: 4-6 hours. Cavefish are the bottleneck – they’re legitimately rare.
Quest Strategy:
Don’t try to complete this in one session:
Session 1 (2 hours): Hunt for Cavefish Session 2 (2 hours): Hunt Sharks and Grouper Session 3 (1 hour): Collect mutations and fish bones Session 4 (1 hour): Crack geodes and turn in quest
Grumpy Hank Quest 4: Ancient Terror (FINAL)
Objective:
Catch 1x Ancient Shark
Catch 3x Cavefish
Catch 4x Shark
Catch 6x Fossil-Mutated Fish
Catch 8x Cactus-Mutated Fish
Catch 12x Sand-Mutated Fish
Collect 12x Fish Bone
Crack 14x Cactus Geodes
Find 9x Tier-2 Treasure Chests
Rewards:
$14,500 cash
40x Star Shards
2x Heavy Oxygen Pods
2x XP Potions
1x Strength Potion
1x Ancient Key (Special!)
How to Complete:
This is the HARDEST quest in Abyss. It requires everything you’ve learned. The Ancient Shark alone is a legendary challenge.
Ancient Shark:
MASSIVE prehistoric shark (3x size of regular Shark)
EXTREME health pool (40-50 shots)
EXTREMELY aggressive
One-shot kill potential (100+ damage)
Spawn rate: 1 per server, random location
Only spawns in the deepest water (350m+)
Sell value: $2,000+
How to Find Ancient Shark:
The Ancient Shark is a server-wide boss-level fish. There’s only ONE per server.
Spawn Locations:
Deep ocean trench between Ancient Sands and Spirit Roots (350-380m)
Underwater canyon system (370m+)
Randomly patrols deep zones
Spawn Indicators:
Screen darkens slightly
Ominous music plays
Fish in the area flee
You might see its shadow before seeing the actual fish
How to Catch Ancient Shark:
REQUIRED EQUIPMENT:
Zepline Tube or Rukiry Tube (MUST have 350m+ depth rating)
Lost Spirit Gun or Magroot Gun (anything less is useless)
5+ Heavy Oxygen Pods
3+ Speed Potions
Full health
Ancient Shark Combat Strategy:
Preparation:
Store ALL valuable fish in Billy’s Bank
Bring ONLY oxygen pods and potions
Set spawn point at Ancient Sands cave
Tell friends/crew you’re attempting this
Engagement:
Spot the Ancient Shark from far away
DO NOT approach it
Start shooting from maximum gun range
It will notice you after 2-3 shots
Combat Phase:
The Ancient Shark charges at you FAST
Swim in large figure-8 patterns
Keep shooting while moving
Use Speed Potion to maintain distance
Never stop moving
Emergency Escape:
If Ancient Shark gets close, use oxygen boost on Tube
Swim to nearest cave immediately
It WILL chase you into caves
Only safe in the air bubble inside caves
Minigame:
THE HARDEST MINIGAME IN THE GAME
Fish icon moves violently
Green zone is smallest possible
Takes 60-90 seconds to complete
One mistake = fail and have to damage it again
Ancient Shark Strategy Tips:
Server hop to find servers where it’s alive (many players hunt it)
Hunt at night (it’s easier to see the shadow)
Bring a friend to help damage it (teamwork recommended)
Expect to die 2-3 times before succeeding
When you finally catch it, BANK IT IMMEDIATELY
Other Quest Requirements:
After the Ancient Shark, everything else feels easy:
Cavefish (Need 3): Same caves as before, still rare
Regular Sharks (Need 4): You’re a Shark hunter now, these are routine
Mutations (6 Fossil, 8 Cactus, 12 Sand): Grind time. This takes 3-4 hours of pure fishing:
Fossil: Focus on Grouper and Scorpionfish
Cactus: Hunt Blackfin Tuna
Sand: Literally any fish works
Fish Bones (Need 12): Natural drops while grinding mutations
Cactus Geodes (Crack 14): $2,100 cost, 70 minutes wait time (do while grinding)
Tier-2 Treasure Chests (Find 9):
This is the OTHER major challenge of this quest. Tier-2 chests are RARE.
Tier-2 Chest Locations:
Deep cave system, 320m (where Cavefish spawn) 2-3. Hidden behind rock formations, 300m+ depth
Inside underwater ruins, 280m 5-6. Ancient Sands/Spirit Roots border, 340m+
Secret cave accessible only with Zepline Tube 8-9. Random spawns in the deepest areas
Tier-2 Chest Hunting Tips:
Use the minimap
Server hop for more chests
Check behind EVERYTHING at 300m+ depth
Some chests are in danger zones near aggressive fish
Total Quest Time Estimate:
10-15 hours minimum. This is not an exaggeration. Breakdown:
Ancient Shark: 3-5 hours (including failed attempts)
Mutations: 3-4 hours
Cavefish: 2-3 hours
Tier-2 Chests: 2-3 hours
Everything else: 1-2 hours
Quest Completion Rewards:
When you finally complete this nightmare quest:
$14,500 cash
40 Star Shards
Heavy Oxygen Pods
XP Potions
ANCIENT KEY
The Ancient Key:
This key unlocks special Ancient Fish Ruins scattered around Ancient Sands. Inside are:
Legendary fish spawns
Rare artifacts
Secret quests
Exclusive rewards
Grumpy Hank Questline Complete!
After finishing all 4 Grumpy Hank quests, you’ve earned $38,250 cash and 100 Star Shards. More importantly, you’re now an elite Abyss player. You’ve caught the Ancient Shark – something less than 5% of players accomplish.
Diver Quest Chain: Easy Deliveries (5 Quests)
The Diver sits on a submarine in the Ocean biome, partway between Forgotten Deep and Ancient Sands. His quests are the EASIEST in the game – just deliver packages. These are perfect for breaks between hard questlines.
Location: Swimming in the ocean, look for a yellow submarine about 150m from the Forgotten Deep dome.
How Delivery Quests Work
All Diver quests follow the same pattern:
Talk to Diver
Accept delivery quest
Diver gives you a Cargo Crate (automatically in inventory)
Equip the Cargo Crate
A yellow indicator appears on screen showing destination
Swim/travel to the destination NPC
With Cargo Crate equipped, talk to the NPC
Delivery complete!
Important: Keep the Cargo Crate equipped while traveling. If you unequip it, the yellow indicator disappears and you’ll get lost.
Diver Quest 1: Deliver to Henry
Objective:
Deliver cargo to Henry (Harpoon Shop)
Rewards:
$250 cash
5x Star Shards
How to Complete:
Talk to Diver on submarine
Accept quest
Cargo Crate auto-equips
Follow yellow indicator
Return to Forgotten Deep dome
Go to Henry’s Harpoon Shop
Talk to Henry with Crate equipped
Done!
Time: 5 minutes
Weight Tip: The Cargo Crate weighs 5-10kg. The Pufferfish Tube can carry it easily.
Diver Quest 2: Deliver to Richard
Objective:
Deliver cargo to Richard (Bestiary NPC)
Rewards:
$350 cash
5x Star Shards
How to Complete:
Same process as Quest 1:
Get Crate from Diver
Follow indicator
Find Richard (near Kraken in Forgotten Deep)
Deliver with Crate equipped
Time: 5 minutes
Navigation Tip: If you have the Teleporter unlocked, you can teleport to Forgotten Deep then walk to Richard. Much faster than swimming.
Diver Quest 3: Double Delivery
Objective:
Deliver cargo to Virelia
Deliver cargo to Scientist
Rewards:
$500 cash
5x Star Shards
2x Small Oxygen Pods
How to Complete:
This quest has TWO deliveries:
First Delivery – Virelia:
Get first Crate
Go to Virelia (purple glowing shop in Forgotten Deep)
Deliver
Second Delivery – Scientist:
Talk to Diver again
Get second Crate
Go to Scientist (blue toilet area in Forgotten Deep)
Deliver
Time: 10 minutes total
Efficiency Tip: Both NPCs are in the same area (Forgotten Deep), so teleport once and walk to both.
Diver Quest 4: Marcus Delivery
Objective:
Deliver cargo to Marcus
Rewards:
$750 cash
10x Star Shards
1x Speed Potion
How to Complete:
First delivery to Ancient Sands!
Get Crate from Diver
Follow yellow indicator
Swim/teleport to Ancient Sands
Find Marcus (archaeological site)
Deliver
Time: 10-15 minutes (depending on if you teleport or swim)
Tube Requirement: You need at least the Boat Tube to comfortably carry the Crate to Ancient Sands. The Pufferfish Tube works but cuts it close on oxygen.
Diver Quest 5: Final Delivery
Objective:
Deliver cargo to the Archaeologists
Rewards:
$1,000 cash
10x Star Shards
1x Small Oxygen Pod
How to Complete:
Get Crate from Diver
Go to Ancient Sands
Find Naomi and Noah (Marcus’s archaeologist companions)
They’re near the archaeological dig site
Deliver to either one
Time: 10-15 minutes
Diver Questline Complete!
Total earnings: $2,850 cash and 35 Star Shards for about 45-60 minutes of simple deliveries. These quests are perfect for:
New players learning the map
Quick money when you’re broke
Breaks between hard quests
Casual play sessions
Pro Strategy: Do all 5 Diver quests in one session for maximum efficiency. Teleport between locations to save time.
Isolde, Lumi, Isaac Quest Chains: Spirit Roots Challenges
The Spirit Roots biome (the third area) contains three major quest-givers: Isolde, Lumi, and Isaac. These quests are HARD and require late-game equipment. Don’t attempt them until Level 25+ with the Lost Spirit Tube.
Spirit Roots Requirements:
Lost Spirit Tube ($8,000+) or better
Lost Spirit Gun ($7,500+) or better
Level 25+
Heavy Oxygen Pods
Completed most Forgotten Deep and Ancient Sands quests
Spirit Roots Environment:
350m+ depth
Aggressive fish
Limited air pockets
Beautiful but deadly
Isolde Quest 1: Spirit Introduction
Location: Inside Spirit Root Hollow cave, under the giant tree
Objective:
Catch 3x Napoleon
Catch 6x Jellyfish
Catch 8x Pacific Fanfish
Catch 6x Spirit-Mutated Fish
Crack 2x Rooted Geodes
Collect 3x Moss
Rewards:
$5,650 cash
15x Star Shards
3x Basic Oxygen Pods
1x Advanced Oxygen Pod
How to Complete:
Napoleon:
Large, colorful fish with prominent forehead
Medium-high health
Found in open Spirit Roots areas
Sell for $200+ each
Jellyfish:
Translucent, floating creatures
Low health but tricky hitbox
Very common in Spirit Roots
Slow-moving, easy to catch
Pacific Fanfish:
Small, aggressive fish with large teeth
Low health but attacks on sight
Swims in schools
Quick catches
Spirit-Mutated Fish:
Purple/blue glowing appearance
2x value multiplier
Common on ALL Spirit Roots fish
Spawn rate: 1 in 8 fish
Moss:
New crafting material
Drops from fish in Spirit Roots
Drop rate: 1 in 20 fish
Used for special crafting recipes
Rooted Geodes:
Drop from Spirit Roots fish
Cost $300 each to crack
Take 10 minutes to crack
Contain best artifacts
Quest Strategy:
Hunt Jellyfish and Pacific Fanfish first (common, easy)
Look for Spirit mutations while hunting
Catch Napoleon in deeper areas
Moss and Rooted Geodes drop naturally while fishing
Time Estimate: 2-3 hours
Lumi Quest: Fairy Gathering
Location: Spirit Root Hollow cave, near Isolde
Objective:
Catch 4x Napoleon
Catch 6x Jellyfish
Catch 10x Pacific Fanfish
Catch 8x Spirit-Mutated Fish
Catch 3x Fairy-Mutated Fish
Crack 3x Rooted Geodes
Rewards:
$8,000 cash
25x Star Shards
1x Speed Potion
2x Basic Oxygen Pods
How to Complete:
Most fish are same as Isolde’s quests. The new challenge is Fairy mutations.
Fairy-Mutated Fish:
Pink/sparkly appearance with wing-like fins
2.2x value multiplier
VERY RARE
Common on: Jellyfish, Napoleon, Pacific Fanfish
Spawn rate: 1 in 25 fish
Finding Fairy Mutations:
Fairy mutations are genuinely rare. Strategy:
Focus on areas with high fish density
Use Drop Luck Potion (increases mutation spawn rate)
Hunt primarily Jellyfish – they have the highest Fairy rate
Be patient – this can take 2-3 hours
Server Hopping: If you haven’t found a single Fairy mutation in 45 minutes, switch servers. Sometimes servers have bad RNG.
Time Estimate: 3-4 hours (Fairy mutations are the bottleneck)
Isaac Quest 1: Spirit Fanfish
Location: On top of the safety platform in Spirit Roots
Objective:
Catch 3x Spirit-Mutated Pacific Fanfish
Catch 7x Pacific Fanfish
Collect 2x Moss
Rewards:
$3,750 cash
15x Star Shards
1x Advanced Oxygen Pod
1x Drop Luck Potion
How to Complete:
Spirit-Mutated Pacific Fanfish:
This is SPECIFIC – you need Pacific Fanfish with Spirit mutation:
Hunt Pacific Fanfish schools
Check each one with Radar
Only shoot Spirit-mutated ones
Spawn rate: 1 in 10 Pacific Fanfish
Strategy: Pacific Fanfish spawn in huge schools (20-30 fish). Find a school, scan all of them with Radar, shoot only the Spirit-mutated ones.
Time Estimate: 1 hour
Isaac Quest 2: Spirit Jellyfish
Objective:
Catch 3x Fairy-Mutated Jellyfish
Catch 7x Jellyfish
Catch 5x Pacific Fanfish
Collect 4x Moss
Rewards:
$3,750 cash
15x Star Shards
1x Advanced Oxygen Pod
1x Drop Luck Potion
How to Complete:
Fairy-Mutated Jellyfish:
Same concept as Quest 1, but even rarer:
Hunt Jellyfish (common fish)
Check for Fairy mutation
Spawn rate on Jellyfish: 1 in 20
Time Estimate: 2 hours
Isaac Quest 3: Rooted Napoleon
Objective:
Catch 2x Rooted-Mutated Napoleon
Catch 8x Napoleon
Catch 6x Jellyfish
Collect 6x Moss
Rewards:
$10,500 cash
40x Star Shards
1x Heavy Oxygen Pod
2x Advanced Oxygen Pods
2x Strength Potions
How to Complete:
Rooted-Mutated Napoleon:
A NEW mutation type! Rooted is the rarest standard mutation:
Brown/woody appearance with root-like patterns
2.5x value multiplier
EXTREMELY RARE
Spawn rate: 1 in 35 fish
Best on: Napoleon, Sunfish, larger fish
Finding Rooted Napoleon:
This is genuinely difficult:
Hunt ONLY Napoleon (larger fish have higher Rooted rates)
Use Drop Luck Potion
Server hop if you don’t find one in 1 hour
Expected time: 2-4 hours for 2 Rooted Napoleon
Alternative Strategy: Some players recommend hunting at specific in-game times (dawn and dusk) when Rooted spawns are supposedly higher. Not confirmed, but worth trying.
Time Estimate: 3-5 hours total for this quest
Spirit Roots Quests Complete!
These three NPCs (Isolde, Lumi, Isaac) together give you:
$57,150 cash
169 Star Shards
Multiple high-tier oxygen pods and potions
Lost Captain, Morveth, Victor, Golem, King Cat: Secret & Hidden Quests
These NPCs are either hidden, require specific conditions, or have extremely difficult quests. They’re for advanced players.
Lost Captain Quest
Location: Shipwreck in the Ocean, deep water (200m+)
Objective:
Reach Level 35
Pay $10,000 cash
Rewards:
$15,000 cash (net $5,000 profit)
30x Star Shards
5x Basic Oxygen Pods
2x Speed Potions
1x XP Potion
Unlocks Angler Cave
How to Complete:
This is a “payment” quest, not a hunting quest.
Grind to Level 35 (catch fish, complete quests)
Save $10,000 cash
Swim to the shipwreck
Find Lost Captain (ghost NPC)
Talk to him
Pay $10,000
Receive rewards + Angler Cave access
Why Complete This?
The Angler Cave contains:
Legendary fish (Anglerfish, King Anglerfish)
Secret chests
Additional hidden quests
High-value loot
Is It Worth $10,000?
YES. The $5,000 net profit + Star Shards + Angler Cave access make it worthwhile.
Morveth Quest 1-4: Cave Challenges
Location: Morveth’s Cave, 280m deep from Forgotten Dome
How to Find Morveth:
From Forgotten Deep dome
Look toward the Ocean (where Diver’s submarine is)
Dive straight down to 280m depth
Look for cave entrance in the ocean wall
Morveth is inside
Quest 1: Level 5 + Coral
Objective: Reach Level 5, catch 2x Coral-Mutated Fish
Rewards: $750, 10 Star Shards, 3x Small Oxygen Pods, 1x Ruby Rune
Quest 2: Level 10 + Metal
Objective: Reach Level 10, catch 3x Metal-Mutated Fish
Rewards: $1,250, 20 Star Shards, 2x Basic Oxygen Pods, 1x Drop Luck Potion
Quest 3: Level 15 + Albino
Objective: Reach Level 15, catch 3x Albino-Mutated Fish
Rewards: $2,150, 30 Star Shards, 2x Advanced Oxygen Pods, 3x Small Oxygen Pods, 1x XP Potion, 1x Ruby Rune
Quest 4: Level 20 + Transparent
Objective: Reach Level 20, catch 4x Transparent-Mutated Fish
Rewards: $3,000, 40 Star Shards, 1x Heavy Oxygen Pod, 3x Basic Oxygen Pods, 1x Strength Potion, 1x Ruby Rune
Total Morveth Rewards: $7,150 cash, 100 Star Shards, 3x Ruby Runes
Ruby Runes: Special crafting material for late-game items
Strategy: Do Morveth’s quests ALONGSIDE Mr. Black’s quests since they overlap (same mutations).
Location: Deep inside Spirit Root Cave, past Victor
Objective:
Catch 1x Eyefish
Catch 3x Sailfish
Catch 10x Sunfish
Catch 6x Spirit-Mutated Fish
Crack 5x Rooted Geodes
Rewards:
$25,000 cash (HUGE!)
20x Star Shards
3x Basic Oxygen Pods
2x Advanced Oxygen Pods
1x Strength Potion
1x Speed Potion
2x Rooted Geodes
Eyefish:
Legendary rarity fish
Found ONLY in deepest Spirit Roots caves (450m+)
Requires Oxy Tube (purchased from Lumi)
EXTREMELY rare
Extremely high value ($1,500+)
How to Catch Eyefish:
Buy Oxy Tube from Lumi ($12,000+)
Dive to 450m+ depth in Spirit Roots caves
Use Magroot Gun (best gun in game)
Eyefish spawns are random, very rare
Server hop to find one
Expect 5-10 hours of hunting
Is Golem Quest Worth It?
YES if you’re a completionist. The $25,000 reward is massive. But catching Eyefish is genuinely one of the hardest challenges in the game.
King Cat Quest
Location: Hidden lair in Spirit Roots (left path from Lumi’s shop)
Objective:
Catch 3x Angelic-Mutated Fish
Catch 20x Golden-Mutated Fish
Catch 3x Bluefin Tuna
Catch 5x Bigmouthfish
Catch 20x Blackfin Tuna
Catch 20x Jellyfish
Crack 20x Geodes
Pay $100,000 cash
Rewards:
King’s Fortune (special item with unknown effects)
How to Complete:
This is the ULTIMATE endgame quest. The requirements are INSANE:
Angelic Mutations (3):
Rarest mutation in game
3x value multiplier
Spawn rate: 1 in 60-80 fish
Can take 10+ hours to find 3
Golden Mutations (20):
Already rare at 1 in 30-40 fish
Need 20 of them
Expect 20-30 hours of grinding
$100,000 Cash:
This is the cash payment after catching everything
You need to have saved $100,000
This takes 40-60 hours of fishing to earn
Total Time Estimate for King Cat Quest:
50-100 hours of gameplay. This is not a joke. It’s designed for the most dedicated players.
Is It Worth It?
Unknown. The “King’s Fortune” reward is mysterious. Some players report it gives:
Permanent luck boost
Special cosmetic
Access to secret area
All of the above
Only the most hardcore players have completed this quest.
FAQ
Which quests should I do first?
Tutorial → Kraken 1–6 → Scientist → Mr. Black (alongside Kraken) → Diver → Marcus → everything else.
Can I skip quests?
Yes! Most quests are optional. Only the tutorial is mandatory. However, quests give the best rewards for time invested.
Do quests reset?
No. Each quest can only be completed once per account.
What’s the most important quest?
The Scientist’s Teleporter Quest. Fast travel saves hours of playtime.
What’s the hardest quest?
Grumpy Hank Quest 4 (Ancient Shark) or King Cat’s quest (100+ hours).
Can I do quests in any order?
Mostly yes, but some have requirements (level, equipment, completed previous quests).
Are quest rewards worth it?
YES. Quests give more money and items than grinding fish for the same time.
How long do ALL quests take?
100–200+ hours to complete every single quest in the game.
What should I spend quest rewards on?
Tubes first (oxygen is life), then guns, then cosmetics.
Can I abandon quests?
No abandoning. If you accept a quest, finish it or leave it incomplete.
Final Tips for Quest Completion
Always use the Radar ($250 from Richard) – saves countless hours
Complete Scientist quest ASAP – teleporter is essential
Do Mr. Black quests alongside Kraken quests – they overlap
Don’t rush to Spirit Roots – you need proper equipment first
Store valuable fish in Billy’s Bank before risky quests
Mutations spawn in clusters – if you find one, hunt nearby for more
Server hop when stuck on rare spawns
Buy the minimap ($450 from Crazy Jeff) for chest hunting
Save oxygen pods for emergencies, not casual swimming
Level up naturally through questing – don’t grind XP separately
Conclusion
You’ve now got the complete guide to every quest in Abyss! From the simple tutorial to the legendary King Cat challenge, you know exactly what to do, where to go, and how to succeed.
Remember: quests are the FASTEST way to progress in Abyss. The cash and Star Shards from quests far exceed what you’d earn from just fishing. Focus on completing questlines, upgrade your equipment with the rewards, then tackle harder quests.
Start with the Kraken and work your way through the biomes. By the time you reach Spirit Roots, you’ll be an expert fisher with top-tier equipment. And who knows – maybe you’ll be one of the few players to complete the King Cat quest and earn the mysterious King’s Fortune!
Good luck, and happy diving! If you found this guide helpful, bookmark it for future reference – you’ll need it when hunting those rare mutations and legendary fish!
If you’re a competitive Fortnite player, you’ve probably encountered the frustrating “System requirements failed” message when trying to join tournaments.…
Your trusted source for the latest in technology, AI innovations, gaming updates, and digital trends - delivering insights that keep you ahead in the ever-changing tech world.