
Grow a Garden 2 Aurora Event Updates (June 2026) Ultimate Guide
Grow a Garden 2 just dropped its Aurora Event Update, and it’s packed with a new mythic pet, a fresh…
Looking to dominate in Roblox’s Devil Hunter? My comprehensive tier list breaks down every contract, fiend, hybrid, and weapon so you know exactly what’s worth grinding for. I’ve spent countless hours testing builds across PvP and PvE to bring you rankings that actually matter in June 2026.
Before diving into the tier lists, you need to understand the three distinct progression paths available in Devil Hunter. Your choice fundamentally shapes how you experience the game, and switching paths isn’t possible without starting a new account.
Human Hunters rely on devil contracts for versatile combat abilities. You can equip up to three contracts simultaneously, allowing for flexible playstyles and strategic depth. The trade-off is managing contract debuffs while maximizing their synergies. This path offers the most flexibility and is perfect for players who enjoy adapting their strategy to different situations.
Fiends sacrifice human versatility for raw, permanent power. When you transform into a fiend, you lose access to contract abilities but gain unique talents by consuming devil body parts. Fiends excel at sustained combat with natural stat boosts and Fear-based progression. This path suits players who prefer straightforward power over tactical complexity.
Hybrids represent the apex of Devil Hunter’s progression system. Through surgery and devil heart transplantation, you gain the ability to transform at will, accessing devastating burst damage and unique abilities. However, transformation drains stamina constantly, making hybrids high-risk, high-reward. This path is endgame content requiring level 50+ and significant resource investment.
I’ve spent over 100 hours grinding through Devil Hunter’s content, testing every contract in both PvP arena fights and PvE raid missions. Unlike other tier lists that just copy rankings, I’ve personally verified each placement through extensive combat testing. My rankings consider real combat performance, not just theoretical power levels.
Each tier reflects actual usefulness across multiple scenarios. S-tier options dominate both PvP and PvE content while maintaining accessibility. A-tier choices excel in specific situations or require more skill to maximize. B-tier and below struggle against competent opponents or fall off in late-game content. I’ll explain exactly why each option sits where it does.
| Tier | Contract Name | Primary Use | Key Strengths |
|---|---|---|---|
| S | Curse Devil | PvP/PvE | Unblockable sword attacks, high burst damage |
| S | Ghost Devil | PvP/PvE | Combo extension grabs, summon utility |
| S | Mantis Devil | PvP | Ragdoll grab mechanics, unparryable |
| S | Octopus Devil | PvP/PvE | Crowd control, combo starter |
| A | Bat Devil | PvE | AOE damage, farming efficiency |
| A | Fox Devil | PvE/Beginner | Easy acquisition, solid damage |
| A | Future Devil | PvP | Perfect dodges, counter windows |
| A | Sea Cucumber Devil | PvE | Lock-on damage, beginner-friendly |
| A | Snake Devil | Late PvP/PvE | Summon mechanics, boss power |
| A | Zombie Devil | PvE | Summon allies, ganking potential |
| B | Leech Devil | PvE | Health sustain, easy to land |
| B | Stone Devil | Beginner PvE | Stun utility, basic control |
| B | Tomato Devil | PvE | Pseudo-revive mechanic |
| C | Frog Devil | Limited | Slow grab, easily dodged |
| C | Mold Devil | Limited | Minimal utility |
| D | Fish Devil | Avoid | Weak damage, no utility |

The Curse Devil contract stands at the pinnacle of Devil Hunter’s combat system. After completing its challenging quest chain (which resets on death), you gain access to both a powerful sword weapon and devastating contract abilities. The M1 sword slashes deal exceptional damage with wide hitboxes, making them reliable in chaotic fights. Your critical strike ignores enemy defenses and breaks through hybrid damage reduction completely.
What truly elevates Curse Devil to S-tier is its unparryable nature. While most abilities can be countered with proper timing, Curse Devil attacks force opponents to dodge or tank the damage. In PvP, this creates unavoidable pressure that even skilled players struggle against. The sword’s combo extension capabilities allow you to chain attacks seamlessly, keeping enemies locked in juggle states. For PvE content, the raw damage output makes raid farming significantly faster. The only downside is the tedious quest requirement, but the payoff absolutely justifies the effort. Master the timing on your critical strikes and you’ll dominate any combat scenario.
Ghost Devil operates as a combo extension powerhouse that defines high-level play. The M1 and M2 grab variants serve as both combo starters and extenders, giving you complete control over fight pacing. When you land a grab, you can chain it into uppercuts, weapon strikes, or other contract abilities for devastating damage sequences. The grabs work even when enemies are in ragdoll states, effectively bypassing standard combo break mechanics.
At maximum favor, Ghost Devil unlocks a defensive summon that fundamentally changes how you approach fights. Hold right-mouse-button after getting knocked down to summon Ghost Devil, creating pressure that forces opponents to back off. This summon provides crucial breathing room in both PvP and PvE, allowing you to reset unfavorable exchanges. The bar costs are substantial, making it better suited for mid-to-late game builds with proper stat investment. In raid content, Ghost Devil’s combo extension capabilities dramatically increase your clear speed by keeping bosses locked in hitstun. Every serious PvP player should aim to acquire this contract once they understand basic combo mechanics.
Mantis Devil specializes in back-attack mechanics and ragdoll manipulation, creating unique pressure that other contracts can’t replicate. The Mantis arm grab extends your combo potential by grabbing opponents after uppercuts, during ragdoll states, or mid-combo. This bypasses normal combo break windows, allowing you to extend damage sequences that should have ended. The telegraph (red light indicator) gives opponents a small dodge window, but skilled players can bait dodges and punish with weapon followups.
What makes Mantis truly S-tier is how it enables infinite combo scenarios. After landing an uppercut, you can Mantis grab into weapon strikes, then uppercut again, creating loops that deal massive damage. In PvP, this punishes positioning errors severely. Good players will try to maintain spacing, but Mantis’s range often catches them off-guard. For PvE content, the combo extension helps you burst down bosses faster while minimizing the damage you take. Mantis Devil pairs exceptionally well with fast weapons that can capitalize on the grab openings. If you enjoy technical, combo-heavy gameplay, Mantis Devil rewards precise execution with some of the highest damage potential in the game.
Octopus Devil brings crowd control and area denial that few contracts match. Its abilities create zones that enemies must respect, giving you space control in both PvP and PvE scenarios. The grab functions as a reliable combo starter with decent range, allowing you to initiate pressure from mid-distance. Once you land the grab, you can transition into your weapon combos or other contract abilities for extended sequences.
The crowd control aspect shines brightest in group content and PvP matches. You can catch multiple enemies in your abilities, creating chaos that your team can capitalize on. In raid missions, Octopus Devil’s area coverage helps you manage adds while focusing on boss mechanics. The ability to control space makes it invaluable for defensive play, allowing you to hold choke points or create safe zones for healing. Octopus Devil’s versatility across both PvP and PvE, combined with its accessibility and consistency, earns its S-tier placement. It works well in beginner builds but scales excellently into late game with proper stat investment.
Bat Devil serves as the premier PvE farming contract, offering exceptional area damage for efficient enemy clearing. The main ability features a slow wind-up, making it nearly useless in competitive PvP against players who understand dodge timing. However, in raid missions and general PvE content, Bat Devil accelerates your progression significantly. The area-of-effect damage hits multiple enemies simultaneously, allowing you to clear mob packs that would take much longer with single-target abilities.
The damage output is substantial enough to one-shot weaker enemies and chunk boss health bars noticeably. For players focused on grinding levels, collecting devil flesh, or farming Yen, Bat Devil dramatically improves efficiency. The slow wind-up becomes less punishing in PvE since enemies don’t have player-level reaction times. You can position yourself safely, charge the ability, and devastate entire groups. While it won’t win you PvP matches, Bat Devil deserves A-tier for how much it accelerates PvE progression. Every farming-focused build should consider including this contract for maximum grinding efficiency.
Fox Devil holds a special place as the best beginner contract and the only free contract available through the tutorial. Both the M1 and M2 variants deliver solid damage that carries you through early-to-mid game content effectively. The abilities have reasonable cooldowns and bar costs, making them accessible even with minimal stat investment. For new players learning Devil Hunter’s combat system, Fox Devil provides a forgiving introduction to contract usage.
In PvE content, Fox Devil remains viable well into mid-game, helping you clear missions and participate in raids successfully. The M2 variant features tracking mechanics that make landing hits more consistent compared to manual-aim abilities. However, competitive PvP players will perfect-block or dodge the M2 easily, limiting its late-game PvP viability. The contract serves its purpose excellently as a stepping stone toward S-tier options. Don’t sleep on Fox Devil early—use it to farm resources for better contracts while learning fundamental mechanics. Even experienced players keep Fox Devil as a reliable PvE option when they need consistent, straightforward damage without complex mechanics.
Future Devil revolutionizes defensive play through its signature Counter ability, arguably the single most powerful defensive tool in Devil Hunter. When timed correctly, Counter instantly nullifies any incoming attack and deals significant damage back to your opponent. This creates mind games in PvP where opponents must bait your counter or risk heavy punishment. Landing three counters in succession grants an automatic dodge chance, further amplifying your defensive capabilities.
The skill ceiling on Future Devil is extremely high—perfect timing requires practice and matchup knowledge. Against predictable opponents, you can counter entire combos, making them hesitant to commit to offense. Pair Counter with Medium Counter Overhead Reprisal for two iframe counter sources, creating an almost unkillable defensive shell in PvP. In PvE, Counter allows you to tank boss mechanics while dealing damage simultaneously. The main limitation is the learning curve; novice players will whiff counters and waste the ability. However, once mastered, Future Devil transforms you into a defensive powerhouse that frustrates aggressive opponents. The contract’s accessibility through multiple acquisition methods makes it an essential addition to any PvP-focused build.
Sea Cucumber Devil mirrors Fox Devil’s role as a solid early-game option with strong PvE performance. The two abilities feature lock-on mechanics that guarantee damage against less mobile enemies, making it exceptional for farming missions and early raids. The M2 variant’s tracking punishes beginner PvP players effectively, allowing you to score easy wins in low-level matches.
However, experienced players will perfect-block or dodge Sea Cucumber’s attacks consistently, drastically reducing its effectiveness in higher-level PvP. The predictable nature of the lock-on telegraphs your attacks clearly, giving skilled opponents ample time to react. Despite these limitations, Sea Cucumber Devil serves its A-tier purpose admirably in PvE contexts. The guaranteed damage helps you progress through content reliably without demanding complex execution. Use Sea Cucumber Devil as a transitional contract while working toward S-tier options, or keep it as a specialized PvE farming tool. It won’t carry you to the top of ranked PvP, but it’ll accelerate your PvE progression substantially during the critical early-to-mid game period.
Snake Devil stands as one of the most powerful late-game contracts, locked behind a challenging quest chain requiring multiple boss defeats. The effort investment is substantial, but the payoff matches the difficulty. Both M1 and M2 variants deal exceptional damage that competes with S-tier options. The unique mechanic of swallowing low-HP devils and resummoning them as allies creates tactical depth unavailable in most contracts.
This summon mechanic provides both offensive pressure and defensive utility. In PvP, the summoned devil can bait abilities, tank damage, or create distractions that open up your main combos. For PvE content, having a constant ally dramatically increases your effective DPS while splitting enemy aggro. The boss kill requirements mean you’ll need strong fundamentals and likely other powerful contracts before acquiring Snake Devil. This positions it as a late-game upgrade rather than a beginner option. Once obtained, Snake Devil elevates your build significantly, offering versatility that justifies its A-tier placement. The quest difficulty prevents S-tier ranking, but make Snake Devil a priority goal once you’ve established your core build.
Zombie Devil offers unique summoning mechanics with a 10% drop rate from the Zombie Raid. The summons provide excellent utility in PvE, functioning as damage dealers and aggro magnets that give you space to work. In group content, your zombie summons can overwhelm objectives while your team focuses on priority targets. The summons make soloing difficult content more manageable by effectively giving you extra lives and DPS.
PvP viability is mixed—the summons can enable ganking strategies and create numerical advantages in skirmishes. However, the current bug where defeating summons grants health packs to enemies significantly reduces their effectiveness. Until this is patched, enemy players can actually benefit from killing your summons, creating a strategic dilemma. Despite this issue, Zombie Devil maintains A-tier status through its PvE dominance and potential PvP applications. The raid farming requirement adds acquisition difficulty, but the payoff justifies the effort. Use Zombie Devil primarily for PvE progression, and leverage the summons strategically in PvP when you can prevent opponents from exploiting the health pack mechanic.
Leech Devil functions as a pure PvE sustain tool, delivering damage while granting health packs on successful hits. This self-healing makes it invaluable for raid missions where healing opportunities are limited. The ability lands consistently against PvE enemies, providing reliable sustain throughout extended fights. In PvP scenarios, Leech Devil becomes significantly harder to land against mobile opponents but remains more viable than lower-tier options.
The sustain aspect can’t be understated for solo PvE content. Leech Devil allows you to chain missions without returning to heal, dramatically improving farming efficiency. However, the damage output doesn’t compete with higher-tier contracts, limiting its overall impact. Use Leech Devil as a defensive option when you need survivability over raw damage. It fills a specific niche effectively but lacks the versatility or power to justify higher placement.
Stone Devil provides straightforward stun utility that works well for learning basic mechanics. The channeled stun interrupts enemies and creates combo windows, making it valuable for beginners understanding fight flow. However, the channeled nature creates vulnerability—you’re locked in place while using it, allowing enemies to punish you easily. In multi-target scenarios, you’re especially vulnerable to being attacked from off-screen.
Against PvE enemies, the stun lands more reliably and helps control dangerous targets. Stone Devil’s easy acquisition and simple usage pattern make it accessible to new players who need time to learn more complex contracts. However, experienced players will exploit the animation lock in PvP, making it increasingly risky as you face better opponents. Stone Devil serves as a learning tool and early PvE option but should be replaced as you acquire more powerful contracts. Its utility diminishes significantly in late-game content where enemies have better AI and players understand counterplay.
Tomato Devil has suffered from balance nerfs that reduced its effectiveness considerably. The M1 variant features a slow wind-up that telegraphs attacks clearly, making it easy to dodge in PvP. The damage output doesn’t compensate for the difficulty of landing hits. However, Tomato Devil’s saving grace is the M2 pseudo-revive mechanic, which can clutch close matches or prevent wipes in difficult PvE content.
The revive creates strategic value that prevents Tomato Devil from falling to C-tier. You can play more aggressively knowing you have a second chance, and the psychological pressure on opponents is real. In PvE, the revive allows you to learn boss mechanics without harsh death penalties. Despite these positives, the overall kit’s weakness and the difficulty landing the M1 variant limit Tomato Devil to B-tier. Consider it a safety net contract rather than a primary damage source.
Frog Devil suffers from a fundamental design problem—its grab ability is too slow to land consistently against aware opponents. The telegraphed nature allows players to dodge on reaction, making it nearly useless in competitive PvP. Against AI enemies, the grab works better, but even then, the damage doesn’t justify the slot compared to higher-tier options.
The main use case is catching opponents who dodge poorly or don’t understand the timing yet. This creates brief windows of effectiveness against inexperienced players, but that utility evaporates as you face better competition. Frog Devil needs a speed buff or additional utility to become truly viable. Currently, it occupies C-tier as a niche tool with extremely limited application. Avoid using resources to acquire Frog Devil unless you’re a completionist.
Mold Devil shares Frog Devil’s fundamental problem of being too slow and predictable. The single ability it provides is easy to dodge, limiting its effectiveness across all content types. Against PvE enemies, Mold Devil performs slightly better than in PvP, as AI doesn’t dodge as effectively. However, the damage output and utility don’t justify equipping it over numerous better options.
Mold Devil exists in C-tier purgatory where it technically functions but provides minimal value. You can use it if you literally have no other options, but that’s the extent of its viability. Focus your contract farming efforts on literally any higher-tier option before considering Mold Devil. The only silver lining is that it’s not Fish Devil.
Fish Devil represents the absolute bottom of Devil Hunter’s contract hierarchy. It offers a single, weak ability with no secondary benefits or utility. The damage output is pathetically low compared to even common weapon attacks. Fish Devil has no niche, no situation where it’s the optimal choice, and no redeeming qualities.
If you somehow acquire Fish Devil, immediately work toward replacing it. Don’t invest resources into upgrading it. Don’t build strategies around it. Simply acknowledge it exists and move on to literally any other contract. Fish Devil serves primarily as a warning about what to avoid, sitting firmly in D-tier as the worst contract in Devil Hunter. Its only purpose is making other contracts look better by comparison.
| Tier | Fiend Name | Primary Use | Key Strengths |
|---|---|---|---|
| S | Angel Fiend | PvP/PvE | Flight mobility, Year Drain healing |
| S | Blood Fiend (Power) | PvP/PvE | High damage, crowd control |
| A | Shark Fiend | PvP | Dive mechanics, combo potential |
| B | Nail Fiend | Limited | Multi-hit criticals |
Angel Fiend dominates the fiend tier list through a combination of mobility, sustain, and versatile damage output. The flight capability alone provides massive tactical advantages, allowing you to engage or disengage fights at will. In PvP, flight lets you kite melee opponents, dodge ground-based abilities, and position for optimal attacks. For PvE content, flight trivializes many mechanics that ground-bound characters struggle with.
The Year Drain ability is what truly elevates Angel Fiend to S-tier status. This life-steal mechanic deals consistent damage while healing you, creating a sustain loop that makes you incredibly difficult to kill. In extended PvP fights, Year Drain allows you to outlast opponents who lack healing. Combined with the Frog Devil talent Tongue Snatch and Life Leech from Leech Devil, you create an unkillable sustain build. The synergy between Angel Fiend’s kit and supportive talents makes it the undisputed best fiend choice for players who want long-term viability. Year Drain’s healing scales with your damage output, rewarding aggressive play while keeping you alive. Angel Fiend suits both beginner fiends learning the system and veteran players pushing endgame content. Save your fiend rerolls specifically for Angel Fiend—it’s worth the wait.
Blood Fiend channels everyone’s favorite character from Chainsaw Man while delivering exceptional combat performance. The close-range focus provides incredibly high damage potential when you can maintain pressure on opponents. Blood manipulation skills offer crowd control that disrupts enemy formations and creates combo opportunities. The multi-hit nature of Blood Fiend abilities allows you to deal burst damage that chunks health bars significantly.
In PvP scenarios, Blood Fiend excels at aggressive, in-your-face combat. The damage output rewards players who can maintain close range despite the inherent risks. Smart positioning and understanding engagement timings are crucial—Blood Fiend punishes mistakes but rewards good fundamentals. For PvE content, the close-range limitation matters less since you can position freely against AI enemies. The crowd control helps manage multiple enemies simultaneously, making Blood Fiend effective in mission farming.
The main weakness is the lack of versatility compared to Angel Fiend. Blood Fiend commits you to a specific playstyle, while Angel Fiend adapts to various situations more easily. However, if you enjoy aggressive melee combat and can manage the close-range requirements, Blood Fiend provides higher damage ceiling than Angel Fiend. The faster M1 animations create pressure that opponents struggle to counter consistently. Mastering Blood Fiend’s kit takes practice, but the payoff is being an absolute menace in both PvP and PvE contexts.
Shark Fiend brings unique dive mechanics that create offensive and defensive options unavailable to other fiends. The Dive ability functions as both gap closer and escape tool, giving you control over engagement ranges. You can initiate fights aggressively or retreat when overwhelmed, making Shark Fiend forgiving for players still learning positioning. The dive chains with other abilities create pressure sequences that opponents must respect.
Jaws and Maul deliver exceptional damage when landed, competing with S-tier fiends in raw output. However, these abilities require proper setup and combo execution to land consistently. Against skilled players, the telegraph gives them time to dodge, limiting effectiveness without proper comboing. This reliance on setup prevents Shark Fiend from reaching S-tier—it demands more effort for comparable results.
In PvE content, Shark Fiend performs admirably. The dive lets you reposition around bosses easily, and the damage abilities chunk health bars effectively. The mobility reduces damage taken by allowing you to avoid mechanics naturally. For players who enjoy technical, combo-focused gameplay, Shark Fiend rewards mastery with strong performance. It’s not as forgiving as Angel Fiend or as straightforward as Blood Fiend, placing it solidly in A-tier as a skilled player’s option.
Nail Fiend occupies B-tier primarily through one strength: its multi-hit critical attack. This ability deals respectable damage in PvP, allowing you to compete in short trades. However, beyond this single tool, Nail Fiend lacks the comprehensive kit that higher-tier options provide. The critical doesn’t provide the mobility of Shark Fiend, the sustain of Angel Fiend, or the raw damage of Blood Fiend.
For PvE content, Nail Fiend performs adequately but unremarkably. It clears missions without major issues but doesn’t accelerate farming like better fiends do. The lack of crowd control or area damage limits effectiveness against multiple enemies. Nail Fiend works if you roll it naturally and don’t have rerolls available, but actively aiming for it over higher-tier options would be a mistake. Use your fiend rerolls to target Angel Fiend or Blood Fiend instead. Nail Fiend serves as a functional but uninspiring choice that gets the job done without excelling at anything specific.
| Tier | Hybrid Name | Combat Style | Transformation Strength |
|---|---|---|---|
| S | Bomb Hybrid | Explosive AOE | Massive burst damage |
| S | Chainsaw Hybrid | Aggressive melee | I-frame dash, sustain |
| S | Flamethrower Hybrid | Area denial | Unparryable pressure |
| A | Deep Sea Hybrid | Aquatic combat | Water-based abilities |
| B | Katana Hybrid | Sword combat | Flashy but limited |
| C | Shield Hybrid | Defensive | Low damage output |
| C | Whip Hybrid | Range control | Weak overall |
Bomb Hybrid delivers some of the most devastating burst damage in Devil Hunter. The explosive abilities cover wide areas, hitting multiple enemies simultaneously in both PvP and PvE scenarios. This area coverage makes Bomb Hybrid exceptional for controlling zones and punishing grouped opponents. The explosion mechanics bait parries effectively—opponents see your wind-up and attempt to parry, only to get caught in the blast anyway.
The multi-hit nature of Bomb abilities disrupts enemy combos and creates pressure that forces opponents to play defensively. In transformation, you become a mobile artillery platform capable of controlling entire sections of maps. PvE content becomes significantly easier with Bomb Hybrid, as you can clear enemy packs efficiently while dealing massive damage to bosses. The transformation resource management requires attention, but the payoff justifies learning proper usage timing. Bomb Hybrid’s combination of area control, burst damage, and pressure mechanics solidly earns S-tier placement as one of the best hybrid options available.
Chainsaw Hybrid epitomizes aggressive transformation combat with unmatched offensive pressure. The signature Chainsaw Dash provides invincibility frames while damaging everything in your path, making it essential for both engaging enemies and escaping unfavorable situations. These i-frames allow you to phase through area-of-effect attacks that would devastate other builds, giving you tactical options unavailable elsewhere.
The transformation grants massive damage buffs to your attacks, turning you into a relentless killing machine. In PvP, Chainsaw Hybrid excels at pressuring opponents constantly, never giving them space to breathe. The heal-on-transformation mechanic provides crucial sustain, allowing you to recover from trades and extend your rampage. For PvE content, Chainsaw Hybrid’s sustained damage output and survivability make raid farming significantly faster.
The main consideration is transformation management—you need to time your transformations for maximum impact rather than wasteful usage. However, the power spike when transformed more than compensates for this requirement. Chainsaw Hybrid suits aggressive players who want to dictate fight pacing through constant pressure. Master the dash’s i-frame timing and you’ll dominate both PvP and PvE content.
Flamethrower Hybrid brings unparryable pressure that forces opponents into unfavorable defensive positions. While other attacks can be countered or parried, Flamethrower abilities must be dodged or tanked, fundamentally changing how fights flow. This anti-parry mechanic makes Flamethrower Hybrid essential in the current meta where parry-focused builds dominate lower skill brackets.
The area denial capabilities excel at controlling space in both PvP and PvE. You can lock down corridors, force opponents out of position, or simply maintain pressure that prevents enemies from executing their strategies. The transformation provides consistent damage output that remains threatening throughout its duration. Unlike burst-focused hybrids, Flamethrower maintains steady pressure that wears opponents down over time.
In PvE content, Flamethrower’s area coverage helps manage multiple enemies simultaneously while dealing respectable boss damage. The unparryable nature means you don’t waste abilities on enemy parries, making your damage more reliable. Flamethrower Hybrid requires good positioning sense to maximize effectiveness, but rewards smart play with dominant performances. The combination of anti-parry mechanics, area control, and consistent damage output justifies S-tier placement alongside Bomb and Chainsaw hybrids.
Deep Sea Hybrid brings unique water-based mechanics that create interesting gameplay patterns. The abilities provide decent damage output and some utility through water manipulation effects. In transformation, you gain access to moves that control space differently than other hybrids, offering tactical variety. The hybrid performs adequately across both PvP and PvE content without excelling dramatically in either.
What prevents Deep Sea from reaching S-tier is the lack of defining strengths. It doesn’t have Bomb’s burst damage, Chainsaw’s sustained pressure, or Flamethrower’s anti-parry utility. Deep Sea Hybrid works perfectly fine—it clears content, wins fights, and functions as intended. However, when directly compared to S-tier options, it falls short in key metrics. Use Deep Sea Hybrid if you roll it naturally and enjoy the aesthetic, but actively farming for it over S-tier options would be suboptimal. It occupies A-tier as a solid choice that gets the job done without breaking the meta.
Katana Hybrid features some of Devil Hunter’s flashiest, most visually impressive attacks. The sword techniques deliver hard-hitting damage that feels amazing to land. In transformation, you gain access to movement skills, counters, and area-of-effect attacks that can wipe enemies quickly when executed properly. The stylish combos and satisfying animations make Katana Hybrid appealing from a gameplay experience perspective.
However, significant limitations prevent higher tier placement. The heavy stamina drain makes extended transformation usage problematic—your bar depletes constantly, forcing you out of transformation when it runs empty. No health regeneration in hybrid form means you can’t sustain through damage, making mistakes more punishing. The transformation functions best as a burst option or comeback mechanic rather than sustained combat form.
Katana Hybrid rewards precise timing and smart transformation usage, but the restrictions make it situational compared to S-tier hybrids. You’ll have dramatic highlight moments where everything clicks, but also frustrating situations where stamina drain costs you fights. Katana Hybrid suits players who enjoy high-risk, high-reward gameplay and can accept the limitations for the satisfaction of landing those perfect combos. It’s viable and fun but objectively weaker than top-tier options.
Shield Hybrid prioritizes defense over offense, providing damage reduction and blocking capabilities in transformation. While defensive utility has value in certain scenarios, the low damage output severely limits effectiveness across both PvP and PvE content. In PvP, you can survive longer, but struggles finishing kills efficiently. For PvE farming, the slow kill times hurt efficiency significantly.
The defensive focus creates a passive playstyle that doesn’t align with Devil Hunter’s aggressive combat design. You’ll survive encounters but take noticeably longer completing content compared to offensive hybrid options. Shield Hybrid fills a niche for players who want to learn mechanics safely, but even then, better alternatives exist. The C-tier placement reflects functional but underpowered design that needs buffs to compete with higher-tier hybrids.
Whip Hybrid attempts to provide range control through reach-based attacks. Unfortunately, the execution falls flat with weak damage output and limited utility. The range advantage doesn’t compensate for the dramatic power deficit compared to other hybrids. In both PvP and PvE, Whip Hybrid struggles to justify transformation costs with underwhelming performance.
The hybrid lacks defining strengths—it’s not tanky like Shield, doesn’t deal damage like offensive hybrids, and provides minimal utility. Whip Hybrid occupies C-tier as an option to avoid when possible. If you roll it, immediately begin working toward better hybrid hearts. The time investment to farm a different hybrid is absolutely worth avoiding Whip Hybrid’s disappointing performance.
| Tier | Weapon Name | Weapon Type | Key Strengths |
|---|---|---|---|
| S | Kuchigatana | Katana | Fast attacks, good hitbox |
| S | Undead Sickles | Dual Sickles | Combo potential |
| S | Rotblade | Sword | High damage |
| S | Sealed World | Special | Unique abilities |
| S | Rot & Ruin | Dual Weapons | Versatile moveset |
| S | Sealed Fang | Sword | Reliable damage |
| S | Brainsplasher | Hammer | Massive damage |
| S | Fleshbreaker | Axe | Raw power |
| A | Devil Crusher | Hammer | Heavy hits |
| A | AK-47 | Gun | Ranged safety |
| A | Cross Punisher | Special | Utility options |
| A | Cobalt Bloom | Sword | Balanced stats |
| A | Punk Hazard | Special | Unique mechanics |
| A | Scissor Blade | Sword | Speed |
| A | Yamada | Katana | Traditional style |
| A | Scarlet Queen | Special | Combo focus |
| A | Murasama | Katana | Critical hits |
| B | Razor Halberd | Polearm | Reach |
| B | Left & Right | Dual Pistols | Basic ranged |
| B | Shibuki | Sword | Standard damage |
| B | Devil’s Maw | Special | Situational |
| B | Kasaka’s Fangs | Claws | Fast hits |
| B | Broad Axe | Axe | Basic power |
| B | Velvet Knife | Dagger | Quick strikes |
| C | Greenshot | Gun | Weak damage |
| C | Yukimura | Sword | Limited use |
| C | Razorfang | Claws | Low power |
| C | 1911 | Pistol | Basic |
| C | Katana | Sword | Generic stats |
| C | Locus Knife | Dagger | Minimal damage |
| C | Combat Knife | Dagger | Starter weapon |
| C | Model Uzi | SMG | Spray and pray |
Kuchigatana stands as one of Devil Hunter’s most reliable weapons, combining fast attack speed with generous hitboxes. The katana moveset flows naturally, allowing you to chain attacks smoothly while maintaining pressure on opponents. In PvP, the speed makes it difficult for enemies to find counterattack windows between your strikes. The weapon skills provide both offensive pressure and defensive options, making Kuchigatana versatile across all combat scenarios.
For PvE content, Kuchigatana’s attack speed translates to high effective DPS against bosses and enemy packs. You can weave in attacks between boss mechanics without committing to long animation locks. The weapon scales excellently with stat investment, rewarding players who build into it properly. Kuchigatana’s balance of speed, damage, and utility earns its S-tier placement as a weapon suitable for both beginners learning combos and veterans pushing endgame content.
Undead Sickles excel at combo extension through their dual-weapon moveset. The attacks hit multiple times per input, allowing you to build combo counts rapidly while dealing sustained damage. Each strike creates opportunities to chain into other abilities, weapon skills, or contract moves. This combo potential makes Undead Sickles essential for technical players who want to maximize damage through extended sequences.
The weapon’s speed rivals Kuchigatana while offering different combo routes and timings. In PvP, the multi-hit nature helps you maintain pressure consistently, making it difficult for opponents to reset neutral. For PvE farming, Undead Sickles clear enemies efficiently while building toward powerful finisher skills. The learning curve is slightly higher than straightforward weapons, but mastering the combo patterns rewards you with some of the highest damage potential in Devil Hunter.
Rotblade delivers exceptional raw damage per hit, making it perfect for players who prefer commitment over speed. Each strike chunks health bars significantly, rewarding positioning and timing. The weapon skills provide burst damage options that delete opponents when landed cleanly. In transformation or with damage buffs, Rotblade’s crits can one-shot unprepared enemies.
The slower attack speed demands better fundamental skills—you must predict opponent movements and commit to swings confidently. However, when you land clean hits, the payoff exceeds faster weapons dramatically. For PvE content, Rotblade makes boss farming faster by reducing the number of hits needed to secure kills. The high damage per hit synergizes excellently with burst-focused contract builds and hybrid transformations.
Sealed World brings unique mechanics unavailable in standard weapon categories. The special abilities create tactical options that change how fights flow, allowing you to adapt to different situations dynamically. The weapon scales excellently into late game, maintaining relevance even as you acquire better stats and contracts. Sealed World’s versatility across both PvP and PvE content makes it a safe investment that won’t become obsolete.
The learning curve involves understanding when to use each ability optimally rather than simple combo memorization. This creates depth that rewards experimentation and adaptation. Sealed World suits players who enjoy tactical variety and want their weapons to provide more than just damage output. The unique mechanics justify S-tier placement by offering utility that complements rather than competes with other top weapons.
Rot & Ruin’s dual-weapon design provides one of the most complete movesets in Devil Hunter. You gain access to attacks for every situation—fast strikes for pressure, heavy hits for punishing, crowd control for groups, and gap closers for mobility. This comprehensive toolkit makes Rot & Ruin excel across all content types without significant weaknesses.
The versatility allows you to adapt your playstyle mid-fight based on what the situation demands. Against aggressive opponents, use defensive options. Against passive players, leverage gap closers and pressure tools. For PvE farming, the crowd control helps manage multiple enemies while the heavy attacks chunk boss health. Rot & Ruin rewards players who understand fundamental combat principles by giving them tools for every scenario. The complete package justifies S-tier as one of the most well-rounded weapon choices available.
Sealed Fang provides reliable, consistent damage across all game modes. The weapon skills hit hard without requiring complex setups or precise timing windows. This reliability makes Sealed Fang excellent for players who want dependable performance without mastering frame-perfect combos. The damage output competes with other S-tier options while being more forgiving to execute.
In PvP, Sealed Fang’s straightforward nature lets you focus on fundamentals rather than weapon-specific tech. For PvE content, the consistent damage accelerates farming without demanding intense concentration. Sealed Fang represents the “no-nonsense” S-tier option—it doesn’t have flashy mechanics or complex systems, but it performs exceptionally well in practice. The accessibility combined with genuine power justifies its top-tier placement alongside more technical options.
Brainsplasher delivers some of the highest single-hit damage in Devil Hunter’s weapon roster. The hammer’s heavy attacks punish positioning mistakes with massive damage spikes. Landing charged attacks or critical strikes can delete opponents outright, creating constant threat opponents must respect. The weapon excels at trades—even if you take damage, your return hits deal significantly more.
The slow attack speed makes Brainsplasher unforgiving against mobile opponents but devastating against predictable ones. In PvE, the high damage per hit makes boss farming efficient despite slower attack speed. Brainsplasher pairs excellently with stun-based contracts or parry setups that create guaranteed hit windows. The sheer damage output earns S-tier placement for players who can land their strikes consistently.
Fleshbreaker combines axe-style heavy hits with movement options that offset the slow attack speed. The raw power rivals Brainsplasher while providing better gap-closing tools for pursuing opponents. Each successful hit deals substantial damage that adds up quickly in extended fights. The weapon skills provide both offensive pressure and defensive resets.
Fleshbreaker rewards aggressive, decisive play. When you commit to swings, you need confidence in your reads. However, correct predictions result in massive damage that shifts fights immediately. For PvE farming, Fleshbreaker’s power makes it efficient despite the slower pace. The combination of high damage, reasonable speed, and useful weapon skills places Fleshbreaker firmly in S-tier as a top offensive choice.
Devil Crusher delivers heavy-hitting hammer attacks that create pressure through sheer damage threat. Each strike demands respect from opponents, forcing defensive play that you can capitalize on. The weapon performs admirably in both PvP and PvE, providing solid damage output across all content. However, it lacks the defining advantages that elevate S-tier weapons above the pack.
The slower attack speed creates vulnerability against fast weapons and mobile opponents. You’ll trade hits rather than overwhelm opponents with speed. For players who enjoy calculated, powerful strikes over rapid-fire attacks, Devil Crusher satisfies that playstyle effectively. It occupies A-tier as a strong choice that performs well without being optimal. Use Devil Crusher when you want hammer gameplay but understand S-tier options provide slight advantages.
AK-47 brings ranged safety that melee weapons can’t match. You can maintain distance while dealing consistent chip damage, making it excellent for kiting dangerous opponents or learning boss mechanics safely. The ranged nature provides value in specific PvP matchups and PvE scenarios where staying at range is advantageous.
However, the damage output can’t compete with melee weapons when both land hits consistently. AK-47 excels as a secondary weapon or learning tool rather than a primary damage source. It occupies A-tier for the utility and safety it provides, even if raw damage falls short of S-tier options. Consider AK-47 when survivability and range control matter more than pure damage output.
Cross Punisher offers unique utility through its weapon skills and special mechanics. The moveset provides options for both offense and crowd control, making it versatile across different combat situations. In PvP, the utility creates mix-ups that keep opponents guessing. For PvE farming, the crowd control helps manage multiple enemies efficiently.
What prevents S-tier placement is the lack of exceptional damage compared to top weapons. Cross Punisher does everything adequately without excelling dramatically in any category. It’s a jack-of-all-trades weapon that suits players who value flexibility over specialized strength. The A-tier placement reflects solid all-around performance that works in most situations without being the absolute best choice.
These A-tier weapons share similar characteristics—they’re all competent, viable options with specific strengths that don’t quite reach S-tier levels. Cobalt Bloom provides balanced stats suitable for various builds. Punk Hazard brings unique mechanics that create interesting gameplay. Scissor Blade offers speed-focused gameplay. Yamada represents traditional katana styling. Scarlet Queen emphasizes combos. Murasama focuses on critical hit damage.
Each weapon serves specific playstyles effectively without matching the complete packages offered by S-tier choices. They occupy A-tier as respectable alternatives that work perfectly fine in practice. Choose based on personal preference and playstyle alignment rather than chasing marginal power differences. All these weapons carry you through content successfully—they’re simply not the absolute optimal choices for min-maxing.
B-tier weapons function adequately for early-to-mid game content but fall behind as you progress. Razor Halberd, Left & Right, Shibuki, Devil’s Maw, Kasaka’s Fangs, Broad Axe, and Velvet Knife all serve roles during your progression journey. However, they lack the power, speed, or utility to remain competitive in endgame content.
Use B-tier weapons as transitional options while farming for better drops. They’ll help you complete missions and participate in raids without being optimal. Don’t invest heavily in upgrading B-tier weapons—save resources for A-tier or S-tier options that provide better long-term value. These weapons aren’t bad, they’re simply outclassed by better alternatives once you have access to them.
C-tier weapons represent early-game starter options or drops that immediately get replaced. Greenshot, Yukimura, Razorfang, 1911, Katana, Locus Knife, Combat Knife, and Model Uzi all struggle to remain relevant beyond the first few hours of gameplay. Their damage output, speed, and utility fall far short of higher-tier weapons.
Don’t waste resources on C-tier weapons beyond basic upgrades needed to progress early content. Focus on acquiring anything from B-tier or above as quickly as possible. These weapons exist primarily to fill your inventory slots until you find better options. They serve their purpose as early-game tools but become obsolete rapidly as you progress.
| Tier | Clan Name | Stat Boost | Early Game Impact |
|---|---|---|---|
| S | Hayakawa | High stat bonuses | Excellent start |
| S | Kishimoto | Strong passives | Great progression |
| S | Kishibe | Balanced boost | Top-tier foundation |
| A | Fujimoto | Solid stats | Good beginning |
| A | Higashiyama | Decent bonuses | Reliable start |
| A | Himeno | Balanced growth | Stable foundation |
| B | Sawatari | Basic boost | Functional start |
| B | Yoshida | Minimal impact | Acceptable beginning |
Your clan choice primarily impacts early-to-mid game progression through stat bonuses and passive abilities. While S-tier clans provide noticeable advantages that smooth your leveling experience, clan selection becomes less critical in late game. Contracts, fiends, hybrids, and weapons overshadow clan bonuses once you’ve established your build fully.
However, the early game advantages from S-tier clans shouldn’t be dismissed. Hayakawa, Kishimoto, and Kishibe provide stat boosts that accelerate your progression significantly during the crucial first levels. Better stats mean easier quest completion, faster farming, and improved survival in early PvP encounters. These advantages compound over time, getting you to endgame content faster than B-tier clans.
A-tier clans like Fujimoto, Higashiyama, and Himeno provide respectable bonuses that work perfectly fine. You won’t feel dramatically handicapped choosing these clans, but you will notice the difference when comparing progression speed to S-tier users. B-tier clans like Sawatari and Yoshida provide minimal advantages that barely impact your experience.
If you’re min-maxing or care about optimal starts, choose an S-tier clan. If you prefer a specific clan aesthetically or thematically, the performance difference won’t make or break your experience. Contracts and weapons matter far more than clan selection in determining your actual combat effectiveness.
Understanding what makes options strong or weak requires knowledge of Devil Hunter’s combat fundamentals. Several key factors determine effectiveness across PvP and PvE content:
Attack Speed and Animation Length – Faster attacks create more pressure and provide better combo potential. Longer animations lock you in place, creating vulnerability windows opponents can exploit. S-tier options typically balance speed with damage output effectively.
Crowd Control and Utility – Abilities that stun, grab, or otherwise disable opponents create combo opportunities and control fight pacing. Pure damage options need exceptional numbers to compete with utility-focused choices.
Parry and Block Interactions – The current meta revolves heavily around parrying and blocking. Options that bypass these defensive mechanics gain significant value. Unparryable attacks, grabs, and delayed timings all provide advantages against defensive opponents.
Resource Management – Contract costs, transformation meter, and weapon skills all require resource investment. Options that provide strong value relative to their costs perform better than expensive abilities with marginal benefits.
Scaling and Late Game Viability – Some options dominate early game but fall off dramatically as content difficulty increases. True S-tier choices maintain relevance across all progression stages, from tutorial to endgame raids.
Skill Floor vs Skill Ceiling – Beginner-friendly options provide immediate value while complex options require mastery. The best choices offer both—effective when used basically but reward advanced techniques with superior performance.
Matchup Spread – Options that work against most opponents and enemies provide more consistent value than niche counters. Versatility across different situations increases practical effectiveness significantly.
Understanding these factors helps you evaluate new content and make informed decisions as Devil Hunter’s meta evolves. Rankings reflect current balance, but the principles behind tier placement remain constant even when specific numbers change.
Most contracts come from specific NPCs through quest chains or faction requirements. Public Safety grants access to Curse Devil and Future Devil through their faction elevator. Yakuza provides Zombie Devil (raid drop), Snake Devil (quest chain), and Katana Man Hybrid (raid crafting). Common contracts like Fox Devil are available through the tutorial and basic NPCs.
Higher-tier contracts typically require more investment—challenging quest chains, faction progression, or raid farming. However, the power difference justifies the effort invested. Prioritize acquiring S-tier contracts even if the process takes time. One excellent contract provides more value than three mediocre options.
Fiend rerolls are precious resources you should never waste randomly. Always use rerolls when you have a specific target in mind—ideally Angel Fiend or Blood Fiend. Using rerolls without a goal wastes opportunities to secure top-tier options. Farm Yen and complete missions to acquire more reroll items before attempting to secure S-tier fiends.
If you start as a fiend with Nail Fiend or another low-tier option, immediately begin working toward rerolls. Don’t invest heavily in talents or progression until you’ve secured a better base fiend. The transformation is permanent once you commit resources, making the initial reroll decision crucial for long-term account strength.
Hybrid hearts require level 50+ and completing specific raid content. Each hybrid requires farming fragments from designated raids, then crafting the heart through surgery. The process demands significant time investment, making hybrid choice crucial. Research your options thoroughly before committing to a specific hybrid farm.
S-tier hybrids (Bomb, Chainsaw, Flamethrower) should be priority targets. Don’t waste weeks farming fragments for C-tier hybrids that won’t provide satisfactory performance. If you accidentally acquire a bad hybrid, you can replace it by farming a different heart and redoing surgery. However, this wastes resources better spent on other progression aspects.
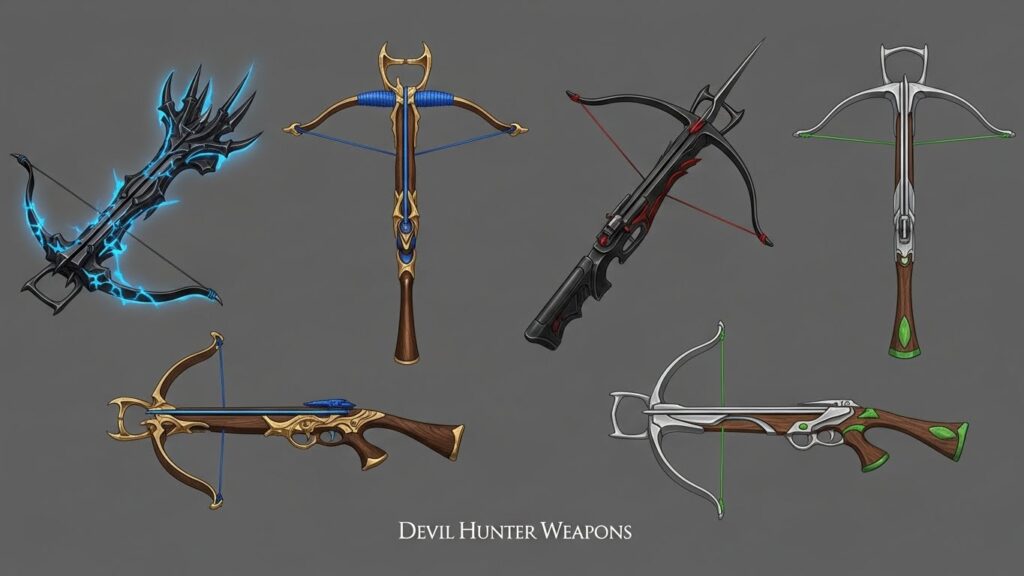
Weapons drop from enemies, bosses, and mission completion rewards. Higher-difficulty content provides better drop chances for rare weapons. S-tier weapons typically come from challenging content—raid bosses, high-level missions, or special events. Some weapons require crafting through collected materials rather than direct drops.
Farm content appropriate to your level that targets specific weapon drops you want. Check community resources and trading channels to understand which bosses drop desired weapons. Trading can accelerate weapon acquisition if you’re willing to use Yen or items others want.
The strongest current meta builds pair Hayakawa or Kishibe clan with S-tier contracts like Curse Devil, Ghost Devil, or Mantis Devil. For fiends, Angel Fiend with sustain talents creates an unkillable machine. Weapons should focus on S-tier choices like Kuchigatana, Sealed Fang, or Brainsplasher depending on your playstyle preference. Hybrids should target Chainsaw, Bomb, or Flamethrower for maximum impact.
Fox Devil is the default beginner contract available through the tutorial and performs well enough for early content. However, once you can access faction content, Future Devil provides excellent defensive utility that helps you learn combat. Sea Cucumber Devil also works well for new players learning positioning and timing fundamentals.
Humans offer more versatility through multiple contract options and flexible build crafting. Fiends provide simpler but more powerful baseline performance once you secure a good base fiend. New players often find fiends easier to pilot effectively, while experienced players appreciate human versatility. Neither path is objectively superior—choose based on your preferred gameplay style and complexity tolerance.
Fiend rerolls can be acquired through Yen purchases in the shop, mission completion rewards, and special event drops. Farm Yen efficiently through raid content and mission grinding. Don’t use rerolls randomly—save them until you understand what you’re aiming for and can make informed decisions.
Raid content provides the best Yen-per-hour ratios once you can complete them consistently. Mission farming works well for early-to-mid game players building toward raid readiness. Using S-tier PvE contracts like Bat Devil or Fox Devil accelerates farming speed significantly. Group content with other players can increase efficiency through shared loot and faster clear times.
Clan selection is permanent once chosen at character creation. There’s currently no way to change clans without creating a new account. Choose carefully during initial setup, prioritizing S-tier clans if you care about optimal progression speed. However, clan impact diminishes in late game, so don’t restart accounts solely for clan reasons.
Weapons and contracts serve different roles that complement rather than compete with each other. Weapons provide your baseline damage through normal attacks, while contracts deliver burst damage and utility. Both are essential for optimal performance. A player with S-tier weapons but weak contracts will struggle, just as someone with great contracts but bad weapons will underperform.
Prioritize contract acquisition, fiend rerolls (if fiend), and essential upgrades that directly impact combat effectiveness. Avoid cosmetic purchases until you’ve established your core build. Weapon upgrades provide solid value once you’ve acquired S-tier weapons worth investing in. Save Yen for important purchases rather than impulse spending on marginal upgrades.