
Bizarre Lineage Codes (March 2026) Free Stand Arrows
Bizarre Lineage is the hottest new JoJo-inspired Roblox RPG right now, set in the mysterious town of Morioh-cho. You build…
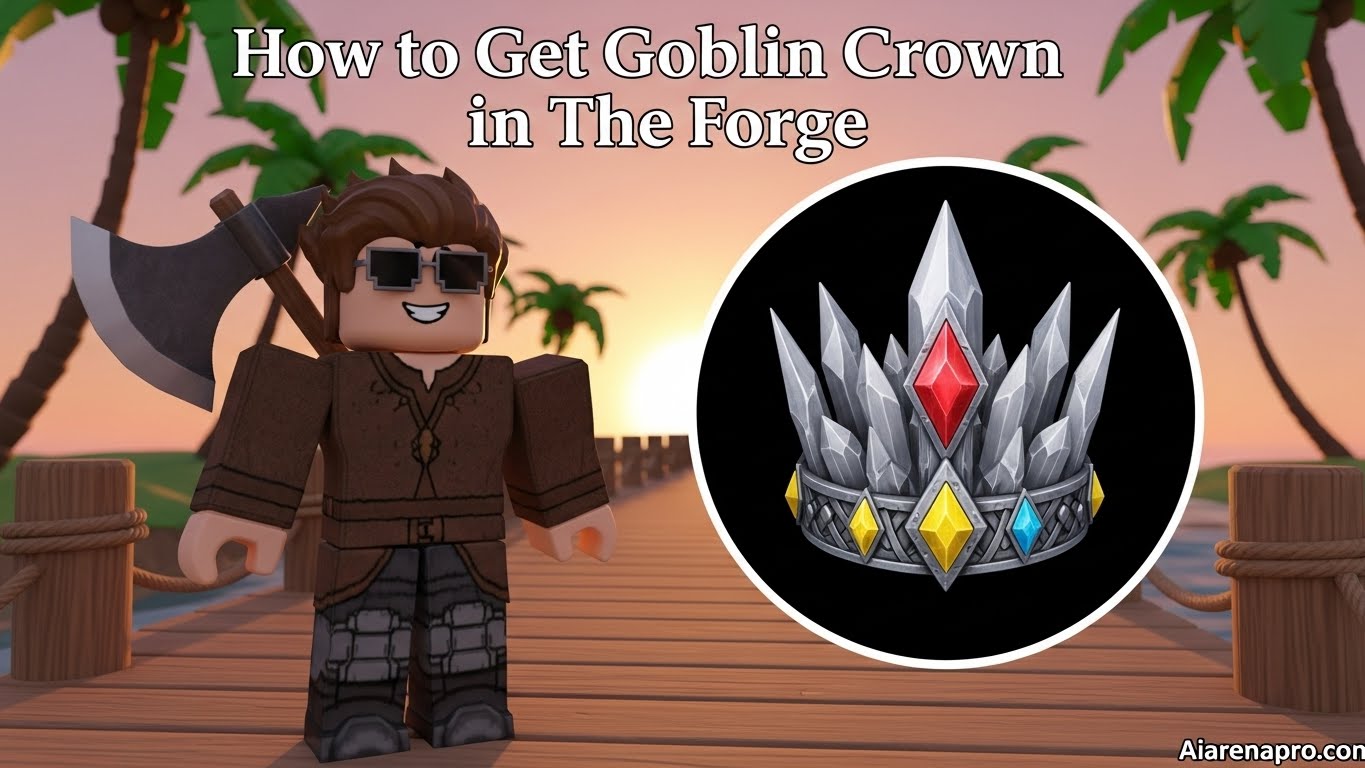
Getting the Goblin Crown in The Forge is one of the most expensive and time-consuming challenges you’ll face in this Roblox game. I’ve spent countless hours grinding through the Goblin Lord questline, and I’m here to share everything I’ve learned so you can unlock this legendary Heavy Helmet recipe without wasting precious resources or time.
The Goblin Crown isn’t just another armor piece. It’s a game-changing Heavy Helmet that offers massive health boosts, making it essential for tank builds and late-game progression. But here’s the catch: you’ll need to invest $550,000 gold and nine rare ores just to unlock the recipe. Then comes the real grind of actually crafting it.
In this comprehensive guide, I’ll walk you through every single step, from prerequisites to final crafting, complete with insider tips that’ll save you hours of frustration.
Before we dive into the how-to, let’s talk about what makes the Goblin Crown worth all this effort.
The Goblin Crown is a legendary Heavy Helmet that dramatically changes your playstyle. When you craft and equip this armor piece, you’ll gain:
| Stat | Effect |
|---|---|
| Max Health (Vitality) | +70% to +90% boost |
| Movement Speed (Swiftness) | -25% or more reduction |
| Defense | Significantly increased |
| Weight Class | Heavy Helmet category |
This makes the Goblin Crown the ultimate tank item in The Forge. You become nearly indestructible in combat, capable of absorbing massive damage that would instantly kill other players. The trade-off? You’ll move considerably slower, turning you into what I like to call a “walking fortress.”
The helmet is perfect for:
However, the Goblin Crown isn’t tradeable between players, meaning every single person must complete the entire Goblin Lord questline themselves. There are no shortcuts.
You can’t just waltz into Frostspire Expanse and start the Goblin Lord quests. There’s a specific progression path you must follow first, and skipping any step will completely lock you out.
At level 70, you’ll unlock access to Frostspire Expanse (Island 3), where the Goblin Lord resides. However, I strongly recommend getting to 75 or higher before starting this questline. The enemies in this area hit hard, and you’ll need the extra stats to survive while farming.
1. Portal Tool You absolutely need the Portal Tool to access different islands in The Forge. To get it:
2. Goblin King Quest Completion This is non-negotiable. The Goblin Lord only appears after you’ve finished the Goblin King questline in the Forgotten Kingdom. Here’s what the Goblin King demands:
| Quest Stage | Gold Required | Gems Required |
|---|---|---|
| Quest 1 | $10,000 | – |
| Quest 2 | $15,000 | 1 Topaz |
| Quest 3 | $15,000 | 1 Diamond, 1 Emerald, 1 Ruby |
| Quest 4 | $15,000 | 1 Diamond, 1 Emerald, 1 Ruby |
| Quest 5 | $20,000 | 1 Diamond, 1 Emerald, 1 Ruby, 1 Topaz |
Total Investment: $75,000 gold + 3 Topaz + 5 Diamonds + 5 Emeralds + 5 Rubies
Once you complete these quests, the Goblin King disappears from the Forgotten Kingdom and reappears as the Goblin Lord in Frostspire Expanse, now decked out in golden armor and riches.
3. Strong Pickaxe You’ll need a pickaxe with solid mining power to gather the rare ores required. I recommend:
4. Luck Potions Stock up on Luck Potions before starting. These significantly improve your chances of finding rare ores like Snowite and Iceite. You’ll want at least 10-15 Luck Potions to complete the entire questline efficiently.
5. Gold Reserves Have at least $600,000 gold saved up before starting. While the questline costs $550,000, you’ll want extra buffer for:
Armor:
Weapons:
Runes:
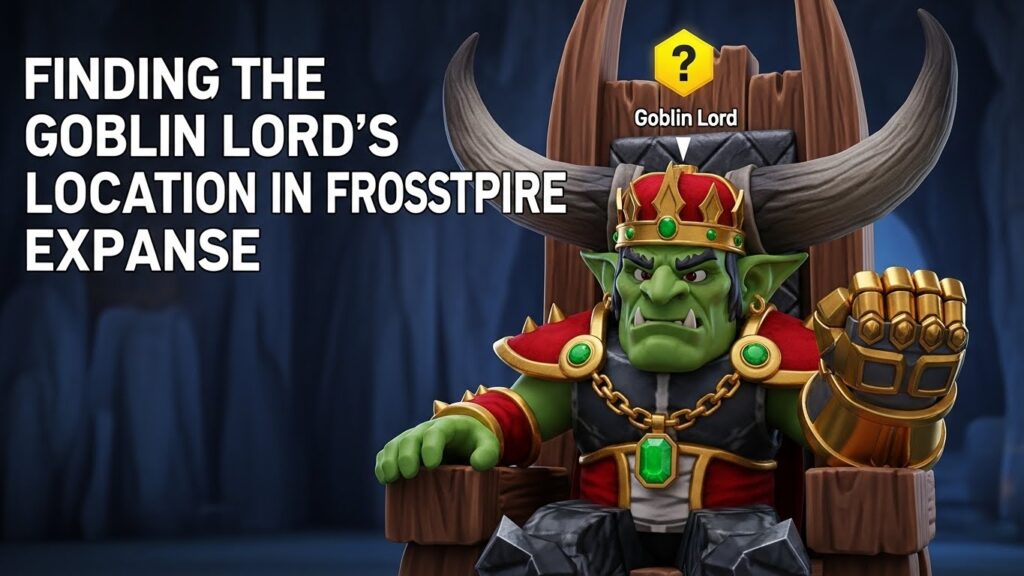
This is where most players get stuck. The Goblin Lord’s cave isn’t marked on any map, and his location feels intentionally hidden. I spent two hours wandering around Frostspire Expanse before finally finding him, so let me save you that frustration.
Step 1: Reach Frostspire Expanse
Step 2: Locate the Spider Cave When you spawn into Frostspire Expanse, the Spider Cave is your main landmark. It’s a large cave entrance that’s hard to miss. Head towards it but don’t enter yet.
Step 3: Navigate to the Goblin Lord’s Cave Here’s the exact path:
The cave entrance has several distinctive features:
Once you enter, you’ll find the Goblin Lord sitting on a throne at the back of the cave. He’s wearing fully golden armor with an emerald necklace and is already wearing a Goblin’s Crown (the one he bought with your money from the Forgotten Kingdom quests).
Pro Tip: I strongly recommend having at least $550,000-$600,000 gold in your inventory before even talking to the Goblin Lord. Starting his questline without sufficient funds is incredibly frustrating because you can’t progress until you farm more gold.
The Goblin Lord doesn’t give you traditional quests with objectives. Instead, he demands sequential “donations” – essentially making you pay tribute in exchange for the Goblin Crown recipe. Think of it as a brutal economic negotiation where he holds all the cards.
| Quest | Gold Cost | Ore Requirements | Total Cost |
|---|---|---|---|
| 1 | $25,000 | None | $25,000 |
| 2 | $50,000 | 1 Velchire | $50,000 + 1 Velchire |
| 3 | $75,000 | 2 Sanctis | $75,000 + 2 Sanctis |
| 4 | $150,000 | 3 Snowite | $150,000 + 3 Snowite |
| 5 | $250,000 | 3 Iceite | $250,000 + 3 Iceite |
| TOTAL | $550,000 | 1 Velchire, 2 Sanctis, 3 Snowite, 3 Iceite | Complete Set |
You must complete these quests in order. Missing one or failing to meet the requirements locks you out of progression until you gather the necessary resources.
This is the easiest quest and serves as the “entry fee” to the Goblin Lord’s questline.
Requirements:
Completion Time: Instant (if you have the gold)
Tips:
Once you hand over the gold, the Goblin Lord immediately presents Quest 2. There’s no waiting period.
Now things get interesting. You need both gold AND a specific rare ore.
Requirements:
Where to Find Velchire: Velchire is a high-rarity ore found exclusively on Island 3 (Frostspire Expanse). The best mining locations are:
Drop Rate: Approximately 1 in 800-1,000 rocks
Farming Strategy:
Average Time: 30-60 minutes with Luck Potions
My Experience: With a Luck Potion active and a Velchire Pickaxe, I found my first Velchire after breaking about 700 rocks. Without Luck Potions, expect this to take 2-3 hours.
The difficulty ramps up significantly here. Not only do you need more gold, but you need TWO Sanctis ores.
Requirements:
Where to Find Sanctis: Sanctis is rarer than Velchire and requires specific mining locations:
Drop Rate: Approximately 1 in 1,200-1,500 rocks
Farming Strategy:
Average Time: 1-2 hours per Sanctis (2-4 hours total)
Important Note: Sanctis has a bluish glow when you’re near it. Don’t confuse it with regular ice formations.
Pro Tip: I recommend farming both Sanctis ores before paying the $75,000. This way, you can immediately submit everything and move to Quest 4 without interruption.
This is where the Goblin Lord questline becomes genuinely challenging. Quest 4 requires THREE Snowite ores, and Snowite has one of the lowest drop rates in the entire game.
Requirements:
Where to Find Snowite: Snowite ONLY spawns from Icy Pebbles in very specific locations:
Drop Rate: Approximately 1 in 2,000-2,500 Icy Pebbles
Why This Is the Bottleneck: Snowite has the worst combination of factors:
Farming Strategy (Optimized):
Server Hopping Method:
Average Time: 4-8 hours total (varies dramatically with RNG)
My Experience: This took me the longest by far. I spent roughly 6 hours across two days farming Snowite. With consistent Luck Potion usage and server hopping, I eventually got all three. My advice? Do this in multiple sessions to avoid burnout.
Critical Tip: Don’t waste Luck Potions on regular rocks during this phase. Save them exclusively for Icy Pebble mining sessions.
You’re almost there. The final quest requires the largest gold investment and three Iceite ores.
Requirements:
Where to Find Iceite: Iceite is another high-rarity ore found in cold regions:
Drop Rate: Approximately 1 in 1,800-2,000 rocks
Farming Strategy:
Average Time: 3-5 hours total
Farming Optimization:
My Experience: After the Snowite nightmare, Iceite felt easier. I found all three in about 4 hours of focused mining with Luck Potions. The Summit’s Edge area is dangerous with Elite Orcs and occasional Ice Golem spawns, so bring good armor.
Final Quest Completion: Once you submit the $250,000 gold and 3 Iceite, the Goblin Lord thanks you for your “generous donation” and the Goblin Crown recipe automatically unlocks in your Forging menu under Heavy Helmet.
Important: You don’t receive a physical item. The recipe is added directly to your crafting options.
After completing this grueling questline myself, here are the insider strategies I wish I knew from the beginning.
1. Sensei Moro Quest Chain The absolute best gold source in The Forge. Each of Sensei Moro’s quests rewards substantial gold:
Complete his entire questline before starting the Goblin Lord quests. This alone can generate $200,000+ gold.
2. AFK Farming Spots Set up in high-density enemy spawn areas:
3. Boss Farming If you have strong gear:
4. Ore Selling Sell any extra rare ores you don’t need:
Best Pickaxe Progression:
Luck Potion Management:
Rune Setup for Mining: Equip your pickaxe with runes that boost:
Server Hopping for Efficiency: When an area’s ores are depleted:
This technique is especially crucial for Snowite farming.
Certain races in The Forge provide significant advantages for this questline:
Best Races for Goblin Lord Quests:
I recommend rerolling for Goblin or Elf race before starting serious ore farming. The difference is noticeable over hundreds of ore gathering sessions.
Don’t underestimate the combat requirements. Frostspire Expanse is dangerous:
Enemy Threats:
Recommended Combat Stats:
Best Armor Sets:
This isn’t a one-day grind. Plan your time wisely:
Suggested Schedule:
Breaking it into multiple sessions prevents burnout and keeps the grind manageable.
Session Length Recommendations:
Mistake #1: Starting Without Enough Gold Don’t talk to the Goblin Lord until you have $600,000 saved. Running out of gold mid-questline forces you to pause and farm more, breaking your momentum.
Mistake #2: Not Using Luck Potions Luck Potions are ESSENTIAL for rare ore farming. Without them, you’ll spend 2-3x longer on Snowite and Iceite collection.
Mistake #3: Ignoring the Goblin King Prerequisite You absolutely must complete the Goblin King questline first. The Goblin Lord won’t even appear in Frostspire Expanse until you do.
Mistake #4: Poor Pickaxe Choice Using a weak pickaxe dramatically increases farming time. Invest in at least a Mythril or Velchire Pickaxe before starting serious ore collection.
Mistake #5: Selling Required Ores Double-check before selling any Velchire, Sanctis, Snowite, or Iceite. Some players accidentally sell these ores, then have to farm them again.
Mistake #6: Farming Ores Out of Order Farm all ores for a quest BEFORE paying the gold. This ensures smooth progression and prevents getting stuck.
Mistake #7: Solo Boss Fighting If you’re trying to farm gold from bosses, group up with other players. Solo boss fights take much longer and risk death with no loot.
Congratulations! You’ve unlocked the Goblin Crown recipe. But wait – you’re not done yet. Now comes the crafting phase, which has its own challenges.
After completing Quest 5, check your Forging menu:
Here’s where The Forge throws you a curveball. The Goblin Crown uses an RNG crafting system:
How It Works:
Drop Rate: Approximately 1 in 8-12 crafts for Goblin’s Crown
This means you’ll likely need to craft the recipe multiple times before actually getting the Goblin’s Crown itself.
Per Craft Attempt:
Recommended Ores:
Total Material Investment: For an average success (8-12 attempts):
Best Ores for Crafting (Efficiency):
Ores to AVOID Using:
My Crafting Strategy: I stockpiled 250 Iron and Copper ores before attempting crafts. This gave me 10 craft attempts, and I got the Goblin’s Crown on my 9th try. Having a huge ore reserve prevents frustrating breaks to farm more materials.
Don’t craft one at a time. Here’s why:
Psychological Benefits:
Practical Benefits:
My Recommended Approach:
You’ll end up with several non-Goblin’s Crown helmets. Here’s what to do:
Option 1: Sell Them
Option 2: Keep for Alt Builds
Option 3: Trade to Friends
Once you successfully craft the Goblin’s Crown, here are the stats you can expect:
Goblin’s Crown Stats:
Best Build Pairings:
After crafting, you can further improve the Goblin’s Crown:
Enhancement Options:
Rune Slotting:
Material Requirements for +5 Enhancement:
After investing 20+ hours into this questline, here’s my honest assessment.
1. Unmatched Survivability The +70-90% health boost is massive. You can tank boss mechanics that would one-shot other players. In the Ice Golem fight, I went from dying in 3 hits to surviving 10+ hits.
2. Required for Progression Some endgame content and quests actually require high health pools. The Goblin’s Crown enables access to:
3. Flexibility in Build Options The extra health lets you use more aggressive armor in other slots, creating unique build possibilities impossible with other helmets.
4. Long-term Investment Unlike consumables or temporary gear, the Goblin’s Crown remains relevant throughout endgame progression. It’s a permanent upgrade to your character.
1. Massive Time Investment 20-30 hours of grinding is no joke. This is:
2. Significant Gold Cost $550,000 is a massive investment. You could use that gold for:
3. Movement Speed Penalty The -25% movement speed is genuinely frustrating for:
4. RNG Crafting Frustration The random helmet crafting system is poorly designed. Spending 550K+ gold only to face RNG gambling for the actual helmet feels unrewarding.
5. Not Optimal for All Content In fast-paced content or situations requiring mobility, other helmets actually perform better:
Perfect For:
Skip If You:
The Goblin Crown is worth it if you plan to engage with endgame tank content. The health boost is genuinely game-changing for specific activities. However, it’s not essential for progression, and many players will find other helmets more enjoyable for their playstyle.
I use my Goblin’s Crown for:
But I switch to Raven Helmet for:
Upgrade Your Pickaxe First: Before starting the Goblin Lord quests, invest in the best pickaxe you can afford. The time saved mining rare ores will outweigh the initial cost.
Use Runes Effectively: Certain runes can significantly boost your mining power and ore-finding abilities. Focus on runes that enhance these specific attributes.
Luck Totems and Potions: These items can increase your chances of finding rare ores by up to 25%. Use them strategically during dedicated mining sessions.
Complete Daily Quests: These provide consistent gold income that can fund your Goblin Crown questline.
Sell Forged Items: Instead of selling raw ores, craft them into weapons or armor first. Forged items typically sell for significantly more gold than the raw materials.
Focus on High-Value Areas: Certain areas in The Forge offer better gold-to-time ratios. Learn these locations and focus your farming efforts there.
Upgrade Your Armor: The journey to the Goblin Cave and the mining process can be dangerous. Ensure you have adequate armor protection.
Learn Combat Mechanics: Master dashing, blocking, and heavy attacks to handle enemies you’ll encounter in Frostspire Expanse.
Bring Healing Items: Always carry healing potions or food items during your expeditions to Island 3.
Starting Too Early: Don’t attempt this questline before Level 70 or without completing the Goblin King quests. You’ll waste time and resources.
Poor Gold Management: Don’t make multiple trips for gold. Accumulate the required amounts beforehand to save time.
Inadequate Pickaxe: Trying to mine rare ores with a weak pickaxe will result in frustration and wasted time.
Ignoring Luck Boosts: Not using luck potions or totems when mining for rare ores is a common mistake that significantly extends the grind.
Selling Raw Ores: Raw ores sell for much less than forged items. Always craft before selling when possible.
Wrong Mining Locations: Each rare ore has specific locations where they’re more likely to spawn. Research these locations to maximize efficiency.
Missing the Goblin Cave Location: Many players get lost looking for the Goblin Cave. Remember: left from Spider Cave, climb the rock, look for guards.
Not Tracking Progress: Keep track of which quests you’ve completed and what materials you still need.
Rushing the Crafting: Don’t craft the Goblin Crown with low-quality materials just to have it quickly. Wait for the best materials available.
Optimal Controls: Take advantage of keyboard shortcuts for efficient mining and combat:
Graphics Settings: Adjust your graphics settings to clearly spot rare ore nodes and important visual cues.
Control Adaptation: Mobile controls require different strategies. Practice combat and mining movements before attempting the questline.
Battery Considerations: This is a long questline. Ensure your device is fully charged or plugged in.
Server Selection: Choose less crowded servers for better mining opportunities and less competition for rare ores.
Time Management: The complete questline can take 10-20+ hours depending on your luck and preparation. Plan accordingly.
You must first reach the Forgotten Kingdom using the Portal Tool, then complete all five Goblin King quests. This removes the Goblin from his Forgotten Kingdom location and causes him to reappear as the Goblin Lord in Frostspire Expanse. You also need to be level 70+ to access Frostspire Expanse where the Goblin Lord resides.
No, there’s no way to skip or shortcut the questline. The Goblin Crown recipe is only rewarded after completing all five sequential Goblin Lord tasks, including paying the $250,000 final quest and submitting 3 Iceite. The quests must be completed in order with no exceptions.
No, the Goblin’s Crown is soulbound, meaning it’s permanently locked to your character. You cannot trade, sell, or give it to other players. Additionally, the recipe unlock is character-specific, so every player must complete the entire Goblin Lord questline themselves to obtain the crown.
From start to finish, expect 20-30 hours of total playtime:
This can be condensed with efficient grinding and good RNG, or extended significantly with bad luck on Snowite drops.
The Goblin Crown represents one of The Forge’s most challenging but rewarding achievements. This comprehensive guide should provide everything you need to successfully obtain this legendary item. Remember to:
Save this guide for reference during your questline, as you’ll likely need to revisit specific sections.
Join the community on official Discord servers for real-time tips and updates.
Stay updated with the official Twitter account for any changes to the questline or new strategies.
Be patient – this is an endgame achievement designed to test your dedication and skill. The satisfaction of wearing your crafted Goblin Crown will make all the effort worthwhile!
Whether you’re a seasoned veteran or a determined newcomer, this guide should help you navigate the complex journey to obtaining the Goblin Crown. Happy forging, and may your pickaxes strike true and your luck be ever in your favor!