
Be a Fish Bait Codes (July 2026) All Active Rerolls & Spins
Be a Fish Bait codes are the fastest way to boost your aura rerolls without grinding. There are currently 8…
If you’re serious about conquering the depths of Roblox Abyss, understanding tube progression isn’t optional it’s essential. I’ve spent countless hours testing every tube in the game, and I’m here to share exactly which tubes you need, when to buy them, and which ones you can safely skip to save your hard-earned cash.
Your tube isn’t just equipment in Abyss it’s your lifeline. It determines how deep you can dive, how long you can survive underwater, how fast you move, and how many fish you can haul back to sell. Make the wrong tube purchases, and you’ll waste thousands of dollars on upgrades that don’t push your progression forward. Follow this guide, and you’ll optimize every dollar spent while unlocking new areas faster than your friends.
Before I dive into the progression path, let me explain what makes tubes so critical in Abyss. Unlike other Roblox fishing games where equipment is mostly cosmetic, tubes in Abyss directly control four crucial stats that determine your success:
| Tube Stat | What It Does | Why It Matters |
|---|---|---|
| Oxygen | Determines how long you can stay underwater | More oxygen = longer fishing trips without returning to the safe dome |
| Max Depth | Limits how deep you can dive before rapid oxygen depletion | Each biome has depth requirements; wrong tube = instant death |
| Weight | Controls maximum fish carrying capacity | Higher weight = more profit per trip |
| Speed | Movement speed while using the tube | Faster tubes = quicker travel between fishing spots |
When you step outside the safety dome in Forgotten Deep, your oxygen bar starts depleting. Once it hits zero, you die and lose 25% of your cash and inventory. That’s why having the right tube for your current area is absolutely non-negotiable.
The max depth stat is particularly crucial. Each underwater zone in Abyss has a minimum depth requirement. For example, Ancient Sands starts at around 120 meters deep, while Spirit Roots requires you to reach depths of 300+ meters. If your tube’s max depth is lower than the area’s minimum depth, your oxygen will drain at an accelerated rate, making survival impossible.
After testing every combination and consulting with endgame players who’ve unlocked all zones, I’ve determined the most cost-effective tube progression path. This route minimizes wasted money while maximizing your ability to access new content quickly.
Wooden Tube → Normal Tube → Pufferfish Tube → Boat Tube → Rukiry Tube → Oxy Tube → Lost Spirit Tube → Ruined Tube
This eight-step progression takes you from complete beginner to endgame explorer. Some guides suggest buying every tube available, but that’s a massive waste of money. Let me break down each stage and explain exactly why certain tubes deserve your investment while others should be skipped entirely.
The Wooden Tube’s 40 oxygen capacity gives you about 20-25 seconds of diving time before you need to surface. That’s enough to catch 2-3 small fish like Clownfish or Tang near the bubble, but nothing more.
With 70 oxygen, you can take longer fishing trips and start completing Kraken’s early quests. The 25kg weight capacity means you can carry about 5-8 small fish per trip, significantly improving your money-making efficiency. I recommend grinding fish with this tube until you’ve saved up $2,850 for the next major upgrade.
Pro Tip: Focus on catching Pompano, Barracuda, and any mutated fish you find. Mutations can sell for 2-5x the base price, dramatically speeding up your progression.
Here’s where many beginners make their first mistake. David’s Tube Shop also sells the Old Tube ($50) and Fire Tube ($1,250). Do not buy these tubes. Here’s why:
Old Tube ($50): Only provides 55 oxygen and 25m max depth. The marginal improvement over the Wooden Tube doesn’t justify spending $50 when you can save a bit more for the Normal Tube.
Fire Tube ($1,250): This tube trap catches a lot of players. With 90 oxygen and 100m max depth, it seems like a logical step between Normal and Pufferfish. However, you’ll need to buy it anyway to complete one of Kraken’s quests, making it a forced purchase later. By the time you have $1,250, you’re better off saving another $1,600 for the Pufferfish Tube, which is significantly better in every way.
The Pufferfish Tube has 110 oxygen (versus Fire’s 90), 180m max depth (versus Fire’s 100m), and 70kg weight (versus Fire’s 40kg). Skipping the Fire Tube saves you from spending money on a tube that becomes obsolete within an hour of gameplay.
The Pufferfish Tube is the first tube with a meaningful speed boost (22m/s versus 20m/s), making travel noticeably faster. More importantly, the 70kg weight capacity allows you to carry 12-15 medium fish, tripling your profit per fishing trip.
I used the Pufferfish Tube for several hours of gameplay, completing Diver delivery quests and fishing in the Ocean area. With this tube, you can comfortably access all of Forgotten Deep and begin exploring Ancient Sands’ shallow areas.
Oxygen Management Tip: Bring 2-3 Oxygen Pods when diving to Ancient Sands with the Pufferfish Tube. You can buy Oxygen Pods from David’s shop for $50 each. Press the designated hotkey to consume a pod when your oxygen drops below 30%, giving you extra time to reach safety or return to the surface.
This tube’s 100kg weight capacity is a massive upgrade from the Pufferfish Tube’s 70kg. You can now carry 18-22 fish per trip, dramatically increasing your profit per hour. Ancient Sands fish sell for significantly more than Forgotten Deep fish—a single Blackfin Tuna sells for $200-$300, while mutated versions can fetch $600-$1,500.
The Boat Tube is worth every penny of its $5,250 cost. I spent about 4-5 hours using this tube, completing Marcus’s questline and farming Ancient Sands fish. By the time I was ready for the next upgrade, I had accumulated over $40,000 in cash.
Farming Strategy: Focus on the area near Crazy Jeff’s cave entrance. This zone spawns Blackfin Tuna, Scorpionfish, and Groupers at a high rate. When your oxygen gets low, duck back into the cave to refill, then immediately return to fishing. I was averaging $4,000-$6,000 per hour with this method.
Here’s my recommendation: Skip the Zepline Tube and save for the Rukiry Tube instead. The Zepline requires you to complete the Diver’s entire delivery questline, which is time-consuming. Additionally, while it has good stats, the Rukiry Tube (available for $40,500) is substantially better and worth the extra $22,000 investment.
However, if you’re struggling with Ancient Sands and want an intermediate upgrade before tackling Spirit Roots, the Zepline Tube is a solid choice. Its 375m max depth allows safe exploration of Spirit Roots’ shallow areas.
The 200kg weight capacity is game-changing. You can carry 35-40 fish per trip, meaning you can stay out fishing for extended periods without needing to return to sell. Combined with 180 oxygen, the Rukiry Tube provides enough survivability to complete most of Spirit Roots’ content.
Warning: Grumpy Hank’s Tower is in a shark-infested area. Bring a decent gun (Crossbow or Wasted Gun) to defend yourself while climbing the tower to purchase the tube. I died twice trying to reach Grumpy Hank with inadequate equipment—don’t make my mistake.
The Rukiry Tube carried me through dozens of hours of gameplay. I completed Marcus’s quests, farmed Ancient Sands extensively, and began exploring Spirit Roots’ upper zones. The next upgrade costs $84,500 (Oxy Tube), so plan on using the Rukiry Tube for quite a while.
Speed Note: The Rukiry Tube’s 20m/s speed is actually slower than the Boat Tube’s 22m/s. This is a minor inconvenience, but the massive oxygen, depth, and weight improvements more than compensate for the slightly slower movement speed.
The 28m/s speed boost makes the Oxy Tube feel significantly faster than previous tubes. You’ll notice the difference immediately when traveling between fishing spots or returning to sell fish. The 250kg weight capacity allows you to carry 45-55 fish, making each fishing trip incredibly profitable.
Spirit Roots fish like Napoleon and Sunfish sell for $300-$500 each, with mutations reaching $1,000-$2,000. With the Oxy Tube, you can farm these fish efficiently and accumulate wealth quickly.
Quest Requirement: You’ll need to complete Isolde’s questline to unlock the barrier leading to Lumi’s shop. Make sure you’ve progressed through her quests before attempting to buy the Oxy Tube. I wasted an hour searching for Lumi before realizing I needed to finish Isolde’s quests first.
However, I recommend skipping the Plane Tube and saving for the Lost Spirit Tube instead. The Lost Spirit Tube costs $150,000 but provides significantly better stats. Unless you’re specifically farming the Diver’s quests, the Plane Tube isn’t worth the investment.
The 370kg weight capacity means you can carry 60-75 fish per trip, allowing you to stay out fishing for 10-15 minutes straight without needing to return. Combined with the 30m/s speed, the Lost Spirit Tube makes farming incredibly efficient.
I used the Lost Spirit Tube to farm Spirit Roots extensively, complete Victor’s questline, and save up for the final endgame tubes. With this tube, you can comfortably reach level 35 and unlock Lost Captain’s quests, which lead to Angler’s Cave.
Legendary Farming: The Lost Spirit Tube’s 600m max depth allows you to dive into Spirit Roots’ underground cave (accessed through a hole near Victor’s location). This cave contains legendary fish like Eyefish ($2,000+ per catch) and rare mutations worth $5,000+. I farmed this cave for hours, accumulating over $200,000 in profit.
However, the Bath Tube requires completing the rubber duck collection quest, which is time-consuming. You’ll need to search all over Forgotten Deep, Ancient Sands, and Spirit Roots to find all 20 ducks. Additionally, the 27m/s speed is slower than the Lost Spirit Tube’s 30m/s, which feels like a downgrade.
Best For: Players without the Sell Anywhere gamepass who need maximum carrying capacity to minimize trips back to the Kraken for selling fish.
Rubber Duck Tip: Use an interactive map guide to locate all duck positions. Some ducks are hidden in hard-to-reach locations that require specific tubes or equipment to access. I spent 3 hours collecting ducks before finally unlocking Bob’s Room.
The Ruined Tube’s 380 oxygen gives you incredible survivability, allowing you to dive for extended periods without worrying about oxygen management. The 32m/s speed makes it the fastest tube in the game, perfect for quickly traveling between fishing hotspots.
Best For: Players who prioritize speed and efficiency over maximum carrying capacity. If you have the Sell Anywhere gamepass (highly recommended), the Ruined Tube is objectively the best endgame option.
To unlock the Ruined Tube, you’ll need to complete Lost Captain’s questline (requires level 35) and gain access to Angler’s Cave. This hidden area contains powerful fish and valuable loot, making it worth exploring even beyond just purchasing the tube.
Endgame Farming: With the Ruined Tube, I farm King Anglerfish in Angler’s Cave, Whales in Spirit Roots, and legendary fish in deep cave systems. The combination of high oxygen, max depth, and speed makes the Ruined Tube perfect for tackling the game’s hardest content.
Throughout my Abyss progression, I’ve identified several tubes that aren’t worth purchasing under any circumstances. Skipping these tubes will save you tens of thousands of dollars that can be better spent on guns, artifacts, or necessary tube upgrades.
The Old Tube provides only marginal improvements over the starting Wooden Tube. For $50, you get 55 oxygen (15 more than Wooden), 25m max depth (10m more), and 10kg weight (5kg more). These improvements are so minor that you’ll outgrow the Old Tube within minutes.
Verdict: Save your $50 and put it toward the Normal Tube ($350) instead.
The Fire Tube seems like a logical progression step, but it’s actually a trap. You’ll be required to purchase it later to complete Kraken’s Quest 6, making any early purchase redundant. Additionally, the Pufferfish Tube (only $1,600 more) is significantly better in every stat.
Verdict: Skip the Fire Tube entirely during early-game progression. Only buy it when Kraken’s quest forces you to, then immediately upgrade to Pufferfish.
The Zepline Tube isn’t bad, but it costs $18,500 and requires completing the Diver’s lengthy delivery questline. The stats are decent (150 oxygen, 375m depth, 140kg weight), but the Rukiry Tube ($40,500) is worth the extra $22,000 investment.
Verdict: Skip unless you’ve already completed Diver quests for other reasons or you’re struggling with Ancient Sands progression and need an intermediate upgrade.
The Plane Tube has good stats (260 oxygen, 550m depth, 305kg weight) but costs $90,500. The Lost Spirit Tube ($150,000) is worth the extra $59,500 investment, providing much better stats and longer-term value.
Verdict: Skip the Plane Tube and save for Lost Spirit instead, unless you’ve been specifically farming Diver delivery quests.
Understanding how tube stats work together helps you optimize your progression and fishing efficiency. Here’s my deep dive into each stat and how it affects your gameplay.
Oxygen determines how long you can survive outside the safe dome. Each tube has a fixed oxygen capacity that depletes at different rates depending on your depth:
Oxygen Management Tips:
Max depth is the most crucial tube stat because it determines which biomes you can access. Here’s how depth restrictions work in each area:
| Biome | Depth Range | Minimum Required Tube |
|---|---|---|
| Forgotten Deep | 0-50m | Normal Tube (50m max depth) |
| Ocean (Diver Area) | 50-120m | Pufferfish Tube (180m max depth) |
| Ancient Sands | 120-275m | Boat Tube (275m max depth) |
| Spirit Roots (Upper) | 275-460m | Rukiry Tube (460m max depth) |
| Spirit Roots (Deep) | 460-600m | Lost Spirit Tube (600m max depth) |
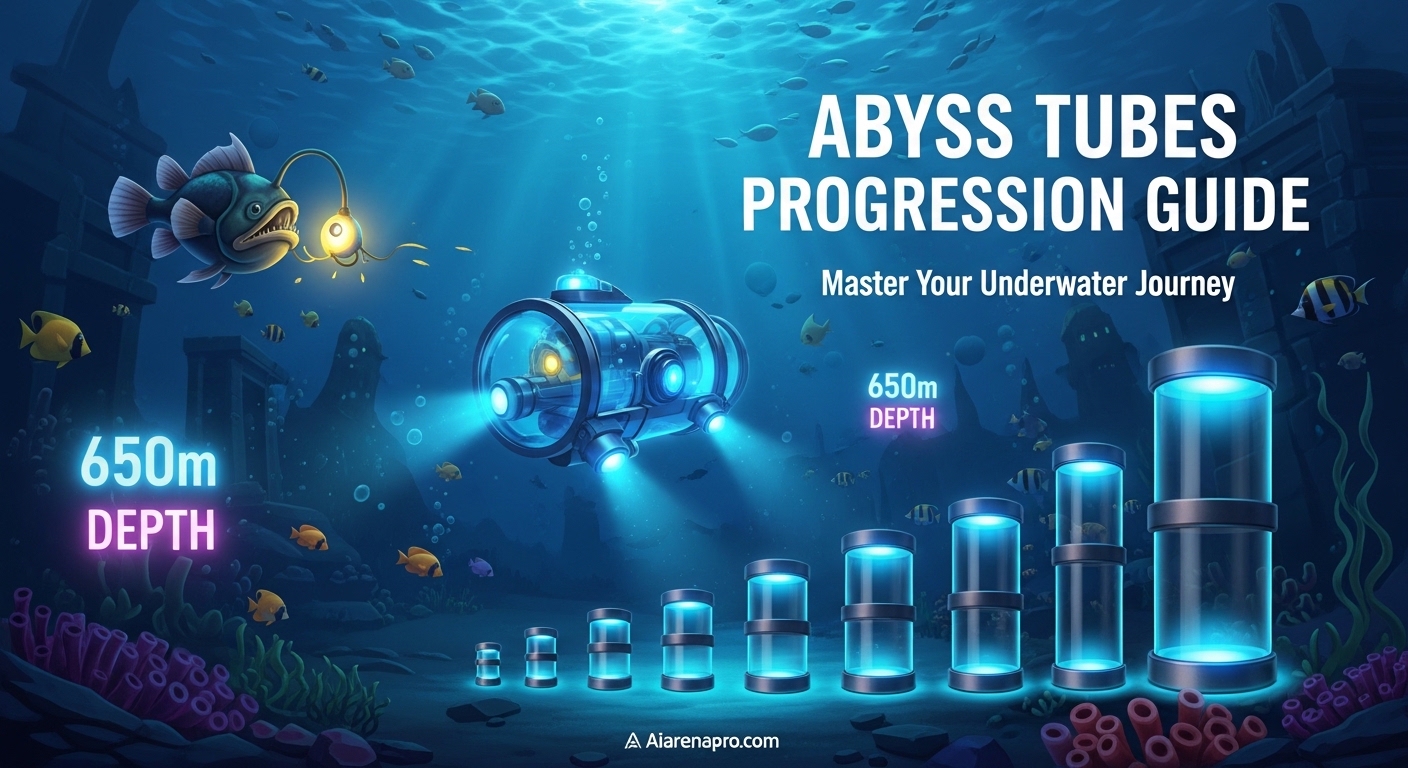
| Angler’s Cave | 600-650m | Ruined/Bath Tube (650m max depth) |
When you dive below your tube’s max depth rating, your oxygen depletes 3-5 times faster than normal. This makes it essentially impossible to explore areas beyond your tube’s range without dying repeatedly.
Pro Tip: Each biome’s minimum depth is visible when you approach the area. Check your depth meter (displayed in the top-right corner) before committing to a deep dive.
Weight capacity determines how many fish you can carry before reaching your limit. Each fish has a weight value (displayed when you catch it), and your tube’s weight capacity limits your total carrying capacity.
Weight Optimization Tips:
Weight Calculation Example:
Speed determines how quickly you move while using the tube. While this might seem like a minor stat, movement speed dramatically affects farming efficiency in endgame content.
Speed Impact on Farming:
The Ruined Tube’s 32m/s speed means you can travel from Spirit Roots to Forgotten Deep in about 45 seconds, compared to 90+ seconds with slower tubes. Over hours of farming, this speed difference adds up to significantly more fishing time.
Tubes don’t exist in isolation—you need to pair them with appropriate guns and artifacts to maximize your effectiveness at each progression stage.
Tube: Normal → Pufferfish Gun: Beginner’s Gun → Advanced Gun
Artifacts: Feather (weight reduction) + Sea Star (oxygen boost)
Focus on oxygen-extending artifacts during early game. The extra oxygen from Sea Star artifacts allows you to stay out longer with lower-tier tubes, helping you farm more efficiently.
Tube: Boat → Rukiry Gun: Crossbow → Wasted Gun Artifacts: 2x Mutated Skull (mutation chance) + Feather (weight reduction)
Mid-game is all about maximizing mutation chances. Mutated fish sell for 2-5x normal prices, dramatically accelerating your progression. Stack Mutated Skull artifacts to increase mutation spawn rates.
Tube: Oxy → Lost Spirit → Ruined Gun: Magroot → Lost Spirit → Ruined Artifacts: Holy Flower (rare fish boost) + 2x Divine Hour Glass (farming speed)
Late-game loadouts prioritize farming efficiency and legendary fish spawns. Holy Flower increases rare fish spawn rates, while Divine Hour Glass artifacts boost your farming speed through various buffs.
Understanding the total cost of tube progression helps you plan your money farming strategy. Here’s the complete financial breakdown:
Total Investment: $553,450
This is the cost to go from complete beginner to endgame-ready tubes. If you buy every tube (including the ones I recommend skipping), you’ll spend over $700,000.
Based on my progression testing, here’s approximately how long it takes to save for each tube upgrade:
Total Time Investment: 65-100 hours of active gameplay to unlock all essential tubes.
These estimates assume average fishing efficiency without gamepass bonuses. The Sell Anywhere gamepass, fast catch minigame completion, and mutation luck can significantly reduce these timelines.
Focus on getting the Pufferfish Tube ($2,850) first. It’s the earliest tube that allows access to mid-game content and Ancient Sands. Skip the Old Tube and Fire Tube entirely to save money.
Yes! Skip the Old Tube, Fire Tube, Zepline Tube, and Plane Tube. These are either forced purchases for quests later or provide minimal value compared to the next tier up. Following my recommended progression saves over $30,000.
The Ruined Tube is the best endgame option for most players. It has the highest speed (32m/s), excellent oxygen (380), and good weight capacity (480kg). The Bath Tube is better if you don’t have the Sell Anywhere gamepass and need maximum carrying capacity.
You can’t directly upgrade a tube’s oxygen, but you can boost oxygen through: (1) Oxygen-boosting artifacts like Sea Star, Tank, or Lantern, (2) Oxygen Pods consumables ($50 each), (3) Race passives like Narwhal (+20% oxygen) or Sea Angel (oxygen regeneration), and (4) Oxygen Potions from codes or quests.
No, tubes in Abyss don’t degrade or require repairs. Once you buy a tube, it lasts forever. You can also switch between tubes freely at any time without penalties.
The Lost Spirit Tube or better is required for most legendary fish. Legendary fish like Eyefish, Dragonfish, and King Anglerfish spawn at 600m+ depths, requiring tubes with high max depth stats.
Race passives stack multiplicatively with tube stats. For example, Narwhal race (+20% oxygen) with Lost Spirit Tube (300 oxygen base) gives you effectively 360 oxygen. Races like Puffer (+10% speed) make fast tubes even faster.
Absolutely yes. The Sell Anywhere gamepass ($499 Robux) is the single best purchase you can make in Abyss. It eliminates the need to return to the Kraken to sell fish, dramatically improving farming efficiency. With this gamepass, weight capacity becomes less important, making the Ruined Tube (high speed, lower weight) the optimal endgame choice.
No, tubes cannot be traded in Abyss. Every player must purchase their own tubes from NPC vendors. However, you can visit other players’ private servers to access vendors in areas you haven’t unlocked yet.
Old tubes remain in your inventory permanently. You can switch between any tubes you own at any time by opening your equipment menu and selecting a different tube. Keep lower-tier tubes for completing specific quests that might require them.
Following this Abyss tubes progression guide will save you tens of thousands of dollars and dozens of hours compared to buying tubes randomly. Focus on the essential tubes, skip the traps, and you’ll reach endgame content far faster than the average player. Now get out there and start diving deeper into the Abyss!