
Looking for the strongest units to dominate Anime Paradox? You’re in the right place. After thoroughly analyzing every character from Legendary to Paradox rarity, I’ve created this comprehensive tier list to help you build the ultimate team. The game’s unique circular spawn system makes unit selection critical your base sits at the center while enemies attack from all directions, making traditional tower defense strategies obsolete.
Stroke (Resurrection) and Zid (Atomic) reign supreme as the top DPS units, while Idol (Pop) and Orqeheme (Sacred) dominate support roles. For farming, a Sprint cart or Bulla are mandatory picks in every team composition.
This tier list ranks units based on their evolved forms with optimal stat rolls across DPS, Support, and Farm categories. Whether you’re pushing through Story Mode Nightmare or grinding Infinite waves, this guide covers everything you need to make informed decisions about which units deserve your precious evolution materials.
Before diving into rankings, understanding what separates meta units from mediocre ones is crucial. Here are the key factors:
Scaling Potential – Units like Sun Jin Wu gain power through on-kill mechanics, making them exponentially stronger in extended modes like Infinite. Early game strength means nothing if a unit plateaus by wave 50.
Range and Coverage – The circular spawn system rewards units with map-wide abilities. Zid’s All Range Atomic hitting every corner simultaneously provides more value than single-target nukers.
Self-Sustainability – Units that heal themselves (Igrus, Ichuga) or gain defensive buffs reduce healer dependency, allowing more DPS slots in your composition.
Synergy Potential – Some units unlock hidden power when paired correctly. Sun Jin Wu and Igrus together create a scaling monster that dominates late-game content.
Consistency vs Burst – Long cooldowns kill otherwise strong units. A unit dealing steady 15K DPS outperforms one hitting 50K every 60 seconds.
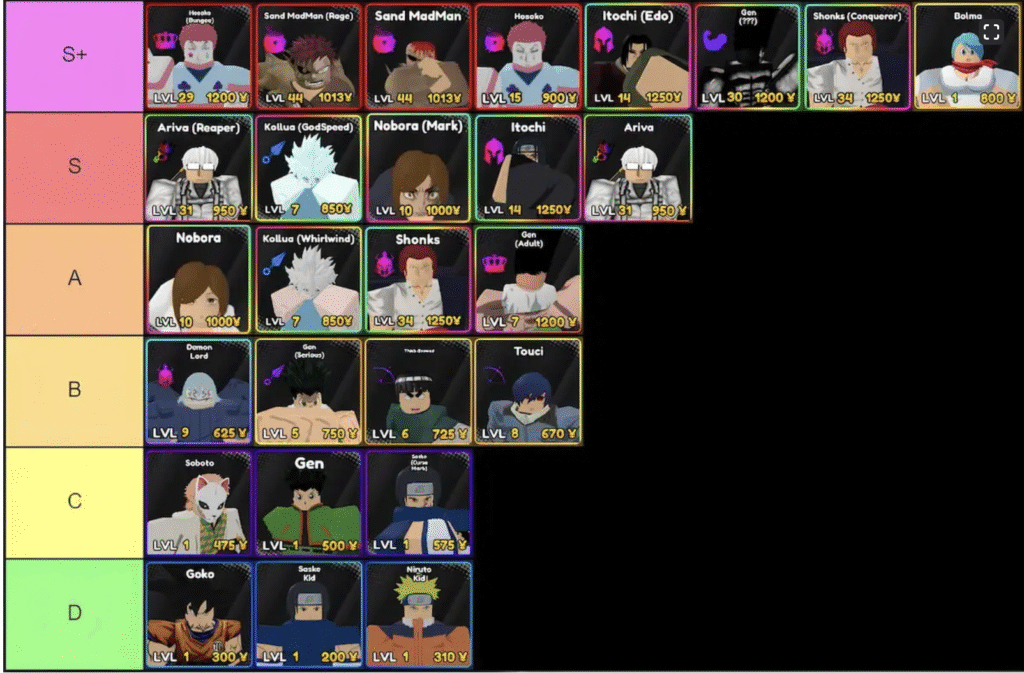
| Tier | Units |
|---|---|
| S+ | Storrk (Resurreccion), Zid (Atomic) |
| S | Sun Jin Wu (Monarch), Igrus (Elite Knight), Ichuga (Vasto Lorde) |
| A | Brolu (Super), Kirrua (Godspeed), Sky (Enhanced), Freezo (Full Power) |
| B | Eryu (Antithesis), Seth (One-Winged), Melio (Wrath), Itochi (Eternal Flame) |
| C | Megomun (Explosion) |
| D | Chae-In (Light), Ciel (Super), Any Legendary |
| Tier | Units |
|---|---|
| S+ | Idol (Pop), Oreheme (Sacred), Sprintcart, Bulla |
| S | Ulquiarro (Murcielago), Shadow Vampire |
| A | Steel (Shadow), Asto (Devil) |
Rarity: Paradox (Banner)
Role: Solo DPS Carry
Tier Placement: S+
Storrk represents the absolute peak of damage dealing in Anime Paradox. This unit doesn’t just lead teams it replaces them. The Number One passive activates when Storrk operates outside ally range, granting overwhelming damage, range, and survivability buffs that turn him into a one-unit army.
His Metralleta ability functions as a tactical nuke, erasing entire waves and chunking 30-40% HP from most bosses in Story Mode. The wolves summoned through his attacks chase targets across the entire map, creating persistent pressure on every spawn point simultaneously.
Evolution is mandatory for Storrk. The Howl of Ruin passive doubles summoned wolf count, transforming good damage into obscene damage. With proper placement away from other units, Storrk can solo carry Nightmare Story Mode waves that break most other compositions.
The only downside? Rarity. As the hardest unit to obtain in Anime Paradox, most players won’t access Storrk for months. However, if you pull him early, invest everything this unit single-handedly shifts your progression timeline by weeks.
Best Used In: Story Mode Nightmare, Infinite Mode, Raid Act 3
Synergies: Works best alone due to Number One passive
Priority: Absolute maximum if obtained
Rarity: Secret (Banner)
Role: AOE DPS
Tier Placement: S+
Zid solves Anime Paradox’s fundamental challenge: covering all spawn directions simultaneously. Once upgraded to All Range Atomic, Zid hits literally every enemy on the map with full damage no falloff, no targeting priority issues, pure global pressure.
His tankiness rivals dedicated tank units while maintaining top-tier damage output. The combination makes Zid nearly impossible to kill while he melts waves. In Infinite Mode specifically, Zid’s value compounds exponentially as enemy density increases.
Most units require strategic placement to maximize effectiveness. Zid requires zero thought drop him anywhere and watch the kill counter climb. This simplicity combined with overwhelming power cements his S+ placement.
The investment required to reach full potential is steep. Zid needs complete evolution and stat rolls leaning toward damage to truly shine. However, even a partially built Zid outperforms most fully evolved Mythics in wave clear.
Best Used In: Infinite Mode, Story Mode, Any multi-spawn scenario
Synergies: All farm units (needs resource generation)
Priority: Evolve immediately after obtaining
Rarity: Secret (Raid Act 3)
Role: Scaling DPS
Tier Placement: S
Sun Jin Wu embodies the concept of exponential growth. His Level Up passive activates on kills, granting permanent stacks that boost damage, cooldown reduction, lifesteal, and execute threshold. In Infinite Mode, SJW transforms from decent DPS into an unstoppable juggernaut around wave 40-50.
Monarch’s Will provides crucial self-sustain, healing SJW when his HP drops below threshold while granting massive damage and cooldown buffs. Combined with Level Up’s lifesteal scaling, SJW becomes increasingly difficult to kill as the game progresses.
The execute mechanic deserves special mention. SJW instantly kills non-boss enemies below a threshold that increases with Level Up stacks. This creates a snowball effect executions generate kills, kills generate stacks, stacks raise execute threshold, higher threshold generates more executions.
However, SJW has a critical weakness: he requires Igrus to reach maximum potential. Together they stack twice as fast, transforming a good scaling unit into a meta-defining powerhouse. Without Igrus, SJW remains strong but not S+ tier worthy.
Best Used In: Infinite Mode (Wave 30+), Raid Act 3, Extended Story Mode runs
Synergies: Igrus (Elite Knight) – MANDATORY for optimal play
Priority: High but only if you have or plan to get Igrus
Rarity: Secret (Siege Shop)
Role: DOT DPS / Support Hybrid
Tier Placement: S
Igrus applies permanent bleed on hit that stacks infinitely, creating sustained damage that melts tanky enemies and bosses. His Undead Commander passive stacks damage buffs on kills up to 100% bonus damage relatively easy to maintain in any wave-based mode.
The self-healing component makes Igrus surprisingly durable for a DPS unit. Combined with bleed’s passive damage, Igrus can front-line better than most dedicated tanks while maintaining competitive damage output.
Where Igrus truly excels is synergy. When paired with Sun Jin Wu, both units receive the Bond of Monarch buff granting additional damage and cooldown reduction. This bidirectional synergy makes the duo far stronger than the sum of their parts.
Solo, Igrus performs as a solid S-tier DPS. With SJW, both units elevate into borderline S+ territory. The accessibility through Siege Shop makes Igrus more obtainable than most Secrets, offering incredible value to dedicated players.
Best Used In: Paired with SJW, Infinite Mode, Boss-heavy content
Synergies: Sun Jin Wu (Monarch), any healer for sustain
Priority: Very High especially if you have SJW
Rarity: Secret (Legend Stage Hollow Act 3)
Role: Sustain DPS
Tier Placement: S
Ichuga combines massive bleed damage with exceptional self-sustainability through Vizard’s Surge. Every 15 seconds, Ichuga heals significantly while buffing his own damage, creating windows of near-invincibility where he can front-line without support.
Getshuga Bleed applies perma-bleed on attacks, and unlike most bleed units, Ichuga’s version scales with his damage buffs. During Vizard’s Surge uptime, bleed damage spikes dramatically, melting enemies that survive the initial burst.
The self-sustain makes Ichuga the most forgiving S-tier DPS unit. New players can place him aggressively without fear of instant death, while experienced players leverage his tankiness to hold dangerous spawn points solo.
However, Ichuga faces a critical limitation: he lacks scaling mechanics. While SJW and Igrus grow infinitely stronger, Ichuga plateaus around wave 60-70 in Infinite Mode. This doesn’t diminish his value in Story Mode or shorter content, but limits his ceiling in extended runs.
Best Used In: Story Mode Nightmare, Raid Act 3, Waves 1-60 Infinite
Synergies: Farm units, minimal healer dependency
Priority: High excellent first Secret unit
Rarity: Mythic (Banner)
Role: AOE DPS
Tier Placement: A
Brolu represents the best Mythic DPS option in Anime Paradox. Legendary Rage stacks damage on kills infinitely without cap, while Unstable Power activates at 25 stacks to double all damage buffs for 30 seconds creating massive damage windows.
The AOE capabilities make Brolu exceptional for wave clear. In dense spawns, he racks up kills faster than any other Mythic, which feeds directly into his stacking mechanic. The synergy between kill count and damage output creates satisfying snowball moments.
Two weaknesses prevent S-tier placement. First, Unstable Power’s 30-second cooldown creates inconsistent damage godlike during active windows, mediocre during downtime. Second, Brolu provides zero utility. Pure damage and nothing else limits team composition flexibility.
Despite limitations, Brolu remains the top Mythic DPS choice for players without Secrets. Easy to obtain from standard banners and delivers reliable performance throughout Story Mode.
Best Used In: Story Mode, early Infinite (Waves 1-40), Raid farming
Synergies: Idol (Pop) for cooldown reduction, Sprintcart for farming
Priority: Medium-High for Mythic-only accounts
Rarity: Mythic (Banner)
Role: DPS / Support Hybrid
Tier Placement: A
Kirrua walks the line between damage and utility better than any Mythic in the game. Godspeed activates every 8th attack, granting permanent-uptime damage and cooldown reduction buffs that make his DPS competitive with pure damage units.
Electric Surge stuns enemies on attack while marking them to take increased damage from all sources. This dual utility makes Kirrua valuable even when his personal damage falls behind he amplifies the entire team’s output while providing crucial crowd control.
The high attack speed synergizes perfectly with Godspeed’s activation condition, ensuring near-permanent buff uptime once fully evolved. This consistency separates Kirrua from burst-dependent units like Freezo.
Lower base damage compared to Brolu or Melio prevents higher tier placement. Kirrua relies on attack speed scaling and team synergy rather than raw numbers. However, his utility floor ensures he never feels useless even in unfavorable content.
Best Used In: Team compositions with multiple DPS, content requiring CC
Synergies: Other DPS units benefit from damage marks, Idol (Pop)
Priority: Medium excellent second or third DPS slot
Rarity: Exclusive (Battle Pass Level 25)
Role: Scaling DPS
Tier Placement: A
Sky represents Battle Pass value at its finest. Limit Break generates stacks on hit and when taking damage, then grants massive damage and cooldown buffs upon reaching 100%. The Limit Resonance passive cuts stack requirements in half after first activation, dramatically improving consistency.
The front-line placement requirement differentiates Sky from typical DPS units. He needs to take hits to build stacks optimally, creating a risk-reward dynamic. Paired with healers, Sky maintains uptime on Limit Break while surviving aggressive positioning.
Once stacks start flowing, Sky’s damage output rivals S-tier units during active windows. The cooldown reduction creates an interesting loop where abilities feed into faster stacking, which feeds into more abilities.
Two factors prevent higher placement. First, Sky functions as a one-trick pony—powerful buffs without meaningful utility. Second, healer dependency makes team building less flexible. He’s strong but not game-changing.
Best Used In: Front-line positions, paired with Oreheme or Idol
Synergies: Healers (mandatory), other DPS for back-line damage
Priority: High IF obtained via Battle Pass
Rarity: Mythic (Banner)
Role: AOE Burst DPS
Tier Placement: A
Freezo delivers devastating AOE damage through Explosive Aura, applying burn while dealing massive damage in a large radius. The flat 60% damage bonus from his passive ensures competitive numbers even without setup.
Burn application adds valuable DOT that continues damaging enemies after Freezo’s abilities expire. In multi-wave scenarios, burn from previous waves chips health before new spawns reach full strength.
The critical limitation preventing higher ranking is cooldown inconsistency. Explosive Aura’s long cooldown creates feast-or-famine damage windows. During active periods, Freezo dominates. During downtime, he contributes minimally.
For players lacking better options, Freezo performs admirably in Story Mode content where burst windows align with wave spawns. However, his value diminishes in Infinite Mode where consistent DPS matters more than periodic nukes.
Best Used In: Story Mode, burst-check content, wave-synchronized fights
Synergies: Idol (Pop) for cooldown reduction, farm units
Priority: Low-Medium only if lacking better Mythics
Rarity: Mythic (Banner)
Role: Boss DPS
Tier Placement: B
Eryu’s Antithesis passive makes him a dedicated boss killer, but this specialization creates problems. Energy Manipulation synergizes with itself nicely, granting range-based buffs that improve both range and damage, but the long cooldown limits consistent value.
The boss focus means Eryu underperforms in wave clear, the primary challenge in most Anime Paradox content. Outside of Raid Acts and specific Story Mode bosses, Eryu contributes minimally to progression.
Recent nerfs hit Eryu particularly hard, reducing his viability even in boss-focused scenarios. The current meta favors generalists who perform adequately in all content over specialists who excel in narrow niches.
Only consider Eryu if you specifically struggle with boss DPS checks and have surplus evolution materials. Otherwise, invest in units providing broader value.
Best Used In: Raid Acts, specific boss-heavy Story stages
Synergies: Team DPS for wave clear, farm units
Priority: Low niche usage only
Rarity: Exclusive (Battle Pass Level 50)
Role: Conditional Burst DPS
Tier Placement: B
Seth gains massive buffs when HP drops below 40%, creating a berserker playstyle that demands perfect healer coordination. Memory of the Ancients doubles abilities every 16 seconds for burst windows, but the long cooldown limits frequency.
The low-HP requirement creates tension Seth needs to be hurt to maximize damage, but dying provides zero value. This risk makes Seth unreliable in difficult content where maintaining specific HP thresholds becomes impossible.
One-Winged Angel restricts to one activation per wave, further limiting Seth’s already conditional power. Even during optimal windows, Seth’s burst doesn’t significantly outpace consistent DPS from higher-tier units.
Battle Pass exclusivity at level 50 represents poor value compared to Sky at level 25. Most players should prioritize other units unless they’ve already maxed better DPS options.
Best Used In: Content where you can control HP thresholds, experimental builds
Synergies: Precise healer management, timing-focused teams
Priority: Very Low experimental unit only
Rarity: Mythic (Banner)
Role: Damage Over Time DPS
Tier Placement: B
Melio’s Cursed Flame applies strong damage over time effects that excel against tanky single targets. Demon Wrath provides a final burst when Melio dies, creating interesting last-stand scenarios.
The problem? Cursed Flame requires enemies to survive long enough for DOT to matter, and high-DPS teams kill enemies too quickly for full value. Demon Wrath’s activation condition (dying) actively works against optimal play.
Melio lacks the utility to justify B-tier placement beyond DOT damage. No crowd control, no team buffs, no meaningful passives beyond damage output that other units provide more reliably.
As a starter Mythic for new accounts, Melio performs adequately. However, he should be replaced quickly as better options become available.
Best Used In: Early game progression, DOT-focused experimental teams
Synergies: Other DOT units (if they existed), farm units
Priority: Low replace when possible
Rarity: Mythic (Banner)
Role: Survival DPS
Tier Placement: B
Tsukuyomi’s Omen provides permanent damage buffs without conditions, making Itochi’s baseline performance acceptable. Crow Escape activates once per wave when Itochi would die, teleporting him to safety instead.
The survival mechanic creates an interesting safety net for aggressive placements, but well-built teams shouldn’t lose units frequently. Crow Escape’s value indicates poor team construction or positioning rather than providing genuine advantage.
Without Crow Escape triggering, Itochi contributes only modest damage without utility. The permanent buff helps, but raw numbers don’t compete with units offering team synergy or scaling potential.
Itochi represents the epitome of “acceptable but unremarkable” never terrible, never great, just existing in the middle ground of Mythic DPS options.
Best Used In: Learning positioning, emergency backup DPS slot
Synergies: Nothing particularly synergistic
Priority: Very Low many better options exist
Rarity: Exclusive (AFK Chamber)
Role: Early Wave Clear
Tier Placement: C
Explosion Arcana nukes entire waves during early Story Mode, making Megomun feel overpowered for the first 10-15 hours of gameplay. Volatile Mana adds burn damage that helps finish weakened enemies.
Then reality hits. The extremely long cooldown on Explosion Arcana means Megomun contributes zero value between activations. As content difficulty increases, single burst windows become insufficient.
Low base damage outside Explosion means Megomun scales terribly into mid and late game. By wave 30 in Infinite Mode, she’s effectively a dead slot waiting for cooldowns.
However, AFK Chamber accessibility makes Megomun an excellent starter unit for brand new accounts. Use her to progress early content, then replace with literally any Mythic or Secret.
Best Used In: Story Mode (Early), farming first 20 Infinite waves
Synergies: Units that benefit from cleanup duty
Priority: Only for new accounts without better options
Rarity: Mythic (Banner)
Role: Time-Limited DPS
Tier Placement: D
Speed of Light grants damage and cooldown reduction for the first 20 seconds of each wave. Then nothing. Absolutely nothing of value after that initial window.
Even during the active 20 seconds, Chae-In’s damage doesn’t compete with properly built A-tier or S-tier units. The brief burst provides insufficient value to justify a team slot.
Zero scaling, zero utility, zero reason to use Chae-In once you obtain literally any other Mythic DPS. She represents the bottom of Mythic rarity and should be avoided entirely.
Best Used In: Never bench permanently
Synergies: Nothing can salvage this unit
Priority: Do not invest any resources
Rarity: Mythic (Banner)
Role: Beginner DPS
Tier Placement: D
Perfect Evolution stacks easily, and Perfect Form provides respectable buffs once fully stacked. For the first few hours of Anime Paradox, Ciel performs adequately and should be your first evolution.
Then you’ll replace him within 24 hours of serious play. Ciel lacks any mechanism to compete with mid-tier units, let alone top-tier Secrets. The self-healing and speed buffs at max stacks help early, but offer no late-game value.
Evolution materials are scarce. Investing heavily in Ciel beyond initial evolution wastes resources better spent on permanent team members.
Use Ciel to unlock evolution mechanics and learn the game. Then move on immediately.
Best Used In: Tutorial, first 5-10 hours of gameplay
Synergies: Other starter units during learning phase
Priority: Evolve once for learning, then replace
Rarity: Mythic (Banner)
Role: Healer / Buffer
Tier Placement: S+
Idol represents the single most impactful support unit in Anime Paradox. Hype Overdrive provides AOE healing while simultaneously buffing damage and reducing cooldowns for all units in range a triple value generator that makes every other unit better.
Encore extends Hype Overdrive’s duration on buffed units who score kills, creating a snowball effect where buffs maintain themselves. In dense wave scenarios, Idol’s buffs achieve near-permanent uptime across the entire team.
Place Idol strategically to cover maximum units with Hype Overdrive’s radius. The combination of sustain and damage amplification makes her mandatory in every serious team composition.
The only consideration is timing, don’t place Idol as your first unit. Let DPS units establish map control, then deploy Idol to enhance their output. Buffs don’t stack, but duration does, so timing activations around spawn waves maximises value.
Best Used In: Every game mode, every team composition
Synergies: Every DPS unit (universal synergy)
Priority: Maximum obtain and evolve immediately
Rarity: Mythic (Banner)
Role: Pure Healer
Tier Placement: S+
When raw healing throughput matters more than buffs, Oreheme stands alone. Sacred Support provides reliable team healing while converting overheal into 30% damage buffs ensuring nothing goes to waste.
Shun Shun Rikka makes Oreheme nearly unkillable through self-healing and protection effects. This durability ensures healing uptime even in the most chaotic wave scenarios.
Choose between Idol and Oreheme based on content difficulty. Story Mode and early Infinite favor Idol’s damage buffs. Nightmare Mode and late Infinite require Oreheme’s pure healing to survive.
Most optimized teams run one or the other, not both. The second support slot typically goes to utility like Shadow Vampire or farm units.
Best Used In: High-damage content, Nightmare Mode, late Infinite (Wave 50+)
Synergies: Aggressive DPS units, front-line tanks
Priority: Very High second only to Idol
Rarity: Epic (Banner)
Role: Farm
Tier Placement: S+
No team functions without farm units generating resources for upgrades and placements. Sprintcart provides reliable farming without occupying valuable Mythic slots, making him the default choice for most compositions.
Place Sprintcart early first or second unit deployed. Farm efficiency scales with game duration, so early placement maximizes total resource generation across the match.
The Epic rarity makes Sprintcart easier to obtain than alternatives, though Bulla technically outperforms as a farm unit. Most players use Sprintcart until obtaining Bulla through farming.
Best Used In: Every game mode as first or second placement
Synergies: Every team (mandatory slot)
Priority: Maximum obtain immediately
Rarity: Legendary (Banner)
Role: Farm
Tier Placement: S+
Bulla generates resources faster than Sprintcart, making her the ultimate farm unit. However, you cannot run both simultaneously—choose one.
The Legendary rarity makes Bulla slightly harder to obtain than Sprintcart. Once acquired, Bulla replaces Sprintcart permanently in all content.
Farm units represent the highest priority after core DPS and healers. Insufficient resources strangles team development, making farm units essential despite not dealing damage.
Best Used In: Replace Sprintcart once obtained
Synergies: Every team (mandatory slot)
Priority: Maximum replace Sprintcart immediately
Rarity: Mythic (Banner)
Role: Crowd Control / Support
Tier Placement: S
Echoes of Emptiness applies Fear every 8 kills, reducing enemy movement speed by 40% in AOE. This slow saves teams during overwhelming waves by creating extra DPS windows before enemies reach vulnerable units.
High-Speed Regeneration provides self-healing when hitting feared enemies and grants damage buffs above 80% HP. Ulquiarro functions as a sustain DPS/Support hybrid, contributing damage while providing crucial utility.
The slow effect proves particularly valuable in Infinite Mode where enemy density creates dangerous rush scenarios. Ulquiarro’s crowd control buys time for DPS units to clear waves before defensive collapse.
Lower base damage prevents DPS tier placement, but the utility floor ensures Ulquiarro remains valuable even when personal damage contribution drops off.
Best Used In: Infinite Mode, high-density wave content
Synergies: All DPS units benefit from slowed enemies
Priority: High best utility-focused support
Rarity: Exclusive (AFK Chamber)
Role: Utility / Crowd Control
Tier Placement: S
The World ability freezes all enemies globally every single mob on the map stops moving simultaneously. No other ability in Anime Paradox provides comparable utility.
Unfortunately, Shadow Vampire contributes minimal DPS or healing beyond this single ability. The 40% activation chance on hit makes The World unreliable for consistent control.
Despite limitations, global crowd control carries enough value to justify S-tier placement. Properly timed activations can save failed runs or enable aggressive strategies otherwise impossible.
AFK Chamber accessibility makes Shadow Vampire available to all players willing to grind. The investment pays dividends in difficult content where a single well-timed freeze turns losses into victories.
Best Used In: Clutch saves, difficult wave timing, experimental strategies
Synergies: Benefits every team when activated
Priority: Medium-High incredible ceiling, inconsistent floor
Rarity: Mythic (Banner)
Role: Tank / Support
Tier Placement: A
The Protector completely negates two enemy hits on all allies every 20 seconds powerful proactive defense that prevents damage rather than healing it. Guardian Sight provides shields to front-line units at risk of dying.
Steel creates space for aggressive positioning with squishy DPS units that would otherwise require back-line placement. This enables damage optimizations impossible with traditional healer-focused teams.
However, the current meta doesn’t particularly favor tank supports. Most optimized compositions prefer healers who enable DPS uptime over damage prevention that doesn’t scale with content difficulty.
Steel represents a tech pick for experimental team compositions or specific challenges requiring defensive tools. Don’t prioritize over core supports, but keep available for niche scenarios.
Best Used In: Protecting fragile DPS units, experimental defensive teams
Synergies: Front-line DPS like Sky
Priority: Low-Medium niche usage only
Rarity: Mythic (Banner)
Role: Debuff / Anti-Shield
Tier Placement: A
Anti-Magic Flow provides the only anti-shield capability in Anime Paradox, making Asto valuable against specific enemy types. Null Slash debuffs enemies to take increased damage from all sources.
The problem? Shields aren’t common enough to justify running Asto proactively. He functions purely as a reactive tech pick against shield-heavy content.
Null Slash provides marginal value since optimized teams kill enemies so quickly that debuff duration barely matters. The delay between applying debuffs and their impact creates awkward timing issues.
Recent nerfs hit Asto hard, reducing his already-niche value further. Only consider if specifically struggling with shield enemies or experimenting with debuff-focused team compositions.
Best Used In: Shield-heavy encounters, debuff experimental teams
Synergies: Team DPS to capitalize on debuffs
Priority: Very Low reactive tech pick only
Understanding acquisition methods helps plan your progression path:
Banner Mythics (Most Common)
Obtained through standard summons using gems. Focus gem income on banners with rate-up events for specific units you need.
Secret Units (Progression Locked)
Paradox Units (Rarest Tier)
Exclusive Units (Battle Pass & Special)
Farm Units
New players should prioritize this progression path:
Step 1: Secure a Farm Unit (Day 1)
Pull for Sprintcart or Bulla immediately. Farm units enable all future progression through resource generation.
Step 2: Evolve Ciel (Days 1-2)
Use starter Mythics to unlock evolution mechanics. Ciel provides adequate damage while learning systems.
Step 3: Obtain Core Healer (Days 2-5)
Pull for Idol or Oreheme. Healing sustains teams through difficult content and enables aggressive positioning.
Step 4: Acquire Primary DPS (Days 5-10)
Focus gems on obtaining Brolu, Kirrua, or any S-tier Secret. Your main damage dealer determines progression speed.
Step 5: Complete Core Team (Days 10-20)
Round out the composition with secondary DPS, utility supports, and synergy pieces based on your primary carry.
Early Team Example:
Replace Ciel and Megomun as better options become available.
Synergy Focus (Sun Jin Wu + Igrus)
Build entire teams around synergistic pairs. The SJW/Igrus combo scales infinitely and should receive all resources once obtained.
Balanced Composition (General Content)
Infinite Mode Specialist (Wave 50+ Focus)
Speed Farm Setup (Resource Grinding)
Gem Spending Priority:
Evolution Material Efficiency:
Gold Optimization:
Infinite Mode Farming:
Reset at Wave 6 for 50 gems every 1:20 minutes most efficient gem farming method for established accounts.
Sun Jin Wu (Monarch) paired with Igrus (Elite Knight) creates the strongest late-game DPS combination. Their synergistic scaling through the Bond of Monarch buff allows both units to grow infinitely stronger as kills accumulate. Solo, Zid (Atomic) provides the most reliable late-game DPS through global AOE coverage.
Idol (Pop) provides the highest overall value through simultaneous healing, damage buffs, and cooldown reduction. Prioritize Idol for general content. Switch to Oreheme (Sacred) only when pure healing throughput becomes necessary in extremely difficult modes like Nightmare Story or Infinite Wave 60+.
Absolutely. Sun Jin Wu, Igrus, and Ichuga all outperform Mythic alternatives significantly. Sun Jin Wu and Igrus specifically become meta-defining when paired together. The progression requirements (Raid Act 3, Siege Shop, Legend Stage Hollow Act 3) align naturally with normal gameplay.
Focus resources on your strongest DPS unit first. A fully evolved S-tier DPS outperforms three partially evolved A-tier units. Once your primary carry reaches full evolution, begin building secondary DPS for team composition flexibility.
Farm units rank equally with core healers as the highest priority. Without consistent resource generation, you cannot upgrade or deploy enough units to clear difficult content. Obtain Sprintcart or Bulla within your first few summons.
Sky (Level 25) and Seth (Level 50) require Battle Pass access. However, Sky represents excellent value at Level 25 and competes with gacha Mythics effectively. Seth provides minimal value and should not influence Battle Pass purchase decisions.
Purchase all Essences from the Merchant shop every hour using gold. Farm Green Essence through Legend Stages (particularly Ichigo stage with 2% drop rates). Complete Challenges for additional materials. Craft higher-tier Essences using excess Green Essence.
Scaling units like Sun Jin Wu, Igrus, and Sky excel in Infinite Mode through infinite stacking mechanics. Pair with Oreheme for reliable healing and Shadow Vampire for emergency crowd control. Avoid burst-focused units like Freezo that depend on cooldown cycles.
Save gems for rate-up banners featuring S-tier units (SJW, Igrus, Ichuga, Zid) or mandatory supports (Idol, Oreheme). Standard pulls provide sufficient Mythic diversity without dedicated gem investment.
Replace Ciel and Megomun immediately upon obtaining any Mythic DPS (Brolu, Kirrua, Melio) or Secret (any rarity). These units serve only as tutorials for evolution mechanics and should not receive resources beyond initial evolution.
This comprehensive Anime Paradox tier list provides everything needed to build optimized teams across all content. Prioritize obtaining farm units and core healers before chasing top-tier DPS, as resource generation and sustainability enable all other progression.
The circular spawn system makes traditional tower defense strategies obsolete map coverage and survivability matter more than raw damage. Zid, Storrk, and the SJW/Igrus combo dominate through addressing these unique mechanical demands.
Remember that tier lists reflect current meta and balance patches will shift rankings over time. Focus on fundamental mechanics scaling, synergy, and consistency rather than chasing temporary power spikes that may disappear next update.
For more Anime Paradox guides and working codes, check out our other resources on Aiarenapro.com!
