
Kick a Lucky Block Admin Abuse (August 2026) Next Event Time & Boosts
Missing an Admin Abuse in Kick a Lucky Block means waiting a whole week to farm OG and Celestial brainrots…
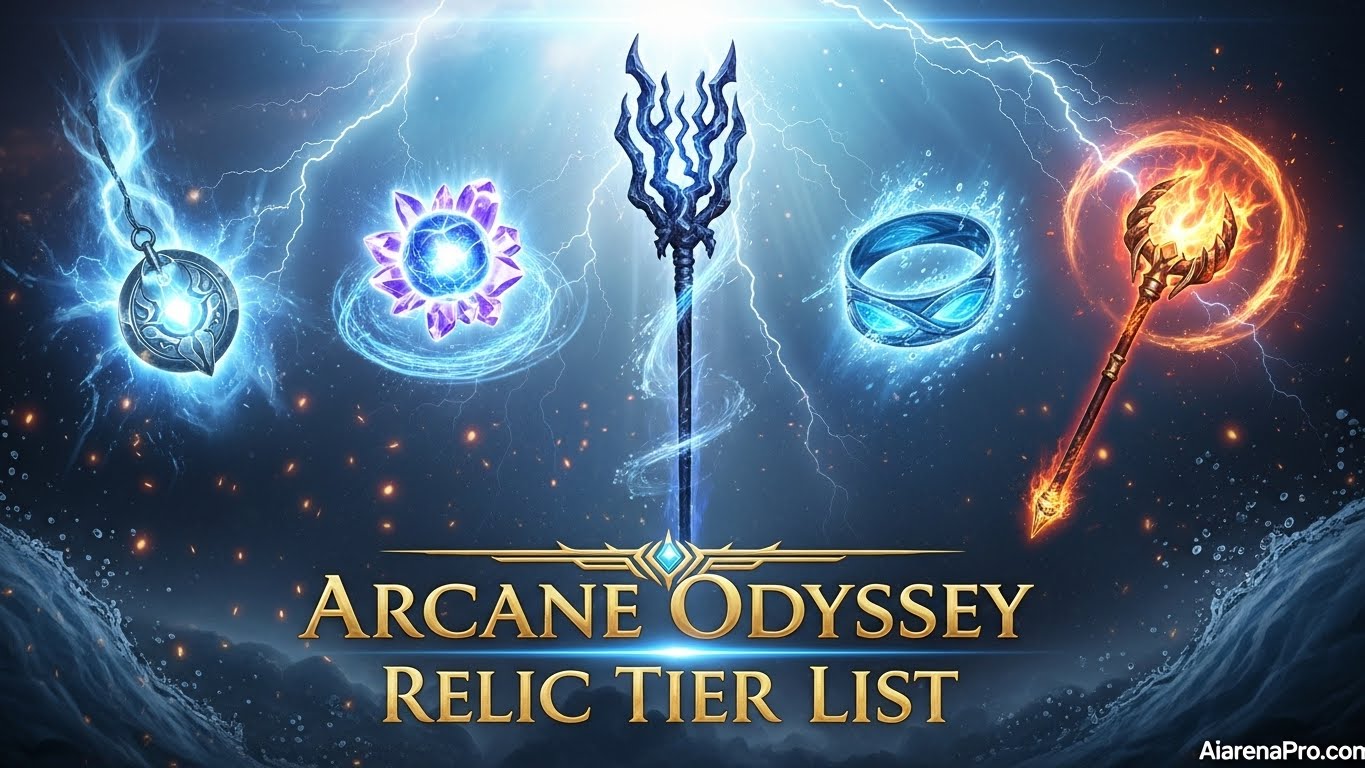
Choosing the right relic in Arcane Odyssey can completely change your gameplay experience. After spending hundreds of hours testing every relic across PvE content, PvP battles, and clan wars, I’ve created this comprehensive tier list to help you make the best decision for your Oracle or spirit-focused build.
Relics are unique spirit weapons blessed by gods that channel your spirit energy into devastating attacks. Unlike magics or fighting styles, relics come with exclusive rites that can’t be obtained elsewhere, making your choice crucial for long-term success. Whether you’re farming bosses in the Bronze Sea, dominating in 1v1 duels, or supporting your clan in massive wars, understanding which relic suits your playstyle is essential.
In this guide, I’ll break down all five available relics, ranking them based on obtainability, PvE effectiveness, PvP dominance, and overall utility. Each relic has unique synergies, exclusive abilities, and specific situations where they shine. By the end of this article, you’ll know exactly which relic to farm and how to maximize its potential.
Relics are spirit-based weapons that Oracle and pure spirit builds use to channel their life force into powerful attacks. Every player starts with the Eagle Patrimony, but four additional relics can be obtained from defeating roaming minibosses throughout the War Seas. Each relic is blessed by a different god and carries unique synergies matching that deity’s domain.
Before diving into the tier list, let me explain the three key factors I used to rank these relics:
Obtainability – How difficult is it to acquire this relic? This considers miniboss spawn rates, difficulty, and location accessibility.
PvE Performance – How effective is this relic for story progression, boss farming, and general PvE content? This evaluates damage output, crowd control, and survivability.
PvP Effectiveness – How strong is this relic in 1v1 duels, clan wars, and general PvP scenarios? This assesses combo potential, pressure application, and defensive capabilities.
| Relic | Tier | Level Requirement | Synergies | Obtainability |
|---|---|---|---|---|
| Crystal Orb | S | 80+ | Light Magic | Delamere (Nimbus Sea) |
| Staff of Night | A | 40+ | Shadow Magic | Dusk (Bronze Sea) |
| Ember Staff | A | 80+ | Fire Magic | The Crone (Nimbus Sea) |
| Eagle Patrimony | B | 0 | Lightning Magic | Starter Relic |
| Tidestone Band | B | 20+ | Water Magic | Laelus (Bronze Sea) |

The Crystal Orb absolutely dominates both PvE and PvP content, earning its position as the only S-tier relic currently available. Blessed by Aether, the god of light, this unbreakable crystal sphere channels spirit energy with incredible precision and power. What makes the Crystal Orb exceptional is its versatile rite combination that works in virtually every scenario.
The Crystal Orb’s exclusive rites are game-changers. Aithoro fires compressed spirit blasts that rapidly deal damage across large areas, making it perfect for boss farming and clearing multiple enemies. Meanwhile, Aithiraki summons a spirit minion that fights alongside you using Spirit Blast and Spirit Burst, effectively doubling your damage output during critical moments. This minion doesn’t just deal damage—it applies pressure in PvP, forces opponents to split their attention, and can secure kills when enemies are low on health.
For PvE content, the Crystal Orb excels at every level. The ranged capabilities combined with area-of-effect damage make story progression smooth and efficient. Boss fights become significantly easier because you can maintain distance while your summoned minion tanks damage and applies consistent pressure. The light synergies also provide excellent clash strength, letting you overpower enemy attacks reliably.
In PvP scenarios, the Crystal Orb shines through its unpredictability and sustained pressure. Opponents struggle to deal with both you and your spirit minion simultaneously. The compressed blast from Aithoro creates excellent zoning opportunities, while Spirit Burst provides close-range defensive options when enemies try to rush you down. Experienced players can layer their rites to create devastating combos that are nearly impossible to dodge.
The main drawback is obtainability—you need to reach the Nimbus Sea and defeat Delamere, a challenging level 80+ roaming miniboss. However, the investment is absolutely worth it. Once you have the Crystal Orb, it remains viable throughout the entire game and adapts to virtually any build or playstyle. Whether you’re running a pure Oracle build or incorporating relics into a Savant setup, the Crystal Orb delivers consistent, top-tier performance.

The Staff of Night represents an excellent middle-ground option that excels in specific scenarios while remaining versatile enough for general use. Blessed by the god of darkness and obtainable from Dusk in the Bronze Sea, this staff channels shadow magic synergies that create unique combat opportunities. Its accessibility at level 40+ makes it the first obtainable relic beyond the starter Eagle Patrimony.
Nichtetheis and Nichtaplia are the Staff of Night’s exclusive rites, both derived from Ancient Greek words meaning “Divine Night” and related shadow concepts. These rites focus on sustained damage and area control rather than burst damage, creating a distinct playstyle that rewards positioning and patience. Nichtetheis excels at applying consistent pressure across medium ranges, while Nichtaplia provides crowd control capabilities that are invaluable in both PvE and PvP.
For PvE content, the Staff of Night performs admirably in story progression and boss farming. The shadow synergies provide good clash strength and the sustained damage model works well against high-health targets. However, it doesn’t quite match the Crystal Orb’s versatility or raw damage output. The Staff of Night requires more careful positioning and timing to maximize its effectiveness, making it slightly less beginner-friendly.
In PvP situations, the Staff of Night becomes particularly dangerous in the hands of skilled players. The shadow synergies create visual clutter that makes it harder for opponents to react to your attacks. The sustained pressure model forces enemies into defensive positions, and experienced players can use this to control fight pacing. The main weakness is against highly mobile opponents who can disengage from your pressure zones.
The Staff of Night is relatively easy to obtain since Dusk spawns in the Bronze Sea and the level 40 requirement is accessible early in progression. This makes it an excellent choice for players who want to try Oracle builds without committing to the endgame grind for the Crystal Orb. Many players use the Staff of Night as their primary relic until they can farm for better options in the Nimbus Sea.
The Ember Staff brings raw power and explosive potential to your arsenal, channeling fire magic synergies that excel at burst damage and aggressive playstyles. Obtained from The Crone in the Nimbus Sea, this level 80+ relic demands serious commitment but rewards you with some of the highest damage output available among relics.
Floganymai and Flomva are the Ember Staff’s signature rites, with names translating to “I am burning” and “fire bomb” respectively. These rites embody pure offensive capability—Floganymai applies burning status effects while dealing consistent fire damage, and Flomva creates devastating area-of-effect explosions that can wipe out groups of enemies or chunk significant health from bosses. The fire synergies amplify damage against targets affected by other status effects, creating excellent combo opportunities.
For PvE content, the Ember Staff absolutely melts through enemies. The burning damage-over-time effect stacks with direct damage, making boss fights faster than with most other relics. The area-of-effect capabilities from Flomva make grinding and farming incredibly efficient—you can clear entire enemy camps with a single well-placed blast. However, the Ember Staff requires good positioning because the fire effects can sometimes obscure your vision during chaotic fights.
In PvP scenarios, the Ember Staff functions as a high-risk, high-reward option. Landing Flomva on opponents results in massive damage that can turn fights instantly, but the longer cast times and predictable trajectories give skilled players opportunities to dodge or punish. The Ember Staff works best in clan wars and team fights where enemies are distracted or grouped together. In 1v1 duels, it requires excellent prediction and setup to use effectively.
The Ember Staff’s placement in A-tier reflects its incredible offensive potential balanced against its specialized nature. Players who enjoy aggressive, damage-focused playstyles will love this relic, while those preferring defensive or utility-focused approaches might find better options elsewhere. The requirement to defeat The Crone in the Nimbus Sea means you’ll need solid gear and skill before attempting to obtain it.

The Eagle Patrimony holds special significance as every player’s first relic, obtained automatically when speaking to Morden at the start of your journey. Blessed by Zeus (though technically rumored), this lightning-pendant channels spirit energy with lightning synergies. While it’s the weakest relic statistically, it serves important roles throughout your entire Arcane Odyssey experience.
Astrapikis and Astropos are the Eagle Patrimony’s exclusive rites. Astrapikis delivers a melee slice similar to shockwave attacks, dealing extra burst damage when lightning effects activate. Astropos temporarily increases the speed of your Eagle Patrimony skills, creating brief windows of enhanced offense. These abilities are functional but lack the power and versatility of higher-tier relics.
For PvE content, the Eagle Patrimony carries you through early game adequately but quickly becomes outclassed once you reach level 20+. The lightning synergies provide decent clash strength and the paralysis interaction with soaked enemies offers occasional utility. However, the lower base stats and simpler exclusive rites mean you’ll struggle against tougher enemies if you rely on this relic too heavily. Most Oracle players replace it as soon as they obtain the Tidestone Band or Staff of Night.
In PvP scenarios, the Eagle Patrimony faces significant challenges. The Astrapikis melee attack requires close range, making you vulnerable to counterattacks. Astropos provides temporary speed boosts but doesn’t fundamentally change your combat effectiveness. Against experienced players with better relics, the Eagle Patrimony puts you at a noticeable disadvantage. Its primary PvP value comes from unexpected lightning synergy activations when facing water magic users.
Despite its B-tier ranking, the Eagle Patrimony remains valuable throughout the game. Because it’s level 0, storing important mobility rites on it doesn’t increase skill costs. Many endgame players keep the Eagle Patrimony equipped specifically for its utility as a low-cost mobility tool, swapping to stronger relics when combat starts. This flexibility prevents it from being completely obsolete despite weaker combat performance.
The Eagle Patrimony cannot be obtained more than once, making it unique among relics. You cannot sell it, trade it, or obtain a second copy. This permanence actually works in its favor—you’ll always have access to a backup relic for experimentation or specific rite setups without risking your better relics.
The Tidestone Band represents the earliest obtainable relic beyond the Eagle Patrimony, dropping from Laelus in the Bronze Sea at level 20+. This water-blessed ring channels ocean-based spirit energy with water magic synergies, offering a different playstyle compared to other early-game options. Its accessibility makes it popular among new Oracle players.
Thalakyma and Thakrousi are the Tidestone Band’s exclusive rites, with names translating to “Billowing Sea” or “Sea Waves” and “Sea Strike” or “Smiting Sea.” Thalakyma creates wave-like attacks that push enemies back while dealing moderate damage, providing excellent crowd control. Thakrousi delivers powerful single-target strikes with strong clash potential. Together, these rites create a balanced offense-defense playstyle.
For PvE content, the Tidestone Band performs adequately in the Bronze Sea region where you’ll first obtain it. The water synergies provide useful interactions with lightning-based enemies and the crowd control from Thalakyma helps manage groups. However, as you progress into higher-level content, the Tidestone Band’s lower stat scaling becomes apparent. It works fine for story progression but struggles in challenging boss fights compared to Nimbus Sea relics.
In PvP situations, the Tidestone Band offers defensive value through its crowd control capabilities. Thalakyma can interrupt enemy combos and create space when you’re under pressure. The water synergies occasionally provide surprise advantages against fire or lightning users. However, the overall damage output lags behind other relics, making it difficult to secure kills against equally skilled opponents. It functions better as a support tool in team fights than a primary damage source in duels.
The Tidestone Band’s obtainability is its strongest asset. Laelus spawns in the Bronze Sea and defeating him doesn’t require endgame gear or advanced tactics. This makes the Tidestone Band an excellent upgrade over the Eagle Patrimony for early Oracle builds. Many players use it as their primary relic through the mid-game before transitioning to the Staff of Night or grinding for Nimbus Sea relics.
The B-tier ranking reflects the Tidestone Band’s role as a transitional relic rather than an endgame option. It’s not bad—it’s just outclassed by relics that require more investment to obtain. If you’re building an Oracle character and just reached level 20, definitely farm for the Tidestone Band. It will serve you well for dozens of levels. Just recognize that you’ll eventually want to upgrade to higher-tier options.
Selecting the right relic depends heavily on your current level, build focus, and personal playstyle preferences. If you’re starting an Oracle or spirit-hybrid build and you’re still in the Bronze Sea region (levels 20-80), your options are limited to the Eagle Patrimony, Tidestone Band, and Staff of Night. The Staff of Night represents the best choice here—it’s accessible at level 40+, provides good damage and utility, and remains useful even into endgame content. The Tidestone Band works as a temporary option if you haven’t reached level 40 yet.
For players who’ve reached the Nimbus Sea and are level 80+, the choice becomes more interesting. The Crystal Orb stands as the objectively strongest option for most situations, offering unmatched versatility, excellent damage, and the unique summoning mechanic that provides consistent value. However, if you prefer aggressive, burst-damage playstyles and don’t mind the higher skill requirement, the Ember Staff delivers incredible offensive potential that can outperform the Crystal Orb in specific scenarios.
Build synergies also matter significantly. Pure Oracle builds (60%+ Spirit investment) benefit most from the Crystal Orb because they can fully utilize all rite tiers and the damage scaling works optimally. Paladin builds (Magic + Spirit) gain extra value from relics that complement their magic choices—pairing shadow magic with the Staff of Night or fire magic with the Ember Staff creates powerful synergy combinations. Savant builds should prioritize the Crystal Orb because its versatility compensates for the reduced specialization of spreading stats across multiple categories.
For PvP-focused players, the Crystal Orb remains the top choice due to its minion summon and pressure capabilities. However, skilled players can find success with the Ember Staff in clan wars where the explosive area damage punishes grouped enemies. The Staff of Night serves niche roles in PvP for players who master its shadow mechanics and sustained pressure patterns. Both the Eagle Patrimony and Tidestone Band struggle in competitive PvP unless you’re significantly more skilled than your opponents.
PvE-focused players have more flexibility in relic choice. The Crystal Orb makes farming and boss battles easiest, but the Ember Staff farms regular enemies slightly faster due to its superior area-of-effect damage. The Staff of Night provides consistent performance without requiring perfect positioning or timing. The Tidestone Band and Eagle Patrimony work for casual PvE but slow down your progression compared to higher-tier options.
Don’t forget to consider obtainability realistically. The Crystal Orb and Ember Staff require access to the Nimbus Sea, defeating level 80+ roaming minibosses who spawn randomly. If you don’t have the time or patience for extensive farming, starting with the Staff of Night and gradually working toward Nimbus Sea relics makes more sense. Many successful Oracle players use the Staff of Night for dozens of hours before obtaining their endgame relic.
Pure Oracle builds gain access to an additional layer of customization through the God Soul imbuement system, unlocked during awakening. This mechanic allows you to imbue absorbed god souls into your relics, changing their stats, visuals, and sometimes granting special effects called “Synergies” or “Unstable” modifications. Currently, Poseidon’s soul (gained during first awakening) is the primary God Soul available, providing size increases to all relics with special interactions for specific relics.
The Eagle Patrimony gains increased damage when imbued with Poseidon’s soul, but this comes at the cost of 2 Drawback points—a significant tradeoff that most players avoid unless building specifically around high drawback setups. The Crystal Orb, Staff of Night, Ember Staff, and Tidestone Band all receive size increases from Poseidon imbuement without negative effects, making this a straight upgrade for these relics.
Future updates will likely introduce additional God Souls as players progress through later story chapters. The imbuement system creates theorycrafting opportunities where specific God Soul and relic combinations could create unique meta builds. For now, pure Oracle players should experiment with Poseidon imbuements on their non-Eagle Patrimony relics to gain free stat increases without downsides.
Unlike weapons that come with fixed skills, relics allow complete rite customization. Every relic can equip five total rites—three basic rites (Spirit Blast, Spirit Burst, Spirit Wall, Spirit Walk) that can transfer between relics, plus two exclusive rites unique to that specific relic. This system enables strategic rite management where you store mobility rites on lower-level relics to reduce stat requirements.
Smart players keep multiple relics in their inventory with different rite setups. For example, storing Spirit Walk (mobility rite) on the level 0 Eagle Patrimony means you can use it without high spirit stat requirements. Meanwhile, your primary combat relic (Crystal Orb or Ember Staff) focuses entirely on damage-dealing rites. This rite management becomes crucial for optimizing builds and efficiently using your spirit stat points.
Spirit Rite Books allow you to obtain additional copies of basic rites, but these books are relatively rare drops. The exclusive rites (like Aithiraki on Crystal Orb or Floganymai on Ember Staff) cannot be transferred to different relics—they remain permanently tied to their original relic. This permanence makes relic choice even more important since you’re committing to specific exclusive abilities.
Relics can be enchanted using the same system as weapons, though with some differences. Tier 1 Enchantment Scrolls (Swift, Strong, Bursting) modify the three core relic stats: Speed, Size, and Damage. Tier 2 Enchantment Scrolls (Ardent, Tempered, Dense) provide more specialized stat modifications. Unlike weapon enchantments, relic enchantments don’t affect the stats granted when imbuing relics into other combat forms.
For PvP-focused builds, Swift enchantments on the Crystal Orb create incredibly fast rite combinations that opponents struggle to dodge. Strong enchantments on the Ember Staff maximize the already impressive burst damage, potentially securing one-shot kills on squishy targets. Bursting enchantments work well on the Staff of Night, further improving its sustained damage output over time.
For PvE-focused builds, balanced enchantments often work best. A mix of Strong and Bursting enchantments optimizes farming efficiency, while Swift enchantments help dodge boss attacks more easily. The specific enchantment choice should align with your overall build stats—if you’re already stacking power amulets and armor, adding Swift enchantments creates better overall balance.
Experienced Oracle players utilize several advanced strategies that maximize relic effectiveness. Rite layering involves casting multiple rites in specific sequences to create guaranteed hit combos. For example, using Spirit Burst to stagger an enemy, immediately following with Aithoro from the Crystal Orb, then finishing with a Spirit Blast creates a devastating sequence that’s nearly impossible to escape.
Positioning mastery separates good Oracle players from great ones. The Crystal Orb’s Aithiraki summon should be placed strategically to cut off enemy escape routes or protect key objectives in clan wars. The Ember Staff’s Flomva needs prediction and map knowledge to maximize its area-of-effect potential. The Staff of Night’s sustained damage rites work best when you maintain optimal spacing that keeps enemies in damage zones while staying safe from counterattacks.
Resource management becomes critical during extended fights. Remember that rites cost both health and energy, reflecting the life-force nature of spirit energy. Knowing when to press aggression and when to retreat to regenerate resources often determines fight outcomes. The Crystal Orb’s minion helps pressure opponents during regeneration periods, while the Ember Staff requires more careful resource planning due to its higher-cost explosive abilities.
Eagle Patrimony: Automatically received when you speak with Morden for the first time on Dawn Island at the start of the game. This relic cannot be lost, sold, traded, or obtained additional copies of.
Tidestone Band: Defeat Laelus, a roaming miniboss who spawns in the Bronze Sea. Laelus typically appears near water-based islands and has moderate difficulty for level 20+ players. The drop rate is reasonable, usually taking 3-7 defeats to obtain.
Staff of Night: Defeat Dusk, a roaming miniboss in the Bronze Sea. Dusk spawns in shadowy locations and becomes accessible once you reach level 40+. The drop rate is similar to Tidestone Band, making it a reliable upgrade path for mid-game Oracle builds.
Crystal Orb: Defeat Delamere, a roaming miniboss in the Nimbus Sea region. This requires completing sufficient story content to access the Nimbus Sea, reaching level 80+, and having appropriately strong gear to defeat Delamere. The drop rate is lower than Bronze Sea relics, potentially taking 10-15+ defeats.
Ember Staff: Defeat The Crone, a roaming miniboss in the Nimbus Sea. The Crone spawns in volcanic or fire-themed locations and is considered one of the more challenging minibosses. Similar to the Crystal Orb, expect a moderate drop rate that rewards persistence.
Many Oracle players make the mistake of over-investing in multiple relics before reaching the Nimbus Sea. While having variety seems appealing, the reality is that Nimbus Sea relics significantly outclass Bronze Sea options. Instead of enchanting and optimizing your Tidestone Band or Eagle Patrimony extensively, save those resources for your endgame relic. A basic Staff of Night outperforms a fully-enchanted Eagle Patrimony in most scenarios.
Another common error involves neglecting basic rite management. New Oracle players often keep all their best offensive rites on their highest-level relic, not realizing this makes those rites more expensive to use. Smart rite distribution across multiple relics—keeping mobility rites on lower-level relics and damage rites on your primary combat relic—dramatically improves stat efficiency and combat flexibility.
Finally, many players chase the “meta” relic without considering their actual playstyle. If you prefer careful, calculated combat, the Ember Staff’s high-risk, high-reward nature might frustrate you despite its theoretical power. Similarly, players who love aggressive, in-your-face fighting might find the Staff of Night’s sustained pressure model unsatisfying. Choose relics that match how you actually enjoy playing, not just what tier lists say is strongest.
The Arcane Odyssey development team continues expanding content with each major update. Future updates will likely introduce additional relics as players explore new sea regions (Vimir Sea, Aegean Sea, Marauding Sea). These upcoming relics might introduce entirely new mechanics or exclusive rites that reshape the current tier list.
Second Awakening (currently unobtainable, planned for level 250+) will grant additional abilities to spirit builds, potentially including 10% damage reduction for pure Oracle builds. This defensive buff could significantly impact relic viability in PvP scenarios, making tankier builds more feasible. The meta may shift dramatically once Second Awakening becomes accessible.
God Soul expansion represents another major future addition. As players defeat additional story bosses and absorb their souls, new imbuement options will create unique relic combinations. A fire-based God Soul imbued into the Ember Staff might create unstoppable burn damage, while a shadow God Soul on the Staff of Night could unlock stealth or ambush mechanics. Theorycrafting opportunities will expand exponentially.
The Staff of Night represents the best option for beginner Oracle builds. It’s accessible at level 40+ from defeating Dusk in the Bronze Sea, provides balanced damage and utility, and remains viable well into endgame content. The learning curve is moderate, making it perfect for players still mastering relic mechanics while offering enough power to progress efficiently through the story.
No, you can only have one relic equipped at any time. However, you can carry multiple relics in your inventory and swap between them through your stat menu (default keybind: J). Smart players keep several relics with different rite configurations to adapt to various combat situations quickly.
Yes, relics work with any build that invests points into the Spirit stat. Paladin builds (Magic + Spirit) and Savant builds (multiple stats including Spirit) can use relics effectively, though they won’t access the highest-tier rites until investing significant Spirit points. Hybrid builds should prioritize the Crystal Orb for its versatility and lower rite requirements.
God Souls provide additional customization for pure Oracle builds through imbuement. Currently, only Poseidon’s soul is available (gained during first awakening), which grants size increases to all relics and special effects for specific relics. Future updates will add more God Souls, creating unique synergy opportunities and potentially new meta builds.
Based on community data and personal testing, Nimbus Sea relics (Crystal Orb and Ember Staff) have approximately 5-10% drop rates from their respective minibosses. This translates to an average of 10-20 defeats per relic drop, though RNG can vary significantly. Bronze Sea relics have better drop rates, averaging 3-7 defeats per drop.
Yes, relics can be traded through the trading system, except for the Eagle Patrimony which is permanently bound to your character. This means you can obtain Nimbus Sea relics through trading if you’re unable to defeat the minibosses yourself, though expect to pay premium prices in galleons or valuable items.
No, Spirit stat points do not directly increase damage from relics. Instead, Spirit points unlock higher rite tiers, which enhance size, clashing power, and visual effects. The actual damage comes from your gear stats (Power, Drawback, etc.) rather than raw Spirit investment. This is identical to how Magic, Strength, and Weapon stats function.
The Crystal Orb is objectively the strongest PvP relic due to its Aithiraki minion summon and versatile rite combination. The minion applies consistent pressure, forces opponents to split attention, and secures kills on low-health enemies. However, the Ember Staff can excel in clan wars and team fights where grouped enemies take massive area-of-effect damage.
Each relic has synergies matching the magic type of its blessing god. The Eagle Patrimony has lightning synergies, Staff of Night has shadow synergies, Crystal Orb has light synergies, Ember Staff has fire synergies, and Tidestone Band has water synergies. These synergies enable interactions like paralysis on soaked targets (Eagle Patrimony) or burning on frozen targets (Ember Staff), but don’t apply the magic’s native status effects.
Save your enchantment scrolls for Nimbus Sea relics. The Eagle Patrimony quickly becomes outclassed and investing resources into temporary gear slows your overall progression. Focus on reaching the Nimbus Sea, obtaining the Crystal Orb or Ember Staff, then apply your saved enchantments to maximize their effectiveness throughout endgame content.
Choosing the right relic dramatically impacts your Arcane Odyssey experience, whether you’re grinding through story content, farming bosses for rare drops, or competing in intense PvP battles. The Crystal Orb stands as the clear winner for most situations, but the Ember Staff and Staff of Night offer competitive alternatives for specific playstyles and build focuses.
Remember that tier lists represent general effectiveness rather than absolute rules. A skilled player with a B-tier relic can absolutely outperform an unskilled player using an S-tier option. Master your chosen relic’s mechanics, optimize your rite combinations, and develop strategies that play to its strengths. The best relic is ultimately the one you enjoy using and match your natural combat instincts.
As you progress through the War Seas, don’t hesitate to experiment with different relics. The trading system makes testing multiple options relatively affordable, and firsthand experience provides insights that no guide can fully capture. Pay attention to which exclusive rites feel satisfying to use, which synergies complement your gear and magic choices, and which playstyles keep you engaged during long grinding sessions.
Keep this tier list bookmarked as we’ll update it with each major Arcane Odyssey update. New relics, balance changes, and Second Awakening abilities will reshape the meta, and staying informed helps you adapt your builds optimally. Join the Arcane Odyssey community through official Discord servers and Reddit discussions to share experiences and discover advanced strategies from veteran Oracle players.
Your relic journey begins now—will you harness the lightning of the Eagle Patrimony, summon light minions with the Crystal Orb, or unleash explosive fire through the Ember Staff? Choose wisely, farm diligently, and dominate the War Seas with your mastered spirit energy.