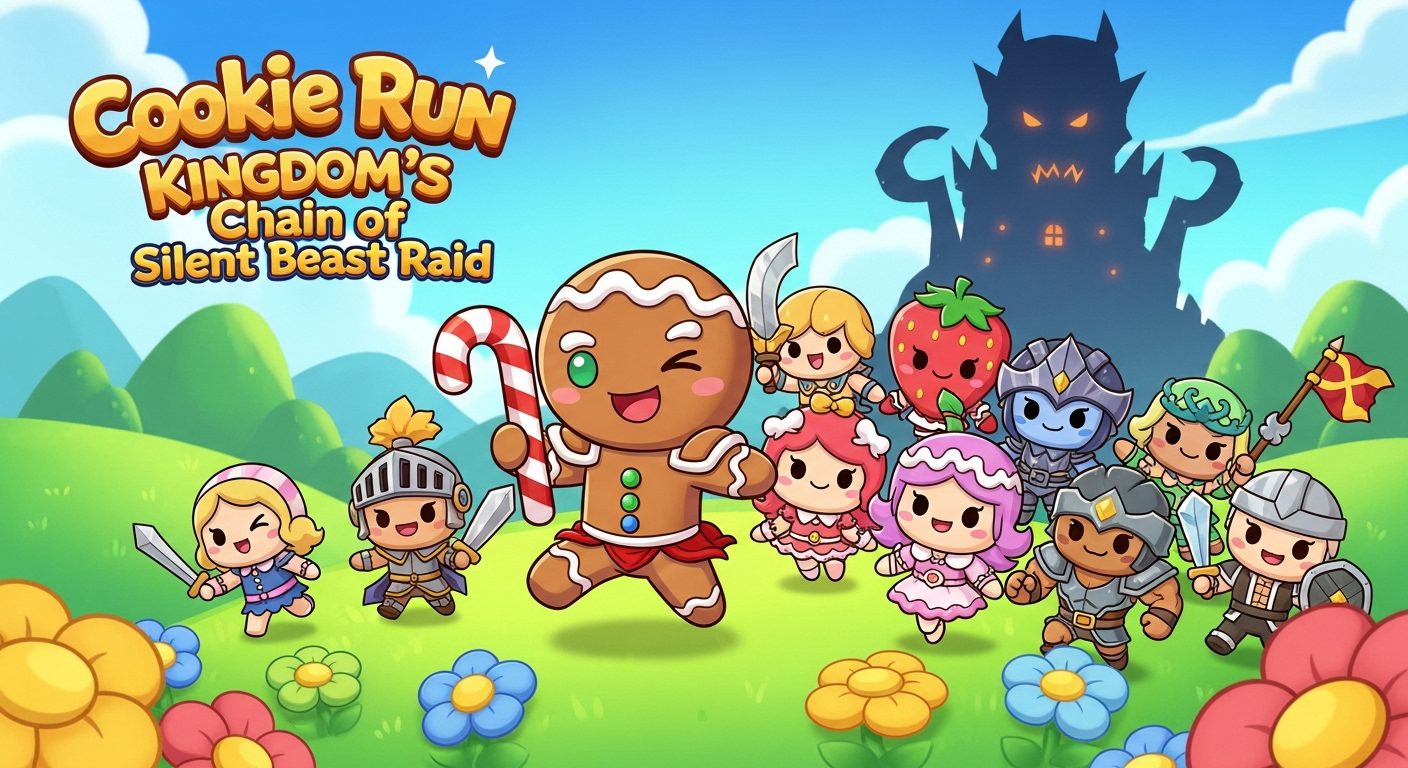
Cookie Run Kingdom’s Chain of Silent Beast Raid (October 2025) Master Rank Guide
Breaking into Master and Master X rank in Cookie Run: Kingdom’s Chain of Silent Beast Raid demands precision, optimal team…

Listen, I’ve been grinding Plants vs Brainrots since the Bosses Update dropped on September 27th, and let me tell you – this update completely changed the game. I remember logging in that Saturday morning, expecting just another regular day of plant placement and brainrot farming. Boy, was I wrong.
The moment I hit my 500th spawn, this massive notification popped up: “A Boss Has Spawned!” My heart literally skipped a beat. I’d been playing casually up until that point, but suddenly I realized there was a whole new progression system I needed to master.
After spending weeks testing every boss, analyzing their patterns, and grinding through multiple rebirths, I’ve learned everything there is to know about these massive brainrots. I’m going to share all my hard-earned knowledge with you, so you don’t have to waste time figuring it out yourself.
Before I dive into each boss, let me explain how this whole system works. It’s honestly more complex than I initially thought.
Bosses aren’t just random encounters – they’re essentially super-powered brainrots that show up based on specific triggers. Here’s what I discovered through countless hours of gameplay:
The Boss Spawning System:
Every single time you hit 500 brainrot spawns (not kills, spawns), the game automatically triggers a boss spawn. I learned this the hard way when I was AFK farming and came back to find a boss completely overwhelming my garden.
The type of boss you face isn’t random though. It’s directly tied to your Spawner Level, which is connected to your Rebirth Level. This means you can’t just skip ahead to the coolest bosses – you’ve got to earn your way up through the progression system.
I made a huge mistake early on. I kept wondering why I was only getting Hotspotini Burrito over and over again. Turns out, I hadn’t rebirthed yet. The game will keep spawning the same boss until you meet the requirements for the next one. It’s the game’s way of making sure you’re ready for tougher challenges.
One thing that really surprised me: bosses can spawn with mutations! I once got a Golden Hotspotini Burrito that earned me way more money than the regular version. These variant spawns are completely random, but they’re definitely worth celebrating when they happen.
Alright, here’s the part you’ve been waiting for. I’ve compiled everything I know about each boss into one massive table. These aren’t just numbers I pulled from somewhere – these are stats I’ve personally verified through my own gameplay.

| Boss Name | Rebirth Required | Spawner Level | Hit Points (HP) | Earnings (Base) | My Difficulty Rating |
|---|---|---|---|---|---|
| Hotspotini Burrito | None (Default) | Level 1 | 15,000-20,000 | $750/sec | ⭐ Easy |
| Rhino Toasterino | Rebirth 1 | Level 2 | 20,000-25,000 | $1K-4K/sec | ⭐⭐ Moderate |
| Esok Sekolah | Rebirth 2 | Level 3 | 32,000-38,000 | $5K+/sec | ⭐⭐⭐ Challenging |
| Chef Cabracadabra | Rebirth 3 | Level 4 | 50,000+ | $2.4K-4.4K/sec | ⭐⭐⭐⭐ Hard |
| Dragon Canneloni | Rebirth 4 | Level 5 | 150,000-233,200 | $7.5K-14K/sec | ⭐⭐⭐⭐⭐ Extreme |
Looking at this table now, I can’t believe how much the HP scales up. Dragon Canneloni has literally ten times the health of Hotspotini Burrito. That’s insane!
My Experience: This was my very first boss encounter, and honestly? It felt almost too easy. I remember thinking, “Is this really a boss?” because my plants melted through it pretty quickly.
When I first faced Hotspotini Burrito, I didn’t really have a strategy. I just let my plants do their thing, and it worked fine. But after fighting it dozens of times, I’ve optimized my approach.
I always make sure to have at least three mid-tier plants in the lane where it spawns. You don’t need anything fancy – even uncommon or rare plants can handle this boss with ease. The key is making sure you’re not completely unprepared when it shows up.
One tip I wish I’d known earlier: don’t waste your premium plants on Hotspotini Burrito. Save those for the tougher bosses later. This guy’s basically a warm-up.
Even though Hotspotini Burrito is the easiest boss, I still farm it occasionally. Why? Because it can spawn with mutations like Golden or other variants that significantly boost its earnings. I’ve gotten Golden Hotspotini Burritos that earned me $1,500+ per second instead of the base $750. That’s literally double the money!
Plus, if you’re stuck at a lower rebirth level and grinding to level up, this boss is your bread and butter. It’s consistent, predictable, and shows up every 500 spawns like clockwork.
My Experience: This is where things started getting interesting for me. The first time I encountered Rhino Toasterino, I’d just completed my first rebirth and was feeling pretty confident. Then this absolute unit showed up and I realized my garden wasn’t quite as strong as I thought.
After losing to Rhino Toasterino my first few times (yeah, I’m not ashamed to admit it), I figured out the winning formula.
First, I upgraded my plant roster. I made sure to have at least one Epic or Mythical plant ready before triggering the boss spawn. These higher-tier plants make a massive difference in damage output.
Second, I learned about positioning. I used to just randomly place plants wherever, but I discovered that concentrating firepower in specific lanes works way better. Now I always make sure the lane closest to my spawner has my strongest plants.
Third – and this was a game-changer – I started using the environment to my advantage. If you time your abilities right and have plants with freeze or slow effects, you can keep Rhino Toasterino stuck in the kill zone for longer.
What really surprised me about Rhino Toasterino is the earnings variability. I’ve gotten base variants that earned $1K per second, and I’ve gotten lucky with mutations that pushed it all the way to $4K per second. That’s a huge range, and it makes farming this boss super rewarding when RNG is on your side.
My Experience: Esok Sekolah humbled me. There’s no other way to put it. I thought I was hot stuff after beating Rhino Toasterino consistently, and then this school-themed boss showed up and absolutely demolished my garden.
I lost my first three encounters against Esok Sekolah. I’m talking complete wipes where my plants got overwhelmed and I had to start over. It forced me to completely rethink my strategy and actually invest in better plants.
After failing so many times, I developed a specific approach for Esok Sekolah:
Pre-Boss Preparation: Before I even hit 400 spawns, I make sure my garden is boss-ready. This means having at least four Mythical plants placed strategically across my lanes. I don’t wait until the last second anymore – I learned that lesson the hard way.
Lane Priority: I focus all my best plants on the two lanes closest to where Esok Sekolah spawns. The other lanes can have medium-tier plants, but those two critical lanes need to be stacked with firepower.
Mutation Advantages: If you’ve got plants with the Frozen mutation from the Icy Blizzard event, this is the perfect time to use them. The freeze effect is incredibly valuable against Esok Sekolah because it gives your other plants more time to deal damage.
Equipment Usage: I started using Frost Grenades against this boss, and it’s been a complete game-changer. The stun effect from Frost Grenades keeps Esok Sekolah locked down while my plants unload on it. If you’ve got Frost Grenades, use them here.
Early Engagement: This is crucial – don’t let Esok Sekolah reach your garden. I start attacking it the moment it spawns using my Carrot Launcher or strongest bat. Every bit of damage you deal before it reaches your plants makes the fight significantly easier.
After all that struggle, let me tell you – defeating Esok Sekolah consistently feels incredible. The $5K+ per second earnings are phenomenal at this stage of the game. I’ve had some lucky spawns where I got mutation variants earning even more. This boss is where the real money-making begins.
My Experience: I’m not gonna lie – when I first saw Chef Cabracadabra spawn, I thought it was gonna be a joke because of the silly name. Nope. This boss is no joke whatsoever.
Chef Cabracadabra represents a massive difficulty spike. It’s got more than 50,000 HP, which is absolutely massive compared to the previous bosses. The first time I faced it, I was completely unprepared and it steamrolled through my garden like I wasn’t even there.
Unlock Requirements:
Stats Breakdown:
My Hard-Earned Strategy:
Fighting Chef Cabracadabra successfully requires serious preparation. Here’s exactly what I do:
Garden Optimization: By the time I’m fighting this boss, I’ve invested heavily in my garden. I’m talking full rows of Mythical and Secret rarity plants. Anything less just doesn’t cut it. I learned this after burning through several attempts with inadequate plants.
Spawn Rate Acceleration: I use Speed Potions religiously at this level. Not only do they help me reach the 500 spawn count faster, but they also help me generate more income to invest in better plants between boss spawns.
Gear Setup: My gear setup for Chef Cabracadabra includes:
Team Coordination: If you’re playing with friends (which I highly recommend at this level), coordinate your plant placements. Having complementary plant types that cover each other’s weaknesses makes a huge difference.
Patience is Key: This boss takes a while to defeat even with an optimized setup. Don’t panic if it feels like it’s taking forever. As long as your plants are steadily dealing damage and you’re not losing ground, you’re doing fine.
Income Strategy:
Even though Chef Cabracadabra’s earnings seem lower than Esok Sekolah in some cases, the boss variants and mutations can push it way higher. I’ve gotten lucky with Golden Chef Cabracadabra spawns that earned me close to $8K per second. It’s all about that RNG luck.
My Experience: Dragon Canneloni is absolutely no joke. This is the final boss currently in the game, and it’s genuinely challenging even for experienced players like myself.
When I finally unlocked Dragon Canneloni after completing Rebirth 4, I was so excited. Then I saw its HP bar. 150,000+ HP. Some variants have over 233,000 HP. That’s legitimately insane. The first time I fought it, the battle lasted over five minutes, and I was sweating the entire time.
Unlock Requirements:
Stats Breakdown:
My Expert Strategy (Refined Through Many Attempts):
Fighting Dragon Canneloni successfully requires everything you’ve learned from the previous bosses, plus some additional optimization. Here’s my complete approach:
Maximum Garden Power: At this point, you need a fully optimized garden. I’m talking:
Pre-Fight Preparation: I don’t trigger Dragon Canneloni until I’m 100% ready. This means:
Active Combat Management: Unlike the easier bosses where you can kind of AFK, Dragon Canneloni requires active management. I’m constantly:
Earnings Maximization: The $7,500-14,000 per second earnings from Dragon Canneloni are absolutely insane. To put this in perspective, that’s roughly 10-20x what you earn from Hotspotini Burrito. The grind to unlock this boss is completely worth it.
Mutation Hunting: I’ve been farming Dragon Canneloni trying to get lucky with mutation spawns. I’ve heard rumors of players getting Golden Dragon Canneloni variants that earn $20K+ per second. I haven’t been lucky enough to encounter one yet, but I’m keeping my fingers crossed.
The Reward for Your Grind:
Defeating Dragon Canneloni consistently isn’t just about the money (though the money is fantastic). It’s about proving you’ve mastered the entire progression system. It’s the ultimate badge of honor in Plants vs Brainrots right now.
After fighting literally hundreds of bosses across all five types, I’ve figured out exactly how the spawning system works. The game doesn’t explain this well, so I’m gonna break it down for you.
The 500 Spawn Count:
Every single boss spawn is triggered at exactly 500 brainrot spawns. Notice I said “spawns,” not “kills.” This confused me initially because I thought it was based on how many I defeated, but it’s actually based on how many appear in your garden.
This means your spawn counter is constantly ticking up as long as brainrots are appearing. If you’re AFK farming, you’re progressing toward the next boss whether you’re actively playing or not.
Spawner Level Dependency:
Your Spawner Level is the absolute gatekeeper for which boss you’ll face. Here’s how it works:
The crucial thing to understand is this: if your Spawner Level is 2, you’ll fight Rhino Toasterino at 500 spawns. You won’t randomly get Hotspotini Burrito anymore (unless you somehow downgrade, which I don’t think is possible). The system always spawns the highest-level boss you’ve unlocked.
After optimizing my farming routine over dozens of hours, I’ve developed a system that maximizes my boss encounter efficiency and rewards. Here’s exactly what I do:
Step 1: Preparation Phase (Pre-400 Spawns)
I don’t wait until 490 spawns to start preparing. At around 400 spawns, I begin my pre-boss setup:
Step 2: Speed Potion Usage
I use Speed Potions starting around 450 spawns. This accomplishes two things:
The Speed Potions I use are from Plants vs Brainrots codes and occasional in-game rewards. Stock up on these whenever possible.
Step 3: Boss Engagement
The moment I see “A Boss Has Spawned!” I spring into action:
Step 4: Post-Boss Optimization
After defeating a boss, I immediately:
Optimization Tips I’ve Learned:
Tip #1: Don’t Over-Prepare I used to spend way too much time optimizing between every boss. Eventually I realized that once you’ve got a solid setup, you don’t need to constantly tweak things. Get your garden to a good state and let it run.
Tip #2: AFK Farming Works For the easier bosses (Hotspotini Burrito and Rhino Toasterino), you can actually AFK farm. Just set up your garden properly, walk away, and come back later. The bosses will defeat themselves.
Tip #3: Rebirth Strategically Don’t rebirth impulsively. I plan my rebirths for when I’ve accumulated enough resources to rebuild quickly. Rebirthing when you’re broke is a terrible idea because you’ll struggle to get back to where you were.
Tip #4: Watch for Mutation Events During special events like the Icy Blizzard event, plants get special mutations. These are incredibly valuable for boss fights. I always try to grow as many event plants as possible.
After extensive testing, I’ve discovered some hidden mechanics that most players don’t know about.
Boss Damage Scaling:
I noticed that boss damage seems to scale based on how long they’ve been active. The longer a boss survives, the more damage it deals to your plants. This means quick kills are optimal not just for efficiency, but also for garden preservation.
Plant Targeting Priority:
Bosses don’t randomly attack plants. They have a targeting priority system:
Understanding this helped me position my plants better. I keep my highest-value plants slightly behind the frontline so they don’t get focused immediately.
Mutation Interaction:
Plants with Frozen mutation are incredibly effective against bosses because the freeze proc can interrupt boss abilities. I’ve noticed that when a boss gets frozen, it temporarily stops dealing damage even if the freeze duration is short.
Similarly, Neon mutations increase earning potential, which stacks with boss defeat rewards. It’s a compounding effect that really adds up over time.
Spawn Counter Reset:
Your spawn counter resets to zero after each boss spawn. This means if you’re at 450 spawns and thinking about rebirthing, wait until after the boss spawns. Otherwise you’re wasting 450 spawns worth of progress toward the next boss.
I’ve made every mistake possible in this game. Let me share them so you can avoid my pain:
Mistake #1: Rebirthing Too Early I rebirthed for the first time when I barely had any resources. It set me back massively because I couldn’t afford decent plants. Wait until you’re financially stable before rebirthing.
Mistake #2: Ignoring Garden Layout I used to just randomly place plants wherever there was space. This is incredibly inefficient. Optimal lane organization makes a massive difference in boss clear speed.
Mistake #3: Hoarding Resources I was so scared of wasting money that I hoarded everything and never upgraded. Eventually I realized that investing in better plants pays for itself quickly through better earnings.
Mistake #4: Fighting Bosses Undergeared I tried fighting Esok Sekolah without proper gear and got demolished repeatedly. Always make sure you’ve got appropriate gear for your current boss level.
Mistake #5: Not Using Codes I played for like two weeks before I realized there were active codes giving free stuff. Check out the Plants vs Brainrots tier list to see which plants are worth prioritizing with your code rewards.
Mistake #6: Solo Grinding Everything Some bosses are way easier with friends. I spent way too long struggling solo when I could’ve just teamed up with other players.
Bosses spawn exactly every 500 brainrot spawns in your garden. This is a fixed counter that applies regardless of which boss you’re currently able to face. The spawn rate never changes – it’s always 500 spawns to trigger the next boss.
No, you can’t skip bosses. The game forces you to progress through the boss tiers sequentially. You’ll fight Hotspotini Burrito until you rebirth to level 2, then you’ll fight Rhino Toasterino until you rebirth to level 3, and so on. There’s no way to jump ahead.
If you rebirth before reaching 500 spawns, your spawn counter resets to zero and you lose all progress toward the next boss. I strongly recommend waiting until after a boss spawns before rebirthing to avoid wasting your spawn count progress.
Absolutely yes! Bosses earn significantly more money per second than regular brainrots. Plus they drop exclusive gear and items you can’t get anywhere else. The progression they enable is essential for advancing in the game.
Currently, trading is disabled in Plants vs Brainrots due to suspected duping issues. The developers have temporarily turned off trading and gifting. Once it’s re-enabled, boss brainrots should be tradeable, and they’ll likely be quite valuable.
Check your Spawner Level, which corresponds directly to your Rebirth Level. Whatever your current Spawner Level is, that’s the boss you’ll encounter at 500 spawns. The game always spawns the highest-tier boss you’ve unlocked.
Not in the way you might think. Each individual boss has fixed HP ranges and doesn’t scale with number of defeats. However, as you progress through the boss tiers, each new boss is significantly stronger than the previous one. Dragon Canneloni has roughly 10x the HP of Hotspotini Burrito.
This depends on which boss you’re fighting, but generally speaking, Mythical and Secret rarity plants with high DPS are ideal. Plants with mutations like Frozen are especially valuable because they can stun bosses. I recommend checking my complete Plants vs Brainrots guide for specific plant recommendations.
Technically yes, if your plants are too weak and the boss overwhelms them. However, with proper preparation this should never happen. The game gives you plenty of opportunity to build up your defenses before facing bosses that can actually threaten your garden.
After all this time grinding bosses in Plants vs Brainrots, I’ve gotta say – this update completely revitalized the game for me. Before bosses were introduced, the gameplay loop was getting kind of repetitive. Now there’s always something to work toward.
The progression system is well-designed. Each boss feels like a genuine achievement to unlock, and the difficulty curve is pretty well-balanced. Yeah, Dragon Canneloni is brutally difficult, but that’s the point – it’s supposed to be the ultimate challenge.
My biggest advice? Don’t rush it. I see so many players trying to speedrun to Dragon Canneloni and burning out because they’re not properly prepared. Take your time, enjoy each boss tier, and build up your resources gradually. The journey is honestly more fun than the destination.
The boss farming gameplay loop is genuinely satisfying. There’s something incredibly rewarding about watching your carefully optimized garden absolutely demolish a boss that used to give you trouble.